Last Updated on December 13, 2021 by foxintheforest
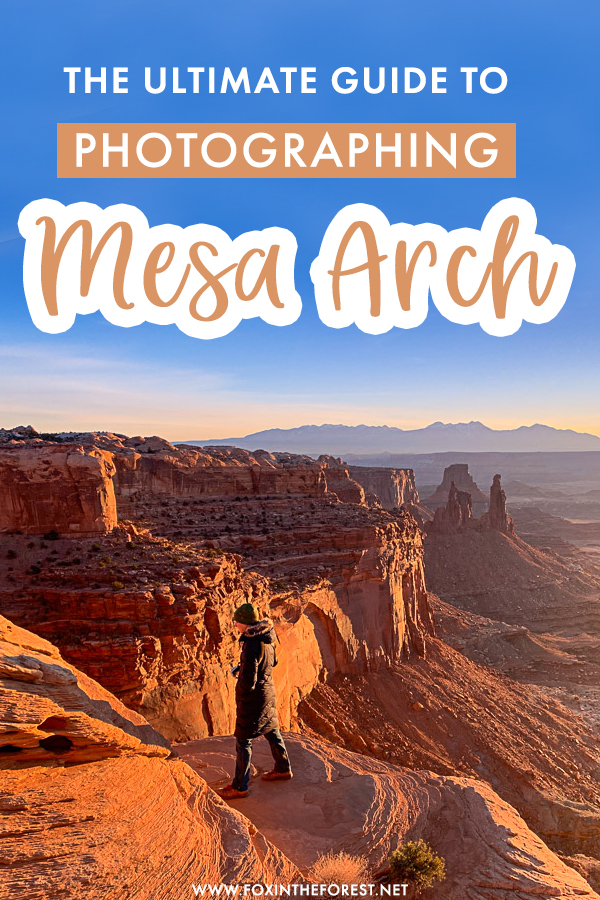
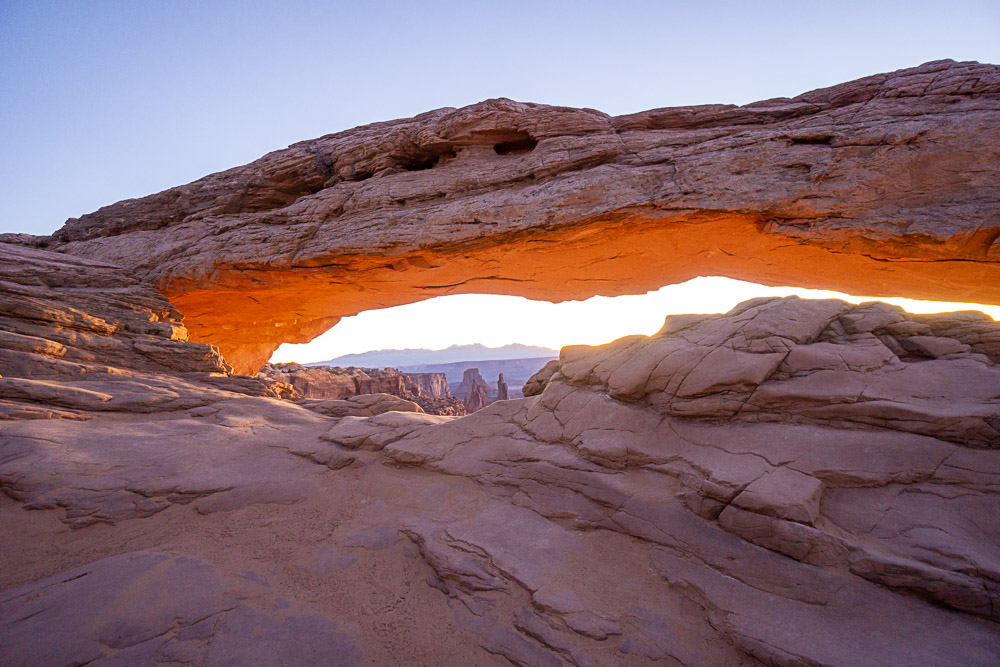
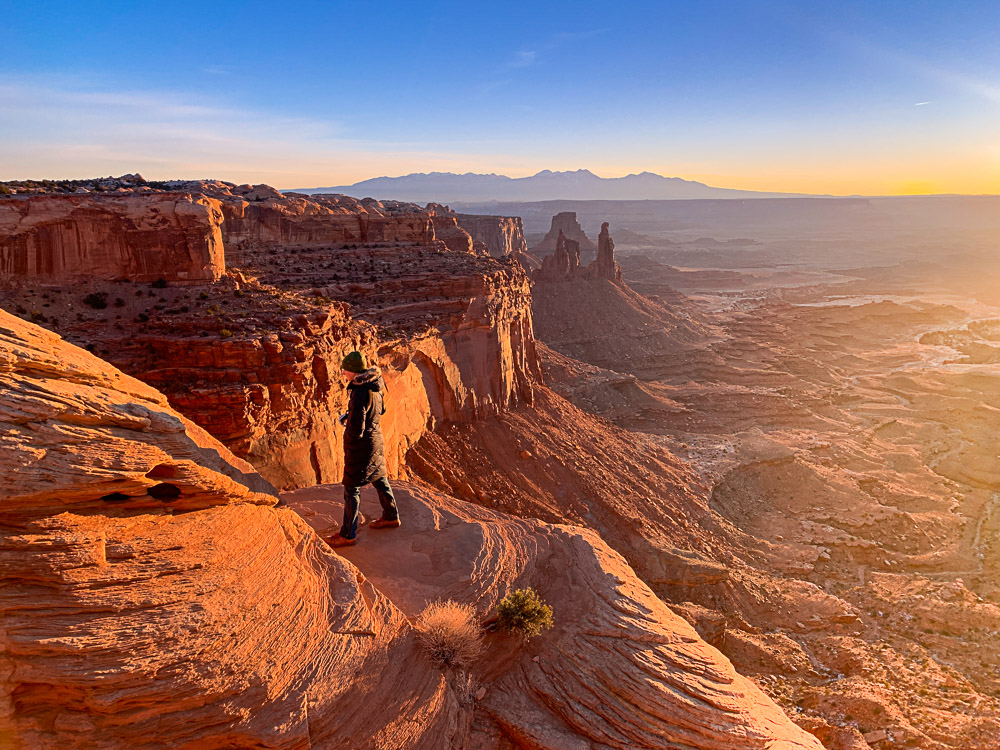
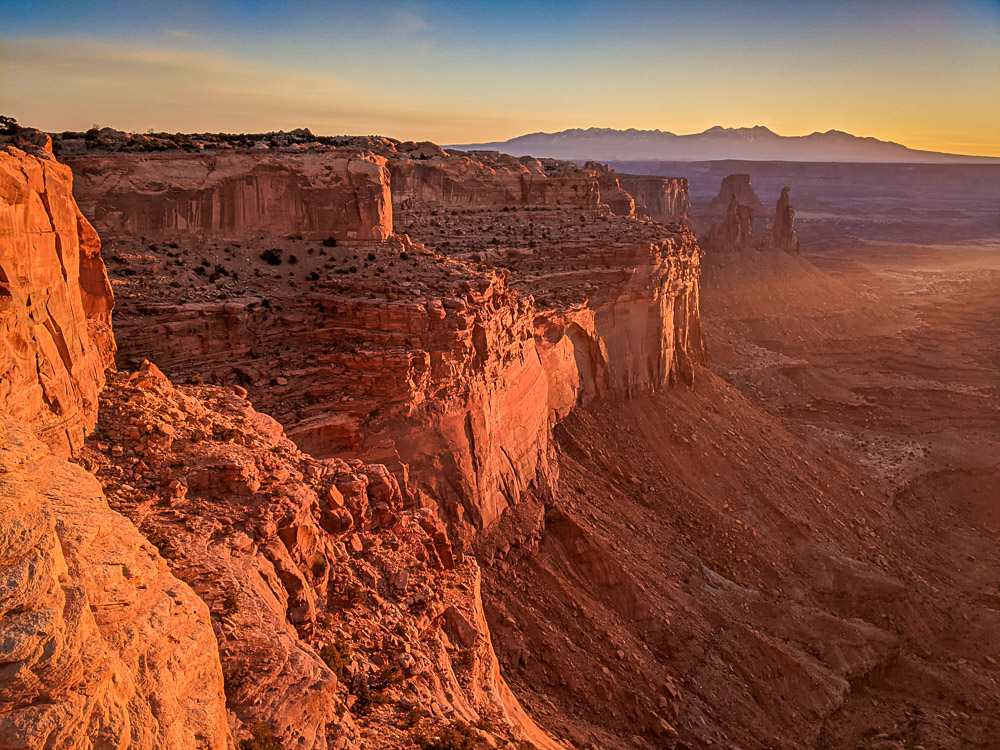
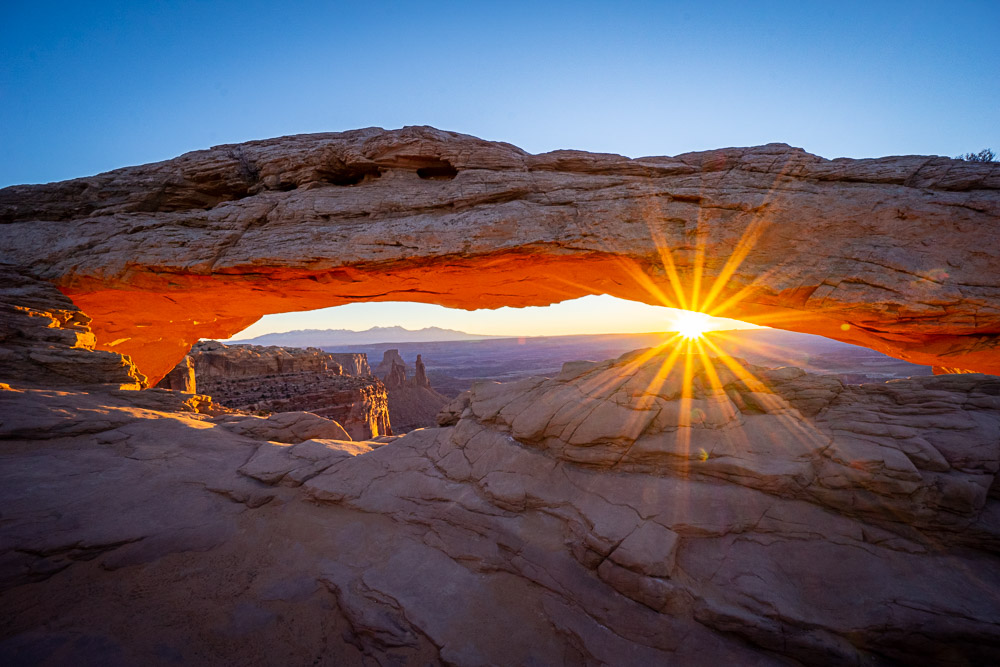
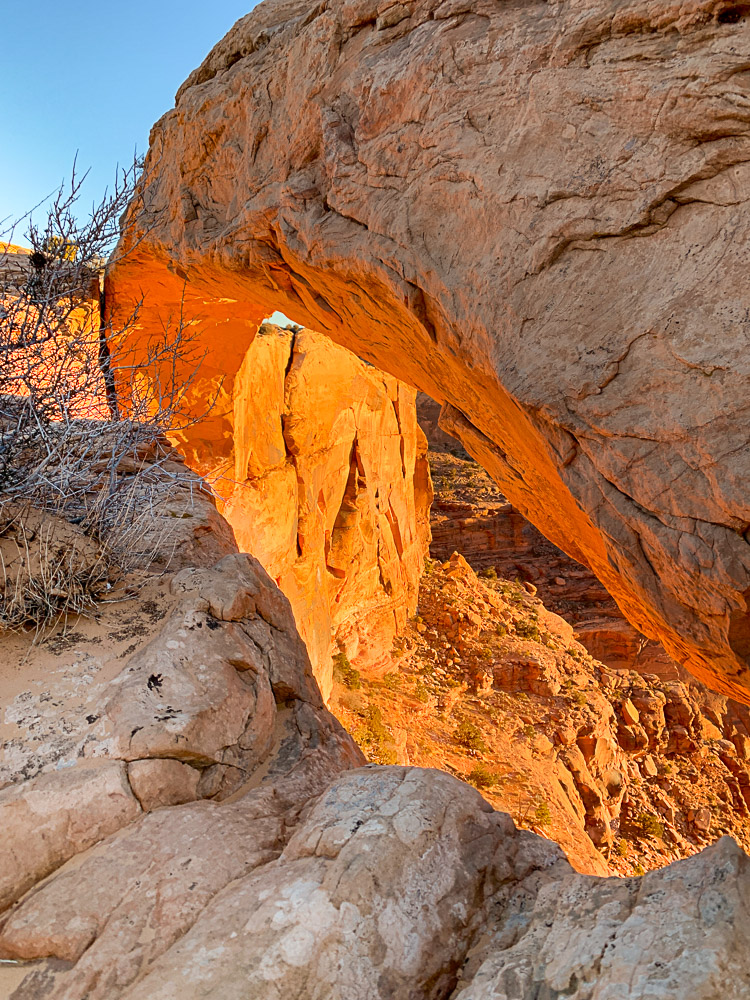
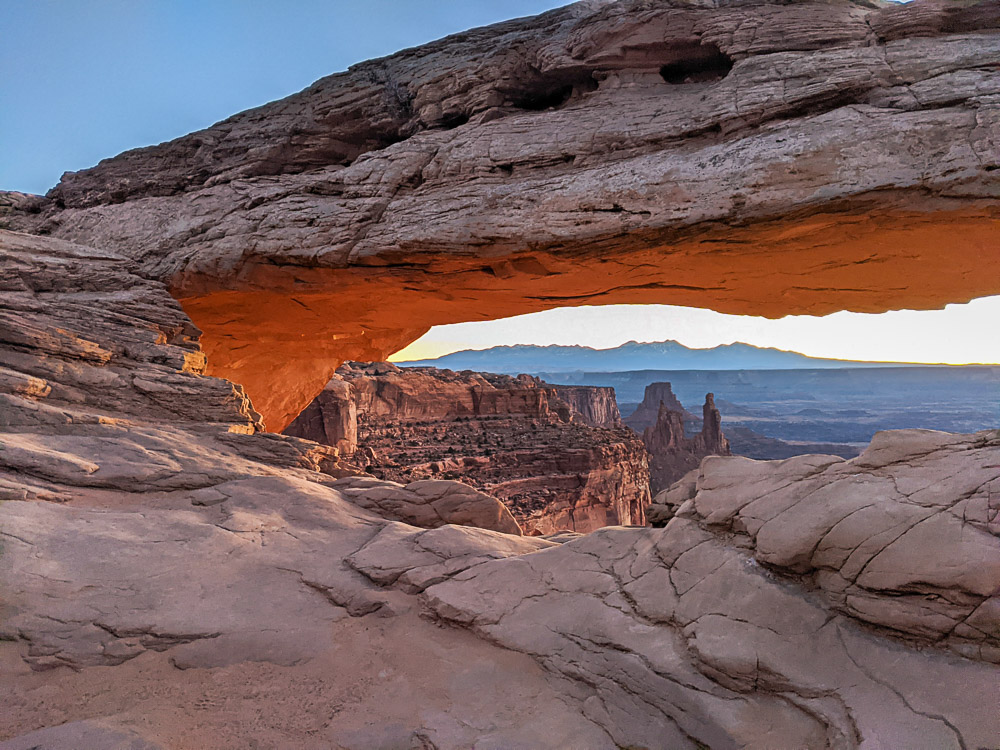
Mesa Arch at sunrise absolutely embodies the beautiful scenery of Moab. The arch glows in the pre-dawn light, while the purple La Sal Mountains contrast against the stunning red rocks of Buck Canyon below the arch.
I had put off photographing Mesa Arch at sunrise for a long time. Simply put, I don’t like hordes of people while I’m in nature. #sorrynotsorry
However, I had major shoulder surgery and a trip to Moab planned over Christmas so I thought why not plan to visit Canyonlands’ Mesa Arch for sunrise on Christmas Eve and experience one of the best things to do in Moab, Utah?
How crowded could the coveted Mesa Arch trail be? It turns out, not too bad, but more people showed up than I thought.
Overall, the experience of seeing this landscape really lights me up (see what I did there). And ya, I got to capture some of those iconic sunburst photos of Mesa Arch and then some.
As an absolute expert at beating the crowds and traveling through the most beautiful places on this planet like a local, not a tourist, I’m passing on the Holy Grail of visiting Mesa Arch for sunrise on to you.
Cue ephemeral music.
Moab is like a second home to me. As one of the most amazing weekend getaways from Denver, I’m out in Moab at least 6 times a year.
I’ve done it all. Seriously.
So you’re in expert-level company when it comes to this guide to the Mesa Arch Trail and photographing this unbelievable landscape.
As a freelance writer for the outdoors, pro outdoor blogger, AND photography nerd, you’ll get it all.
About this Guide to Visiting Mesa Arch at Sunrise
Photographing Mesa Arch at sunrise takes a little pre-planning and a few insider tips to really nail down.
Don’t fret.
I’ve got you covered. In this guide to visiting Mesa Arch in Canyonlands National Park you’ll find:
- Practical information about reaching the Mesa Arch trail. From details about where to find this awesome icon to what to expect on the trail.
- The best time to visit the arch and when to arrive at Mesa Arch for sunrise based on the season you want to visit.
- Tips for beating the crowds at Mesa Arch
- Photographing Mesa Arch, including a kit list
- Nearby things to do in Canyonlands
- More resources to plan the most epic trip to Canyonlands National Park
Where is Mesa Arch in Canyonlands National Park?
You’ll find the start of the Mesa Arch Trail along Grand View Point Road in the Island in the Sky District of Canyonlands National Park.
Take Highway 191 north out of Moab until you hit a junction for Canyonlands National Park and Dead Horse Point State Park.
Head left (west) and continue along that road through the entrance to Island in the Sky until you reach the trailhead. Signs lead the way.
If you reach the intersection with Upheaval Dome (very obvious) you’ve gone jussstttt too far.
Visiting Mesa Arch is one of the best things to do in Moab, but you’ll want to plan for at least a 45-minute drive to the trailhead from downtown.
Practical Info About the Mesa Arch Trail
One of the best parts about hiking to Mesa Arch in Canyonlands for sunrise is the trail is SUPER short.
The Mesa Arch Trail is not only one of the best hikes in Canyonlands, but it’s one of the easiest too.
I did this in a giant parka, headlamp, and a sling while carrying my camera on a snowy trail without any issues.
As one of the top-notch Moab hikes, the trail is well marked and it’s roughly a 10-minute walk to get to the arch itself.
Distance: 0.7 miles
Elevation Gain: 65 feet
Max Elevation: 6,099 feet
Difficulty: very easy, not wheelchair accessible
Approximate Time: 20-minute hike out-and-back. You’ll likely spend around an hour and a half to 2 hours at the arch, longer if you’re visiting during the busy season.
Highlights: Canyon views (hubba hubba), La Sal Mountains, wondering around the arch, easy hiking
Red Tape: No dogs, $30 entry fee into Canyonlands National Park
The Best Time to Visit Canyonlands’ Mesa Arch
Sunrise is the best time to visit Mesa Arch for one unique reason. The sun rises (throughout the year) in between the arch.
Many people come to see the arch light up from the bottom and snag a coveted photograph of this phenomenon.
However, you can visit the arch at any time of day and still have a pretty awesome experience.
Winter is by far the best time to visit Mesa Arch, in fact, Canyonlands National Park in winter is a worthwhile adventure!
Even though the most popular time to visit is between spring and fall, there really isn’t a lot of room at Mesa Arch to see the sunrise. Only about 20-25 tripods will fit in the area.
Pro Tip: The sun rises more towards the south (far left) of the arch in the summer. Some people may like this time better since the light hits the towers framed differently, however, the winter is a more dynamic time to visit.
Realistically, there is room for about 25 tripods, and only 10 or so will fit at the coveted lefthand side of the arch.
Winter is best because it’s quieter, the air is crisp, and the La Sals are dusted in snow, creating some drama to the scene.
Pro Tip: Don’t expect solitude. This place is still crowded, even on Christmas Eve. I actually found more solitude visiting Delicate Arch for sunrise.
When Should I Arrive for a Mesa Arch Sunrise?
The earlier the better when it comes to snagging a coveted spot at Mesa Arch for Sunrise.
How early depends on the time of year and what the weather is doing.
So when I read that the weather called for clear skies, but temperatures in the 10-degree range for sunrise, I gotta admit, I grimaced. Especially since I didn’t have feeling in a few fingers (thanks to surgery).
Thankfully, I didn’t have a painful alarm that day, since the sunrise is later – making winter all the better time to visit the arch.
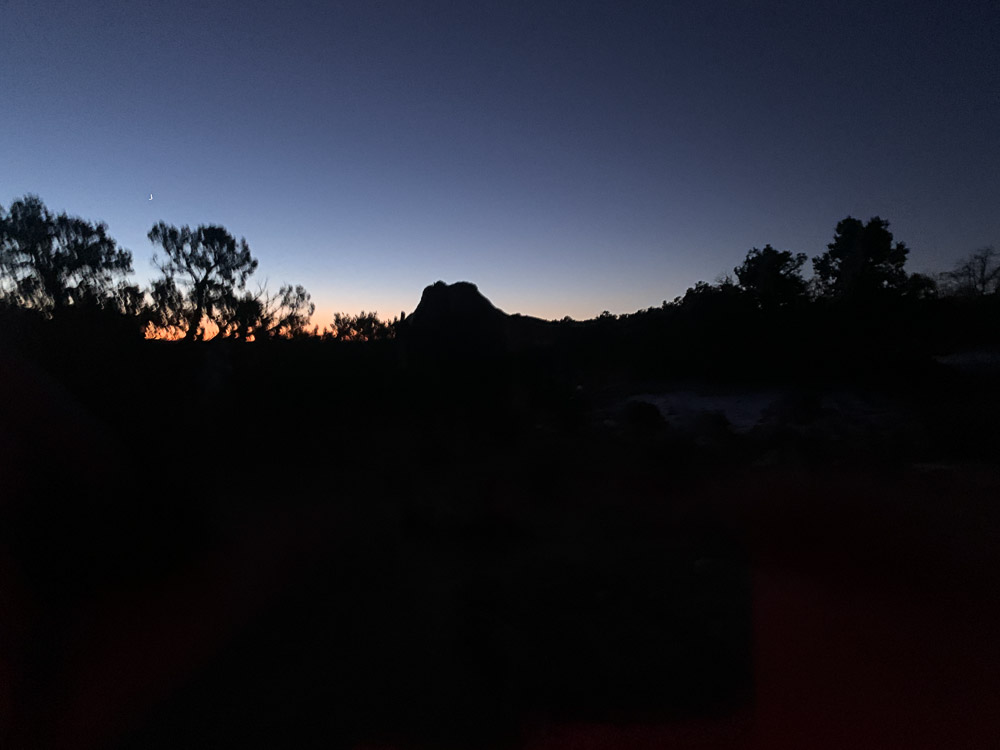
On Christmas Eve, we arrived at the parking lot maybe 45 minutes before first light and were the 4th car in the lot (with others pouring in behind us).
I was set up and ready to go about a half hour before sunrise. This gave me plenty of time to play around and tweak the camera a bit before show time.
There were around 25 people watching the sunrise that day, only about 8 tripods in total. Overall a huge win for clear skies and likely one of the least crowded times to have this experience.
For winter, arriving 1-hr to 45 minutes before sunrise is a good bet.
Pro Tip: Check the sunrise times in Canyonlands for your visit before heading out.
If you’re arriving before sunrise in the spring or fall, plan to get there 2 hours before first light if you want to snag a prime spot.
Summers are even more competitive, arrive at least 3 hours before the sun comes up (and pack accordingly) if you want to visit Mesa Arch in the summer.
How to Beat the Crowds at Mesa Arch
If you absolutely must see the sunrise at Mesa Arch, then visit during the week in the winter (or over a major holiday like New Years Day or Christmas). This is your best bet for beating the crowds.
Otherwise, consider visiting Mesa Arch an hour or two after sunrise for the most solitude. People pack up and leave after the sun passes through the arch, so you’ll have more solitude during this time.
Go in with the expectation that there will be crowds here and you won’t be disappointed.
Tips for Photographing Mesa Arch
If you’re looking to capture amazing photos of Mesa Arch at sunrise, you’ll want to do a little leg work.
These expert tips for photographing Mesa Arch will let you make the most of your experience.
Do Your Homework
Always check the weather before you go. Cloudy days aren’t ideal for sunbursts and if the trail is icy, you might want some traction.
Canyon rims are windy places. You might want a tripod with a hook at the bottom to hang your hiking bag for added weight.
Look around at photos of Mesa Arch for inspiration.
Prep Ahead
Getting up hours before the sun isn’t everyone’s forte. I have had 12 am wake-up calls to go on 15-hour alpine expeditions up mountains with a tremendous amount of gear.
Trust me – the last thing you want is to be fussing with something silly the morning you’re headed out. Before you leave be sure to:
- Charge your battery and extra battery
- Clean your lens(es)
- Set your ISO and preferred camera settings (RAW, manual, etc)
- Clear your memory card and pack an extra
- Check that your tripod extends easily.
- Pack all of your essentials
- Double-check the weather
- Make sure your car has enough fuel to reach the trailhead
Keep Your Batteries Close
Even in the spring and fall, camera batteries can succumb to the cold quickly (especially with a Sony camera).
Be sure to keep your camera batteries close to you as you walk. Store them in an interior pocket or breast pocket. Then insert them when you get there, keeping your spare in that same pocket for body heat.
Bracket Your Shots
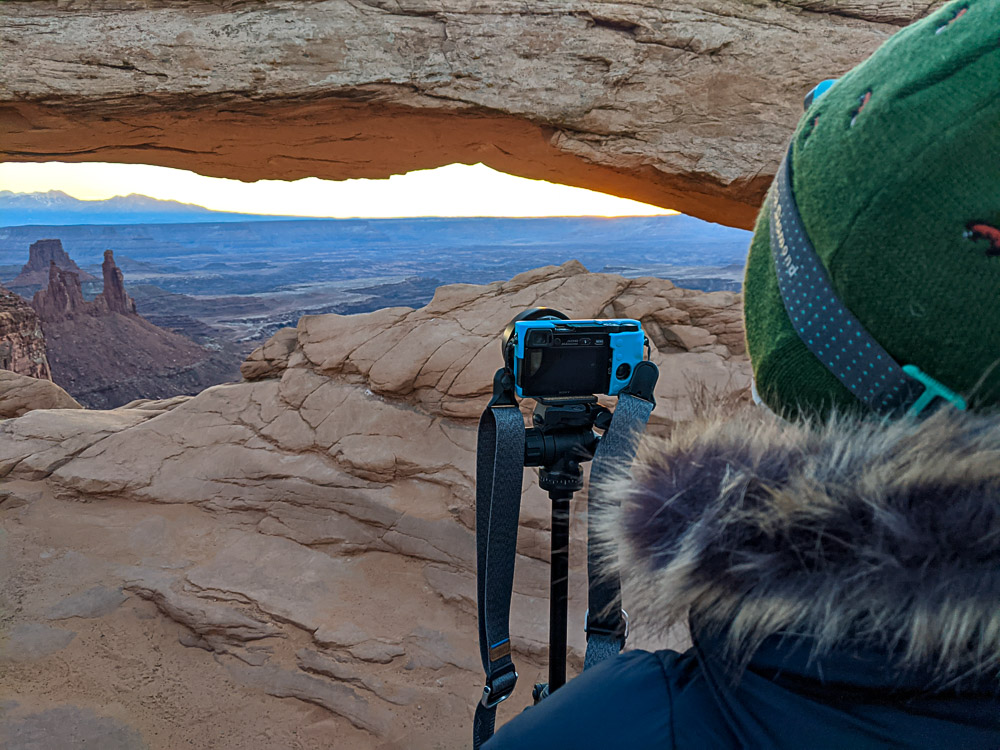
Time is of the essence when shooting sunbursts, and Mesa Arch at Canyonlands is like expert mode, so take a few test shots and get ready to bracket your shots for the main event.
This means going up or down a full stop for a variety of photos. I shot from -1.5 to 1.5 going half stops for maximum impact.
Pro Tip: Shooting on a phone? get more of that sky by tapping on the sky and letting the scenery be darker. Lightroom can make quick work of lightening up dark spots, but if you lose that color info, it can’t come back.
Be Kind, Share Space
Rude people are everywhere – don’t be one of them. In general, we found everyone to be cheery and courteous when we visited Mesa Arch.
If you’re there late and can’t get the shot you want, consider coming back another day and checking out Grand View Point instead.
Or just be friendly and see if you can squeeze in. Get creative. Do something to make the most of your experience and learn from the errors.
Don’t Climb on Mesa Arch
It is illegal to climb Mesa Arch or any named arch in a national park. Period. You’ll be tempted, it’s easy but don’t.
Pick Up After Yourself
Don’t leave trash behind (if you see it, pick it up!), and certainly do not carve into the rock. Again, illegal. Always leave it better than you found it.
Have a Wide Angle Lens
A wide-angle lens is pretty essential (unless you’re a post-production stitching wizard).
I photographed Mesa Arch at sunrise with a Sony 10-18mm at ISO 1000 with zero issues. I got 90% of the arch with this lens.
Opt for a Unique Angle
Once you get the shot you want, wander around! There are a lot of really cool features surrounding the Mesa Arch Trail. Explore, capture something different, release your creative side!
Sure the iconic photo is awesome and all, but it’s far more fun to wander around and get other unique views.
Tripods are Essential for Serious Shots
Serious photographers will need a tripod in order to bracket, so definitely bring one (you can always rent one).
Set it up to your liking. The ground is pretty uneven so it will take a second to get exactly what you want.
If you strike up a friendly convo with a fellow photographer, offer to swap spaces.
Bring Layers, Snacks, and Some Coffee
It can be cold and windy while waiting for the sun to come out. Pack some coffee or tea, a few snacks, and the proper layers.
Keep it Quiet
Sunrise is a tranquil time and I’ve been across the world in search of nature’s best sunrise spots. No matter where I am, quietness and low voices are essential.
You Don’t Need the World’s Most Expensive Camera to Snap Kick-Ass Photos
I don’t have a super-expensive set up (Sony a6000). The key to getting capturing a Mesa Arch sunrise is in the lens you use. If you’re going to spend money or rent gear, start with the lens.
Avid phone photographers might not be able to get sunbursts (yet), but you’ll still capture some fun shots.
Wander Around
After a minute, put the camera down and enjoy the moment. Don’t forget you’re at one of the most beautiful places in the world and certainly one of the more scenic spots in Moab.
Photography Packing List
Here’s what to bring for your sunrise at Mesa Arch. You can also use this list to hike the Mesa Arch Trail, but you don’t need to bring all the photography equipment.
- Jacket, hat, gloves, and warm layers, especially from fall through spring. Check out my guide to amazingly-warm hiking clothes.
- A headlamp to hike in the dark.
- Thermos of coffee with a sealable lid (rocky surfaces are easy to spill)
- Snacks
- Baggie for any trash
- Tripod
- Hiking bag
- Water
- Sunscreen (for post-sunrise visits)
- Camera clip
- Camera lens (I used a Sony E 10-18mm F4 OSS Wide-Angle Zoom Lens)
- Extra camera battery
- Camera (I used a Sony A6000)
- Phone
Pro Tip: I didn’t use any filters, although you certainly can (I recommend a graduated ND filter for easier contrast). If you shoot in RAW – a must – you can do all of the filter editing using Lightroom.
Nearby Attractions
Spend the day in the Island in the Sky District of Canyonlands National park as a part of your kick-ass Moab itinerary. Here are a few other spots to check out nearby:
- Grand Viewpoint Island in the Sky
- Green River Overlook
- White Rim Overlook
- Upheaval Dome
- White Rim Trail and Shaffer Canyon
- Gemini Bridges
Catch me on YouTube!
Want more secret backpacking trips? Ultralight hacks that every hiker can adapt? Experience the top outdoor destinations in the world without the crowds? If you want to get insider knowledge of all things outdoors, then you’ll wanna subscribe to my YouTube channel, where I am giving away my DECADES of knowledge as an outdoor professional. I’ll see ya there!
More Canyonlands National Park Trip Planning Resources
Planning a trip to Canyonlands? Travel like an expert, not a tourist with these pro guides to the best of Canyonlands National Park:
- Moab in Winter
- Druid Arch Hike
- Visiting the Needles District
- Moab’s Most Scenic Drives
- Arches National Park Bucket List
PIN THIS POST