Last Updated on October 31, 2023 by foxintheforest
A classic Moab adventure and a great way to dip your big toe into the wonderful world of mountain biking or overlanding the White Rim Trail is a true desert gem.
Winding 4×4 roads take you down from the perch in Island in the Sky in Canyonlands into another red rock world that changes around every bend. The 100-mile loop that encompasses the route known as the White Rim Road is a real thrill for all kinds of adventurers.
The rugged and backcountry-like nature lets you get into the heart of Canyonlands National Park without having to hoof it on foot. Best as a multi-day journey, and even better with a couple of bikes in the mix, the White Rim Trail is a must-do adventure.
As an ex-writer for the outdoor industry and total pro at navigating the desert, I’ve been to Canyonlands National Park countless times. In fact, I go on a permitted adventure so often, the ranger who manages permits knows me on a first-name basis.
If you’re looking to get the inside scoop on how to bike and drive the White Rim Road like a pro, not a tourist, then you’re in the right place.
About this Guide to White Rim Road
Inside this expert’s guide to the White Rim Trail, you’ll get:
- Practical info about the White Rim Trail
- What to know before you go
- A map of the White Rim Road
- Tips for biking the Road with support vehicles
- What you need to know about White Rim Trail Permits
- FAQs about the White Rim road
- Info about White Rim Trail camping
- Additional highlights and side trips along the road
- More info on visiting Canyonlands National Park
Practical Info About Biking and Driving White Rim Road
The White Rim Trail is a more rugged desert adventure that requires plenty of advanced planning and a few handy desert camping skills. If you plan on biking the road (which I highly recommend), there are a few more important pieces of info to keep in mind. But here’s a look at the basic info for your White Rim Road adventure.
Location: Island in the Sky District of Canyonlands National Park
Distance: 100-mile loop with around 86 miles of the route in Canyonlands National Park
Difficulty: Moderately difficult to drive. Difficult on a bike.
Average time: 2 – 3 days by car and 3 – 4 days by bike. See below for itinerary time recommendations.
Permits required? YES. Overnight permits must be obtained day of the release if you want a shot at being able to do this drive. Day-use permits are also required and are available 24 hours in advance. See “permits” for more info.
Vehicle requirements: 4WD vehicles with low gears (4-low driving option). This means anything that is a Toyota 4Runner, Jeep Wrangler, or equivalent. Stock clearance is fine, however, all-terrain tires are extremely helpful.
Red Tape: NO DOGS. No ATVs, OHVs, or other vehicles that are not street legal, campfires, or generators
Facilities: There are NO SERVICES along the White Rim Trail. Come prepared with all of your own water, food, and emergency equipment. Getting towed from the White Rim Road starts at $1,500. Vault toilets are located at all campgrounds.
Best Time: Between mid-March and early May and the month of October. Spring is windier (there is no shelter from the wind) and there is a greater chance of rain. October is exceptionally dry and mild, but more competitive for permits.
Summers are sweltering and there is no shade (there is also a monsoon season in August that will make travel impassable).
Winters can be bitterly cold and windy. The Shafer Switchbacks frequently close due to ice in the winter because they are on a north-facing cliff. You can exit via lower Shafer Canyon, but you’ll miss an iconic part of the road. Crowds are minimal and permits are easy to get.
Pro Tip: One permit is good for 3 vehicles and up to 15 people.
Know Before You Go
There are a lot of important things to know before you set out on the White Rim Trail. First, you’re totally on your own. It’s your responsibility to stay safe, carry your own supplies, and plan a route that makes sense for your group.
The road is pretty rough and bumpy.
Oftentimes, the going is pretty tedious on a bike and in the car. In terms of technical driving, there are only a few notable sections and you will use your lower gears.
Pro Tip: Google Maps drive times are highly inaccurate. Double them at least. The speed limit on the road is 15 miles an hour but plan on going no faster than 7-10 miles an hour for the majority of your journey.
The road can be extremely narrow at points, less than one car length in spots so know the rules of driving on 4×4 roads.
The uphill vehicle always has the right of way.
Get out of your car and check downhill sections before proceeding, as there is not always a spot to pull over.
Bikers always have the right of way over vehicles. Pullover for cyclists and let them pass.
Let others know how many are in your group. Hold out your hand signaling the number of vehicles behind you. If you’re last, hold up a closed fist.
Reconsider your trip if rain is in the forecast.
This road will be completely impassible during a rainstorm. The road becomes extremely muddy, rockfall along cliffsides is common and dangerous, and washes cross the road throughout your journey. Use a tool like weather.gov to get accurate, pinpoint weather, up until the day of travel.
There are no reliable water sources along the White Rim Road.
Pack in all of your water, and pack out all of your trash. Plan on bringing one gallon per person per day.
Spring and fall are busy seasons for the White Rim Road.
We went in the fall, it never felt crowded, thanks to the permit system, but permits are extremely difficult to snag. The entire fall season sold out in just 5 minutes of permits being open.
Leave No Trace
Don’t bust the crust. The raised, bumpy, black soil is a living thing and provides vital protection against erosion, allowing plants to grow. Stick to marked trails and sturdy, rocky surfaces.
Stick to the road. It’s illegal to drive off-road along the White Rim Trail. All of the best views can be found directly on the road or at signed detours that require a short walk.
Don’t harass wildlife. The desert ram call this area home and seeing these endangered creatures was a real treat.
I watched a heard cross right in front of me as I was riding my bike. It was utterly magnificent to see so many of them. Then I realized they were fleeing from some asshole in a Subaru who had snuck in via Shafer Canyon and brought their dog who chased the ram. You bet I had words with them. They, their vehicle, and their dog had no business being on the road.
Tips for Biking White Rim Road
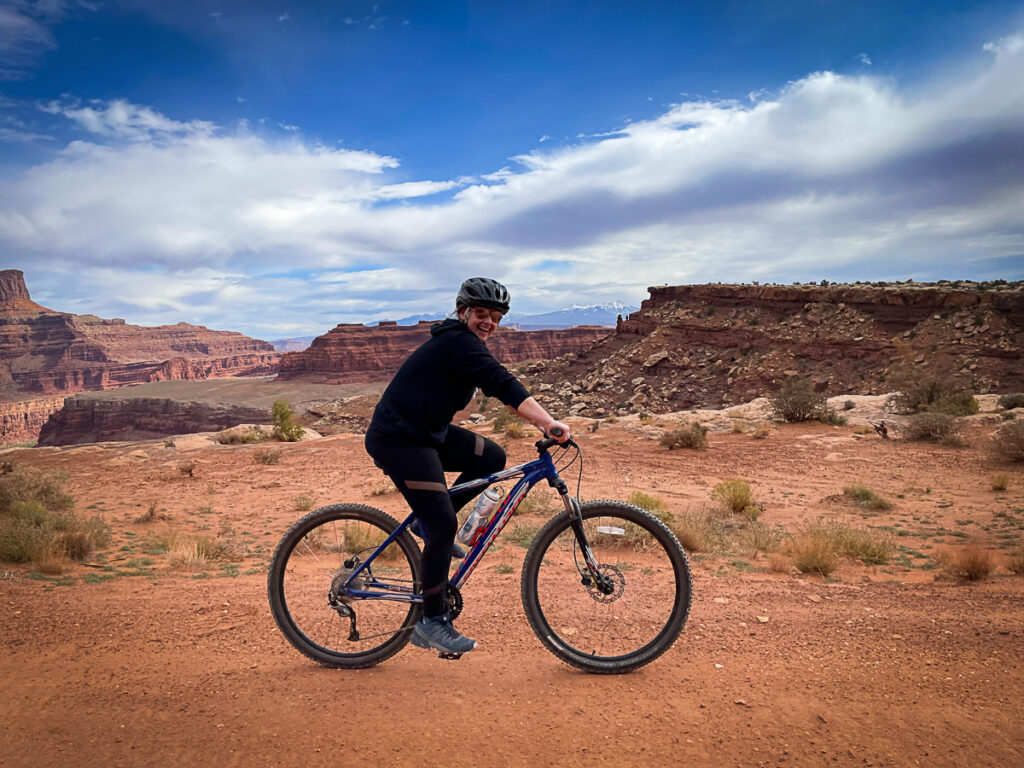
Biking the White Rim Trail is a bucket list item for countless MTB enthusiasts. If you’re into biking, it’s a great adventure.
Personally, I’m still on the fence about mountain biking. Biking this road in my first trimester of pregnancy gave me a skewed perspective, but it certainly had its highlights.
For the best experience with biking the road, head clockwise. There is more downhill in this direction. Plus you get to fly down the Shafer Canyon Switchbacks, which is endless fun!
You’ll certainly want a support vehicle unless you’re a die-hard bikepacker. Having a big truck haul your supplies lets you make the most out of the road.
We did a biking/driving combo and if I had to do it again, I would have spent three nights on the trail instead of 2. Three nights will let you go at a sustainable pace on a bike and give you time for side excursions.
Getting Permits for White Rim Trail
As one of the top things to do Moab, permits for the White Rim Road are not easy to obtain. In fact, during the busy spring and fall season, they will sell out within 5 minutes of opening up. Summers also tend to be busy with permits, although I wouldn’t advise traveling to Mob
Pro Tip: Have 1-2 itineraries ready before you log on for permits and familiarize yourself with camping options so you can quickly adjust as needed.
The permit cost is $36 per reservation for overnights and $6 for day use. Fees are non-refundable.
Important Permit Dates: Overnight Permits
If you want to snag an overnight permit for the White Rim Road, you’ll want to log into recreation.gov the moment permits open up. Be sure to select “Island in the Sky White Rim Road.” Here are the dates you need to know about:
- Spring permits (March 10 – June 9) open November 10.
- Summer permits (June 10 – September 9) open February 10.
- Fall permits (September 10 – December 9) open May 10.
- Winter permits (December 10 – March 9) open August 10.
Permits open at 8 am MST.
Day Use Permits for the White Rim Trail
If you’re looking to drive the White Rim Road in a day, you’ll still need a backcountry permit. Permits can be reserved one day in advance, opening at 8 am the day prior to travel. During spring and fall these permits sell out almost immediately.
Can You Do the White Rim Trail in a Day?
As one of the top scenic drives in Moab, many people opt to try to do the entire White Rim Trail in one day. Be warned, it’s a bold move.
Expect to spend 12 hours in the car along a bumpy, tedious road. You will not have any spare time to get out and enjoy the views or any side trips if you want to make it out of the park before dark. Expect to be in the vehicle and completely out of energy by the end.
Again, you’ll need all your supplies. Food, water (at least one gallon per person), and emergency equipment will be required.
I’m sure some insane mega-athlete has biked the entire White Rim Road in one day, but a one day biking trip is not advised for those that can’t handle the rough terrain.
How Long Does it Take to Ride the White Rim Trail?
Most people take 2 to 3 nights to drive the White Rim Road. If I had to do it all over again, I would have spent 3 nights along the road (we spent 2 nights). 3 nights is enough time to enjoy biking, hiking, slot canyons, and take your time leaving camp in the morning.
2 nights and 3 days will let you drive at a leisurely pace, stop at famous landmarks like the Goosenecks Overlook, White Crack, and others. You’ll also be able to split time pretty evenly by biking and driving. However, bigger side trips such as hikes and the really cool Holman Slot Canyon will probably be just out of reach.
Overnight trips are possible, but you’ll feel extremely rushed and probably won’t enjoy the journey as much as you’d like. Biking on an overnight trip would be tough unless you’re a complete expert. There is quite a bit to see, so a 3-day minimum is recommended.
How Difficult is White Rim Road?
Overall, the White Rim Trail is a moderately difficult adventure that requires knowing how to use lower gears in your vehicle, navigating easier 4×4 obstacles, and a lot energy. It’s a deceivingly long trail with plenty of tedious sections that will test your patience after a long day. But don’t worry, the scenery makes it worth it.
If you’re biking, the road has some exceptionally steep sections, sandy sections, and slickrock sections that aren’t exactly smooth rides. MTB project rates it an intermediate ride, but if you have zero experience mountain biking, you can rent a bike and simply joy ride the sections of the road you’d like to (that’s what I did).
Pro Tip: If you’re biking without a support vehicle, this is a challenging ride. Water sources are not reliable if they are even available, and you’ll be begging for water. We had a few bikers do this.
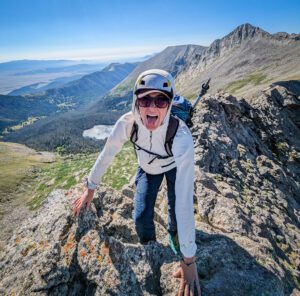
Pro Tips: My Experience
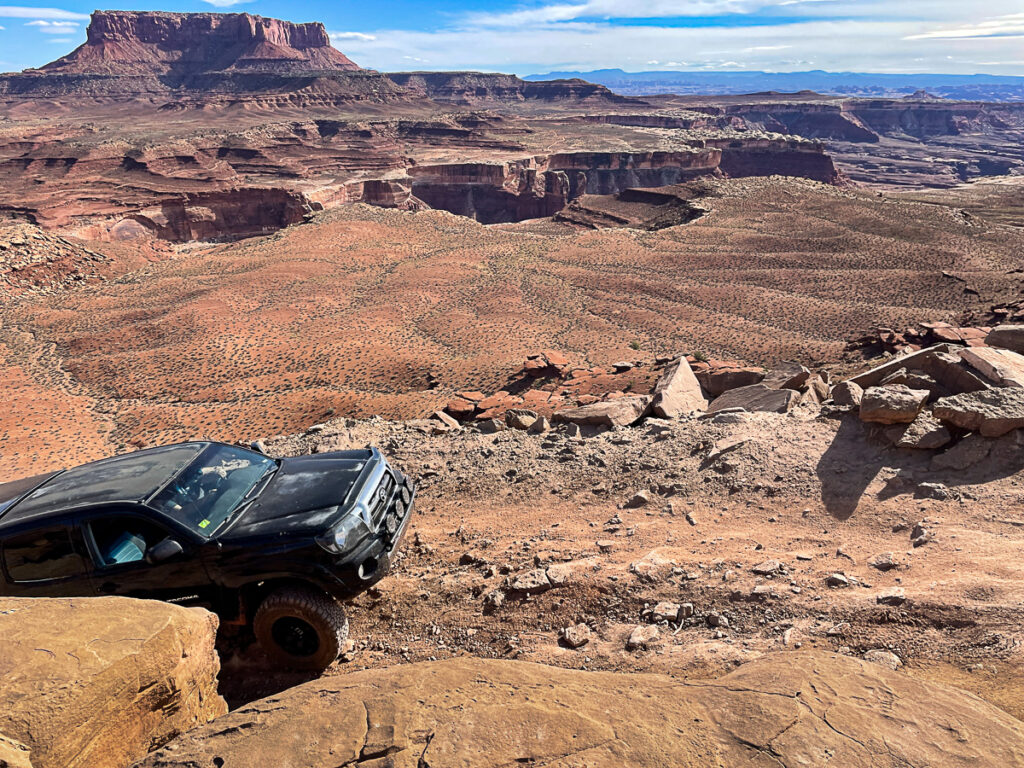
However, difficulty is relative. I’ll put the White Rim Road into perspective for you. I have plenty of 4×4 driving experience, especially in the desert, drive a stock 4Runner with BF Goodrich Allterrains and I found the driving to be quite easy from a technical perspective.
There are a few butt-puckering sections that will get your heart racing, but I drove a majority of this road, while my friend biked.
From a biking perspective, I have next-to-no experience mountain biking. I only biked about 20 miles of the road and found it to be an enjoyable, yet challenging jaunt.
I did all of this without the support of my partner while I was 8 weeks pregnant. Not to mention, I didn’t know it at the time, but I came down with a breakthrough case of COVID on the last day (joy – not). Basically, I felt hungover for most of the journey.
There were points where I was completely trashed and exhausted. The White Rim Road ended up being a bit more demanding than I had anticipated, but it was totally worth the effort.
Driving White Rim Road Clockwise
Is it better to drive the White Rim Trail clockwise or counter-clockwise? Most people drive clockwise because it offers the most downhill driving and riding.
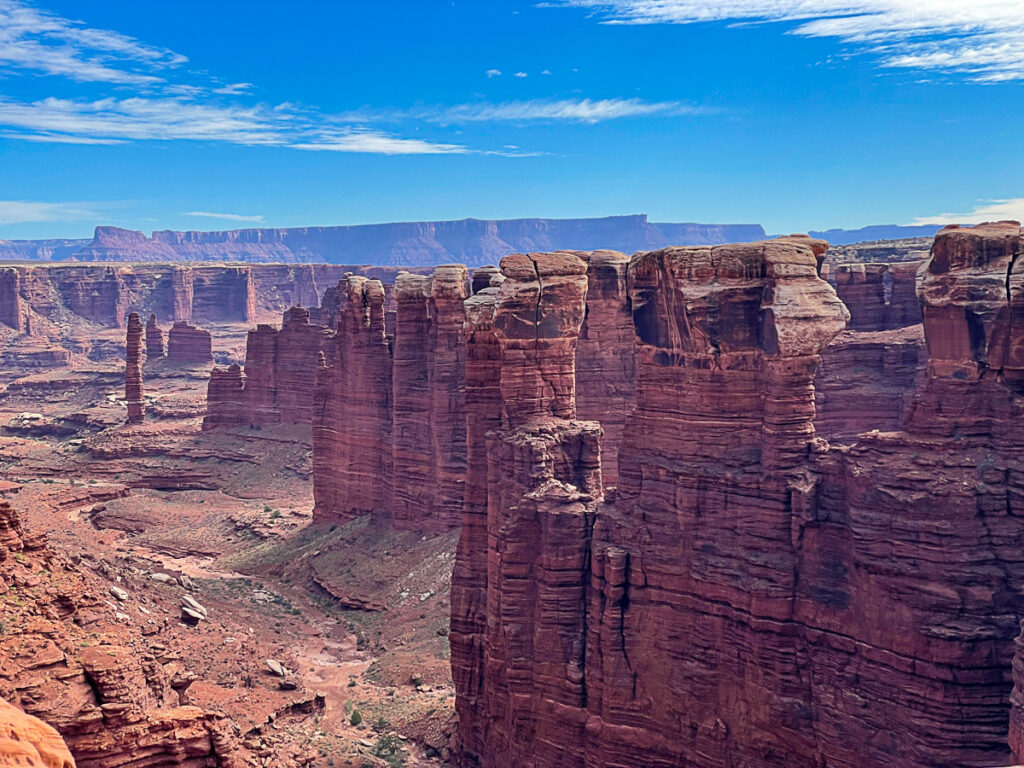
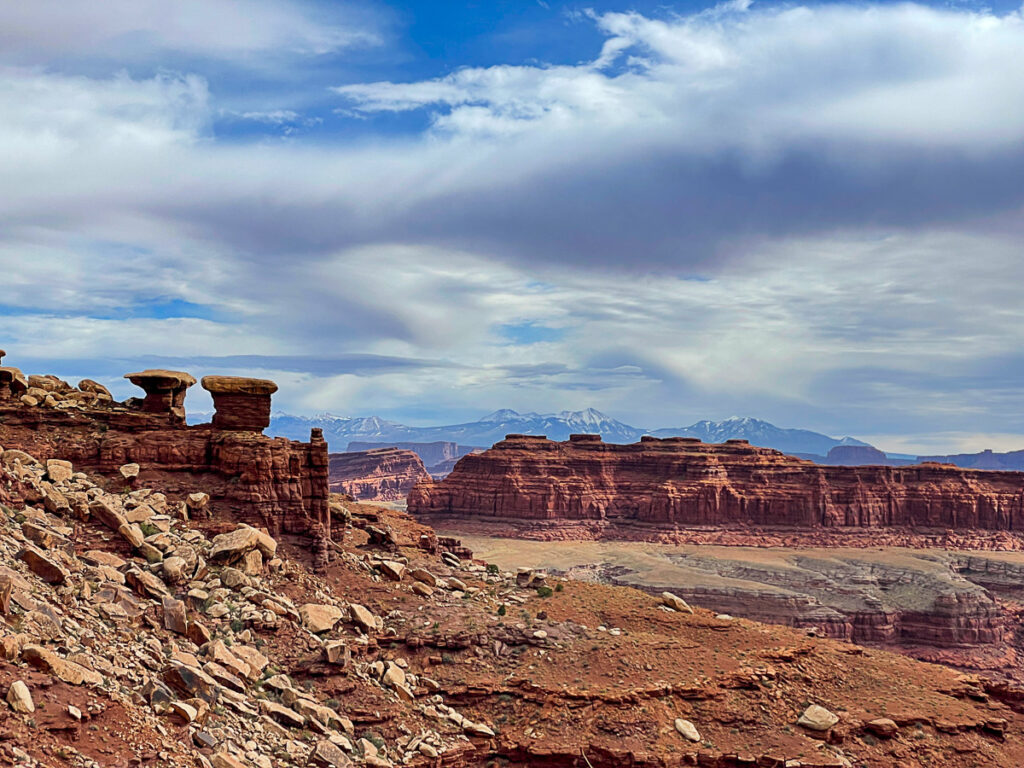
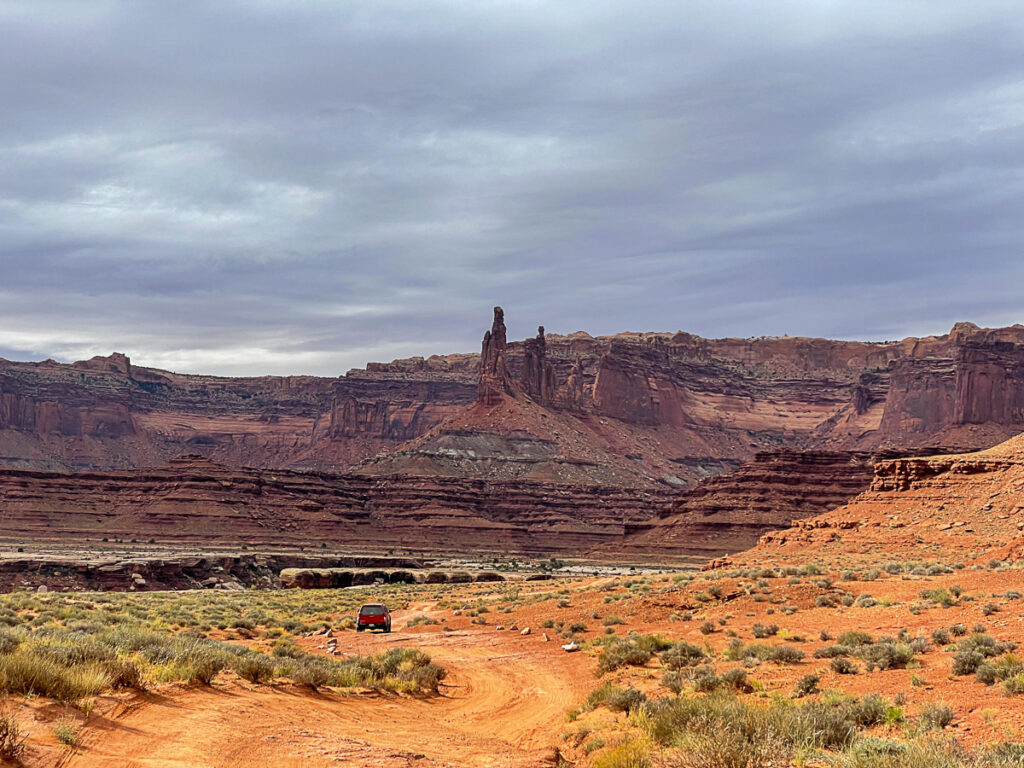
The scenery changes regularly throughout the journey and many people think that it is prettier on the Shafer Canyon side than it is on the Mineral Bottom side, but the fact is the two sides show two different desert environments.
Leaving via Mineral Bottom puts you on a much wider, easier road than the Shafer Switchbacks. However, biking down the Shafer Switchbacks is about 100 times more enjoyable than going up them – unless you’re into sadistic torture.
Overall, clockwise is a better way to travel if you’re biking the road or have less 4×4 driving experience.
White Rim Trail Counter-Clockwise
Counter-clockwise is also a popular direction of travel namely because the scenery supposedly gets better as you go onwards in this direction. That’s honestly pretty relative to your personal tastes.
Counter-clockwise will take you downhill on the steepest technical sections, which may not be ideal for those who don’t have a lot of 4×4 driving experience. You’ll also have shorter downhills by bike.
Counter-clockwise is a better way to drive if you would rather save some of the dramatic views of hoodoo-laden canyons for last.
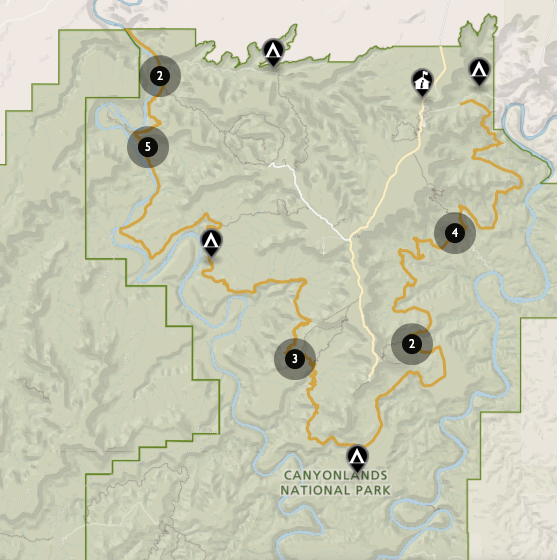
Map of White Rim Road
Get oriented with this map of the White Rim Trail. Following the map counter-clockwise you can get a sense of the highlights along the White Rim Road and how to make the most of your visit.
Highlights Along White Rim Road (Clockwise Direction)
Heading in a clockwise direction you’ll take your first left turn after entering the Island in the Sky District of Canyonlands. It takes roughly a minute to reach the parking area. Here you can gear up for the road ahead.
You start the White Rim Trail on Shafer Canyon Road until you reach the Shafer Canyon Road/Potash Road Junction. From here, White Rim Road officially begins.
Total drive time from Moab: 40 minutes
Shafer Trail Viewopint
Continue along the gentle dirt road until you reach an obvious pullout with spanning views. Down below you can see the White Rim Road and the journey ahead. The switchbacks are just out of view.
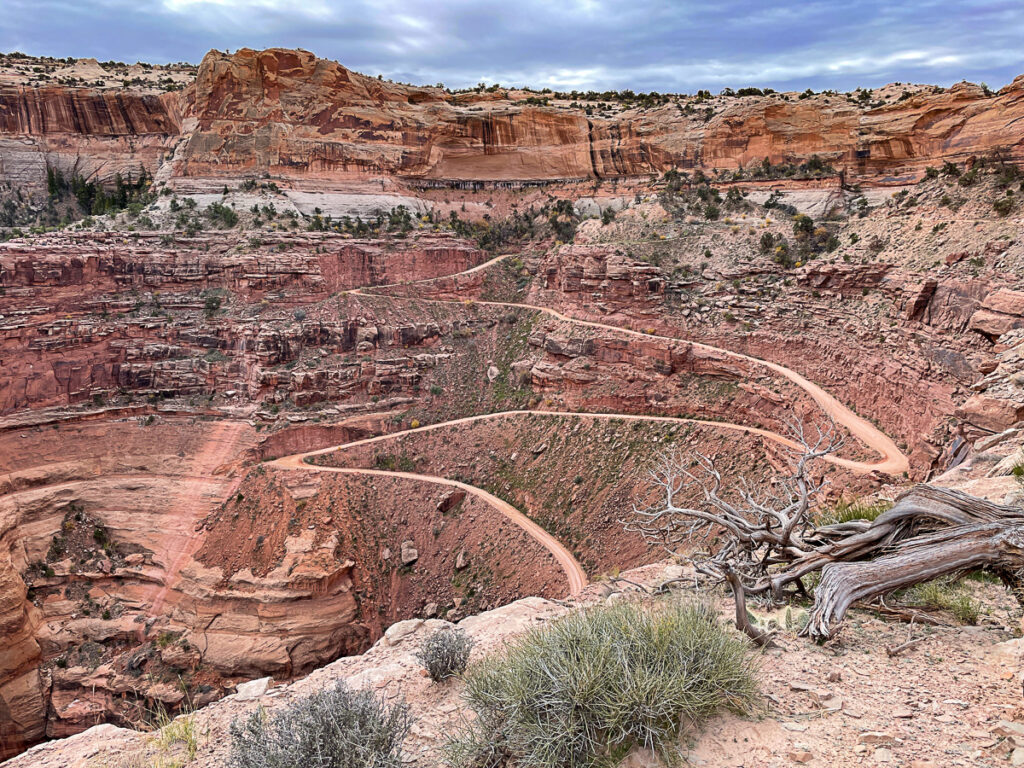
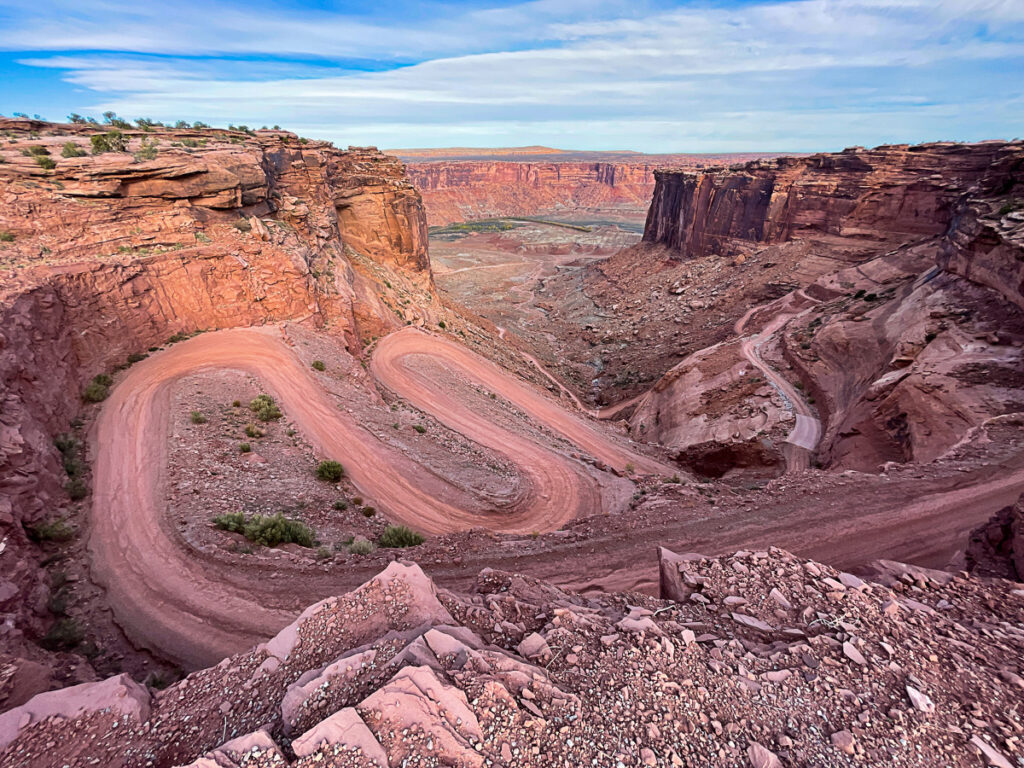
Shafer Trail Switchbacks
Eventually, you’ll start to hug a cliffside on the right side of the vehicle and the famous lookout point of the Shafer Switchbacks comes into view. Get out here and scope the road, noting the amount of uphill traffic.
Most of the switchbacks have a spot where vehicles can pull over and the road is fairly wide. Just beware of bike traffic, as they always have the right of way on the White Rim Trail.
Pro Tip: Riding downhill on the Shaffer Switchbacks is a total thrill! Just be aware of steep hairpin turns covered in loose dirt.
Potash Road and Shafer Trail Junction
After the switchbacks, you’ll head straight for a while until you reach a signed junction for Potash Road. There are toilets and this is a great spot for a quick rest if you need it. Stick straight to stay on the route. From here, you’re officially on the White Rim Road!
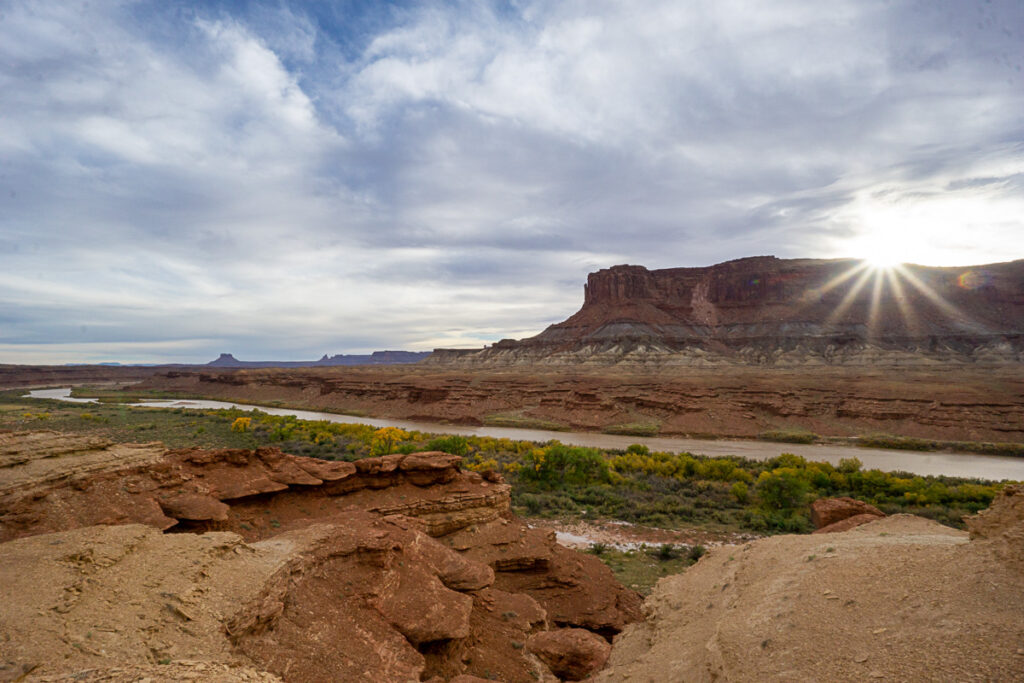
Gooseneck Overlook
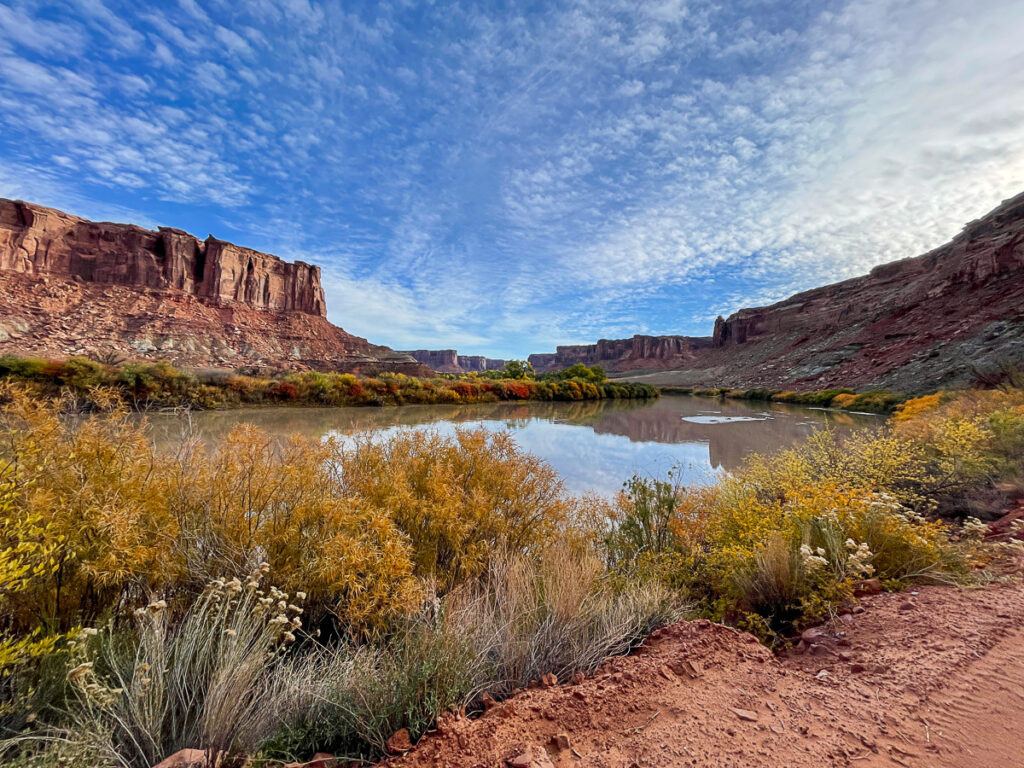
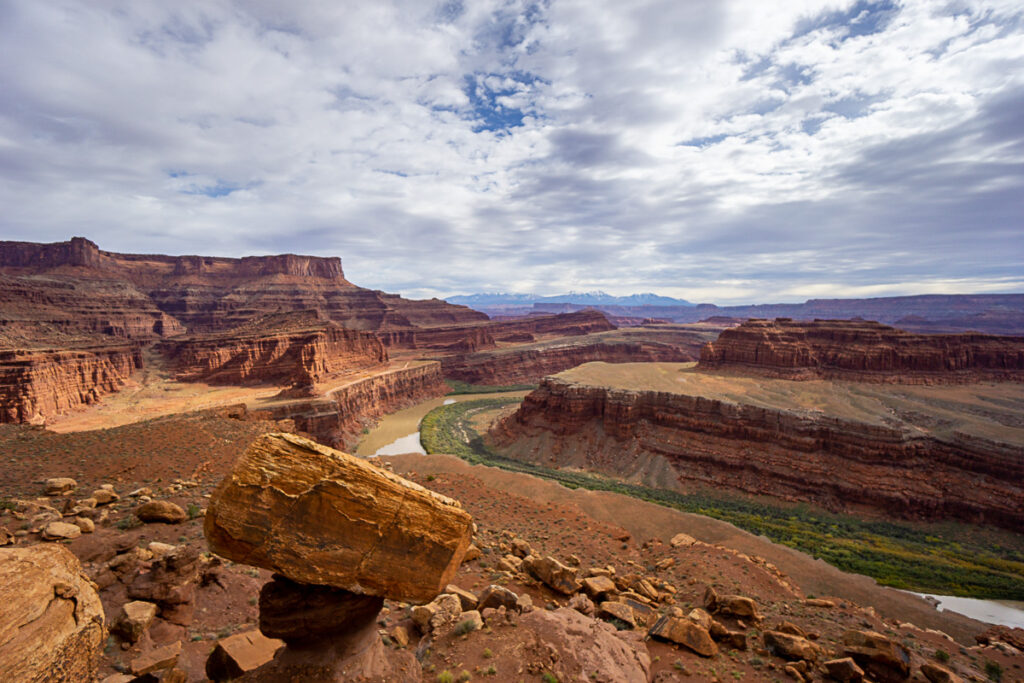
Travel a little further to reach a signed parking area for the Gooseneck Overlook. A quick 0.3-mile walk takes you to a stunning viewpoint of the Colorado River. You can’t quite see the entire gooseneck bend (you’ll need to check out Dead Horse Point State Park), but it’s a tranquil scene that really gives you a sense of scale.
Pro Tip: The parking area provides a nice place for a group lunch.
Musselman Arch
Another worthwhile side trip along the White Rim Road is to the oddly-satisfying Musselman Arch. A 5-minute walk from the road takes you to a viewpoint where you can view this flat-topped arch.
This arch is exceptionally delicate and climbing or walking on the arch is not allowed (I wouldn’t trust the rock anyway, it’s cracked in multiple places).
Lathrop Canyon Road Junction
Just before the first campground in the counter-clockwise direction – Airport Campground), you’ll swing along the outside of Lathrop Canyon. There is a rugged, -mile-round-trip technical road that descends into the canyon. It’s certainly challenging and has plenty of obstacles if you’re looking for some 4×4 fun.
Pro Tip: As of fall of 2021, rockfall has closed sections of this road, proceed with caution.
Airport Campground
The first campground along White Rim Road is the 4 campsites at Airport Tower. Frankly, the Airport Campground was highly disappointing. Just a flat wasteland with absolutely no shelter from the wind, privacy from the road, or escape from the sun.
Distance from the Visitor’s Center: 19 miles.
Gooseberry Campground
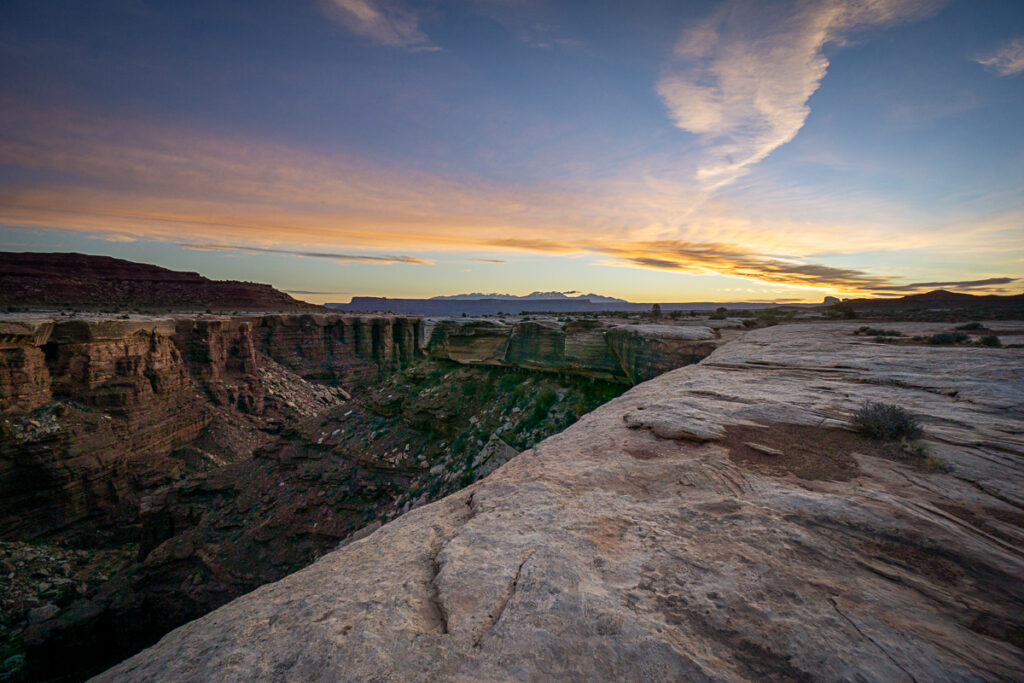
Continuing on you’ll eventually reach the 2-site campground of Gooseberry. The rangers have told me this is one of their favorite campsites along the White Rim Road thanks to the beautiful sunsets.
We stayed at Gooseberry A (the better of the two sites), and sunset was uneventful (cloudy), but the sunrise was pretty spectacular. Just keep in mind it’s about a 3-minute walk along to the canyon’s edge.
Distance from the visitor’s center: 30 miles
White Crack Viewpoint and Campground
Out of all of the campgrounds along the White Rim Trail, White Crack is the absolute best. Down its own 1.20-mile side road, this secluded spot marks the southern apex of the White Rim Road.
The views are to die for, and certainly plan to visit the White Crack Campground even if you aren’t staying here. It’s an excellent lunch spot. Be sure to check out both sides of White Crack for views of both the Needles District and the Maze.
The road in is quite bumpy and sandy, so drive carefully.
Pro Tip: This spot fills up almost immediately since there is only one site. It would be a burly day to push here in one go, so if that’s your plan, start early.
Miles from the visitor’s center: 39.

Murphy Hill Technical Driving Section
You’ll make your way across some mellow desert terrain until things begin to get a little hilly. There are a few sandy, but short hills to navigate as you wind your way closer to Murphy Hill. You’ll know when you get there. This steep, exposed hillside is a one-way affair, with no way to turn around until the top. You’ll want to drop it into 4-low for this one.
Murphy Hogback Campground
Once you crest the hill you’ll be treated to some of the best bird’s eye views along the White Rim Trail. The Murphy Hogback Campground has 3 sites. There is little protection from the wind aside from a few tiny juniper trees. Since you’re perched on a hill, the wind can certainly be relentless, but it’s a small price to pay for one of the prettier campsites along the White Rim Road.
Distance from visitor center: 45 miles
Candlestick Campground
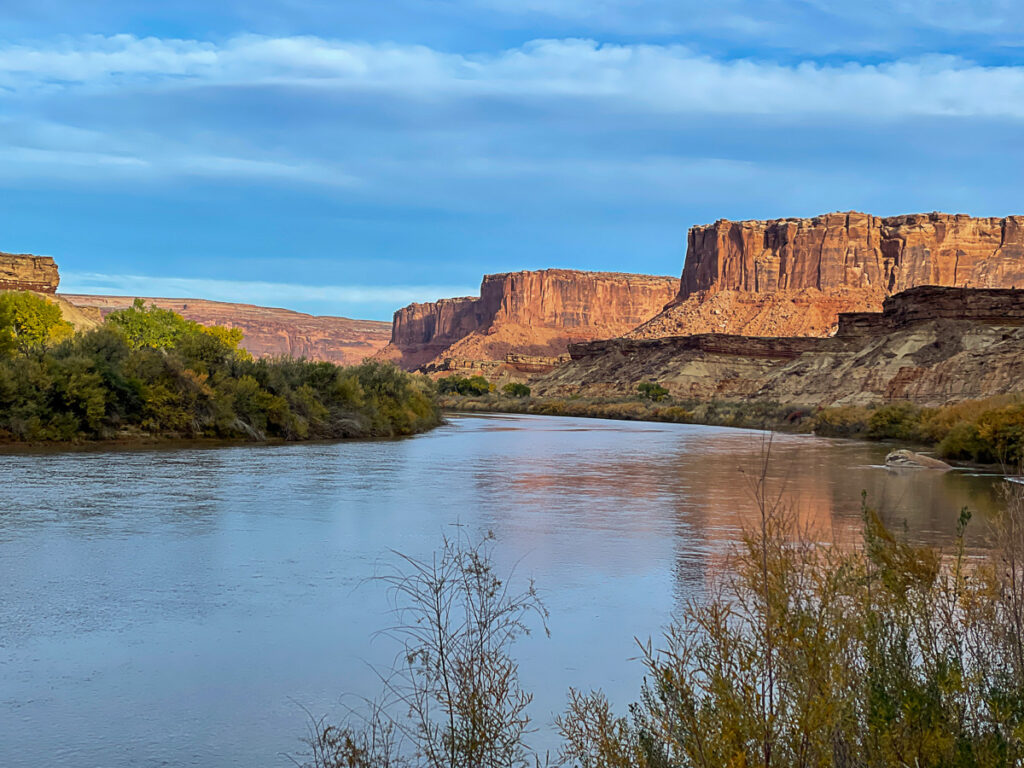
You’ll descend the Murphy Hill for a fun-filled downhill ride. Afterward, you can pick up a little speed as the road gets a tad bit nicer for a bit. Eventually, you’ll reach the Candlestick Campground. A single campsite that’s completely exposed with no coverage or privacy gives you solitude, but at the cost of being subjected to the elements. Although the views of the Green River are quite nice.
Distance from visitor center: 55 miles.
Holman Slot Canyon Detour
You won’t find this unique slot canyon mentioned in any official accounts of the White Rim Road. In fact, most blogs don’t even know it exists. It isn’t signed, but the drop is in obvious along the left side of the road at this mile marker.
It’s a quick detour. Simply head towards the river down the slotted canyon right on the roadside. You’ll find a few fixed hand lines to help you go down. Just remember, you’ve got to crawl back out. Eventually, you’ll reach a section where you won’t be able to descend any further. Simply come back the way you came.
Potato Bottom Campground
Another pretty campground, Potato Bottom offers stunning views of the Green River, but no river access. These sites are quite nice (better than Hardscrablle in my opinion). Staying here means you’ll save the most technical part of the whole drive, but it puts you close to both the Holman Slot Canyon and Fort Bottom Ruins.
Pro Tip: Some of the 3 campsites at Potato Bottom offer shade, but in the spring months there are plenty of bugs due to the proximity of the site to the river.
Distance from visitor center: 66 miles
Hardscarbble Hill Technical Driving Section
Hardscrabble Hill crawls across a steep, narrow pile of debris at the bottom of the upper canyon walls. The rock is loose and not confidence-inspiring. In some areas, the road has eroded to be preciously narrow. Take your time and pay attention.
There are virtually no places to pull over to let others pass through this section so do your best to scout the route before you drive.
You’ll want to have low gears engaged and be prepared to stomp it up and over big rock ledges on an uphill incline. Downhill can be tough to see, so take your time.
Pro Tip: The road hugs a cliff and you’ll want to fold in your side-view mirrors in places to avoid any unwanted vehicle damage.
Fort Bottom Ruins Trail
Immediately after you’ve navigated Hardscrabble hill, you’ll see a sign for the Fort Bottom Ruins Trail. A 3.6-mile out-and-back trail heads downhill towards the water to an old ruin site. This building was used for tuberculosis patients to overnight in as they traveled downriver for medical assistance. Spooky!
The river views are certainly beautiful, and in October, the Cottonwood trees are bright yellow and orange.
Hardscarble Campground
There are two campsites at the Hardscrabble Campground. Hardscrabble A is wonderful and suitable for bigger groups and tents. Hardscrabble B was an astounding disappointment. The campsite was tiny and there was no level parking ground, making it challenging if you’re sleeping in your vehicle. Not to mention, the bathroom door didn’t shut.
Both sites offer shelter from the wind, shade, and access to the river.
Distance from visitor center: 70 miles
Upheaval Dome Trailhead
As one of the top hikes in Canyonlands National Park, Upheaval Dome is notoriously difficult. In fact, most of the trails you’ll see along the White Rim Road are extremely hard because they go all the way up the cliffside to the paved areas of the Island in the Sky District.
If you want to hike to this unique – and somewhat out of place – dome, you can start your 7.1-mile journey from the White Rim Road. Personally, I’d recommend the upper loop instead, originating at the Upheaval Dome Trailhead and the Syncline Loop Trailhead along the main road of the park.
Labyrinth Campground
The last campground along the White Rim Road that’s inside of Canyonlands National Park is the Labyrinth Campground. Again, river views are the highlight here. However, both Labyrinth Campgrounds are open and exposed with no river access. They can also be buggy in the spring.
Distance from visitor center: 72 miles
Exiting Canyonlands National Park
Once you’ve passed Labyrinth, the road begins to get substantially easier. You’ll pass through a cattle guard with a bunch of signage marking the boundary of Canyonlands National Park. Surprisingly the road widens and is much better maintained. At this point the technical driving is over and it’s a simple cruise back to the top of the canyon and out the way you came.
Mineral Canyon Switchbacks
Eventually, the White Rim Road hits a T-Junction with BLM road 129. Head right to return to Moab and complete the loop.
The last big feature along the White Rim Trail is the slog up Mineral Canyon. Unlike Shafer, Mineral Canyon’s switchbacks are well-graded (with concrete in spots) and wide. It’s an easy jaunt back to the top of the canyon. And once you top out there is a huge parking area with a toilet where you can soak up the last of the views.
From here, it’s a straight shot down BLM road 129 until you hit the paved road the paved 313 highway that leads to either the entrance to Island in the Sky or connects with Highway 191.
Tips for Driving the White Rim Road
When it comes to driving the White Rim Road there are a few handy tips to keep in mind.
Dust is everywhere. It’s the desert, you’ll get dust everywhere. Bring along a neck gaiter or Buff to keep lungs from getting agitated. Pack eye drops and nasal spray too. Roll up the windows when passing other vehicles.
Mice are everywhere at campsites! Keep food items off the ground and in hard-sided storage to avoid unwanted invasions from your fury desert friends.
It takes longer than you think. We were 3 vehicles with 3 bikes and 6 people and it took us all day to travel from Gooseberry A to Hardscrabble B. Google Maps drive times are highly inaccurate.
You will not have cell phone service. Occasionally you may have a bar to send out a text, but don’t plan on using cell service to navigate. Download maps for offline use before heading out and use your speedometer.
The signage is quite good. Almost all attractions and road junctions are signed which makes navigation easier.
Travel on a full tank of gas. There are no services along the White Rim Trail. The nearest gas station is right at Highway 313 and Highway 191 junction at an RV park.
You must print and sign your permit. As of 2021, permits are no longer issued in person but sent via email verification one week before your trip. You also no longer need to check in with the ranger station. Carry your permit and your vehicle permit with you at all times. We stashed ours on the dash.
Catch me on YouTube!
Want more secret backpacking trips? Ultralight hacks that every hiker can adapt? Experience the top outdoor destinations in the world without the crowds? If you want to get insider knowledge of all things outdoors, then you’ll wanna subscribe to my YouTube channel, where I am giving away my DECADES of knowledge as an outdoor professional. I’ll see ya there!
Additional Canyonlands National Park Resources
Planning a trip to Canyonlands National Park and beyond? Don’t travel like a tourist, explore the desertlike an expert with these resources: