Last Updated on November 6, 2025 by foxintheforest
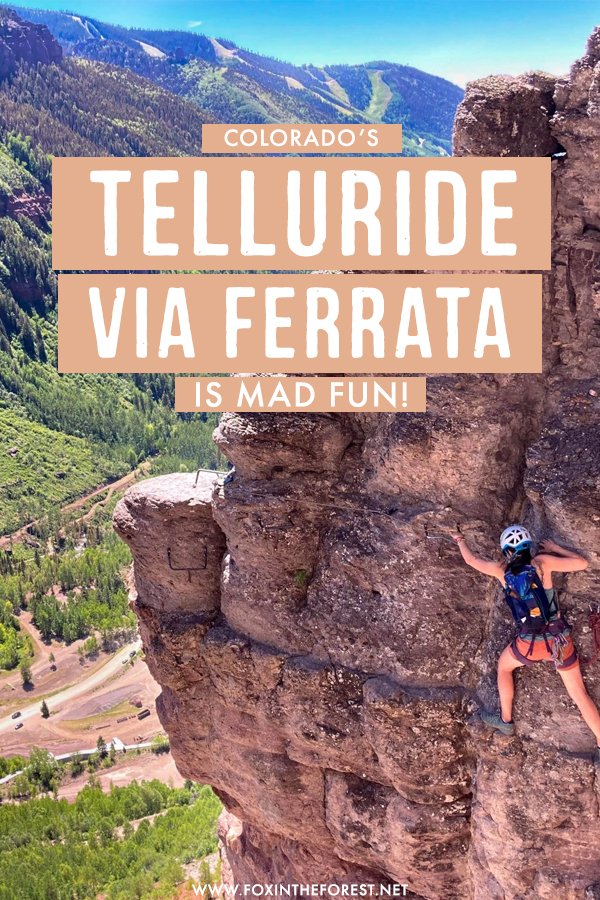
Just outside of town, you’ll find the breathtaking Telluride Via Ferrata. This difficult, exposed hiking trail requires special gear as you precariously traverse narrow cliff ledges. However, with some solid rock climbing experience, you can hike the must-see Telluride Via Ferrata without a guide.
As a full-time freelance writer for the outdoors and avid rock climber, I know quite a bit about how to safely travel through Colorado. The Via Ferrata in Telluride, Colorado is an awesome experience for seasoned adventure junkies.
With years of outdoor rock climbing experience, and a solid climbing science education, I felt perfectly safe doing the Via Ferrata in Telluride. In fact, I took several badass women with more limited climbing experience with me.
We did the Telluride Via Ferrata in early July as part of my bachelorette weekend. A few kick-ass friends and I said forget the random phallic decor, let’s get outside and get dirty!
Aside from myself and my regular climbing partner/close friend Kat, everyone else had limited climbing experience, but we were able to safely navigate this unique, adrenaline-pumping adventure.
About this Guide to Doing the Telluride Via Ferrata Without a Guide
So you want to do the Telluride Via Ferrata without a guide. That’s great! Seriously, this is one hell of an adventure. It’s not too time-consuming, and the scenery is beyond gorgeous. It’s just the right dose of type 2 fun that still leaves you the rest of the day to play.
However, keep in mind this is a serious undertaking. This guide is written to help you determine if you should do the Via Ferrata without a guide. We’ll cover:
- The best time to do the Telluride Via Ferrata
- Determining if you should hire a guide for the Telluride Via Ferrata
- What gear you need to hike the Telluride Via Ferrata
- How to create your own Via Ferrata tethers
- Practical info about the Via Ferrata
- Nearby attractions and other Colorado adventure resources
HEADS UP! The Via Ferrata is a dangerous activity. A slip or fall can certainly cause serious injury or worse. This guide is intended to help experienced climbers tackle this challenging, beautiful route, anyone else should probably enlist the help of a guide. By getting on the Via Ferrata you are doing so at your own risk. I do not take responsibility for your safety, so weigh your decision wisely.
When is the Best Time of Year to Hike the Telluride Via Ferrata?
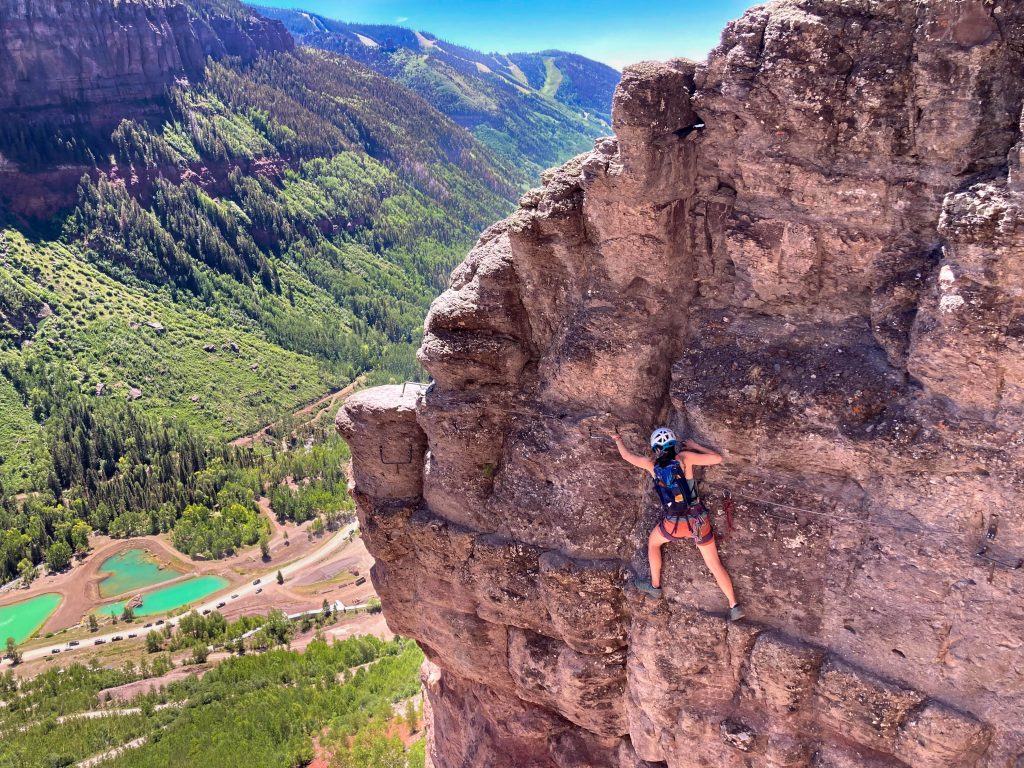
The Telluride Via Ferrata features amazing scrambling and climbing enhanced by metal rails and cables. The routes is largely exposed, meaning a slip and a fall could be disasterous.
Since the path mostly traverses the side of a cliff, you’ll want to visit the Via Ferrata in Telluride when it’s snow-free. Typically the snow melts out by late or mid-June (depending on the snow year) and stays snow-free through early to mid-September.
Another thing to watch out for is weather. Always check the forecast first. If the weather calls for storms, beware! You’ll be traveling along metal cables, which is essentially a lightening rod, so only attempt the Via Ferrata when the skies are clear.
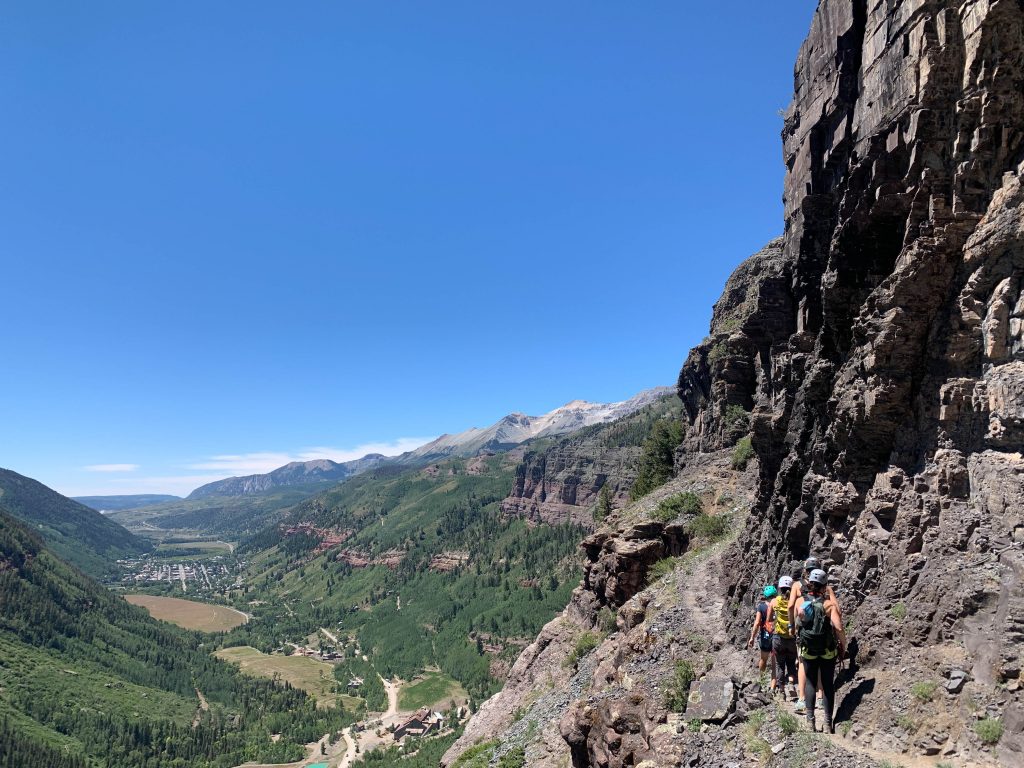
Lastly, it does get crowded here. We opted to do the Via Ferrata on a sunny Friday at around 2 pm. I thought our late start would mean plenty of crowds, but the route spaces out nicely. If you’re unguided and well-versed in ropes and scrambling, guided groups will typically let you pass.
We were surprised that despite the busy parking lot, the Via Ferrata was mostly crowd-free. But keep in mind, you could get stuck behind a slow group. At a certain point, passing is impossible.
Is the Telluride Via Ferrata Scary?
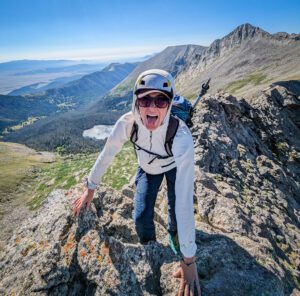
I’ve always been terrified of heights, and throughout the years I’ve worked hard to overcome my fear of heights. Despite having nearly 6 years of outdoor climbing experience under my belt, this was my first Via Ferrata.
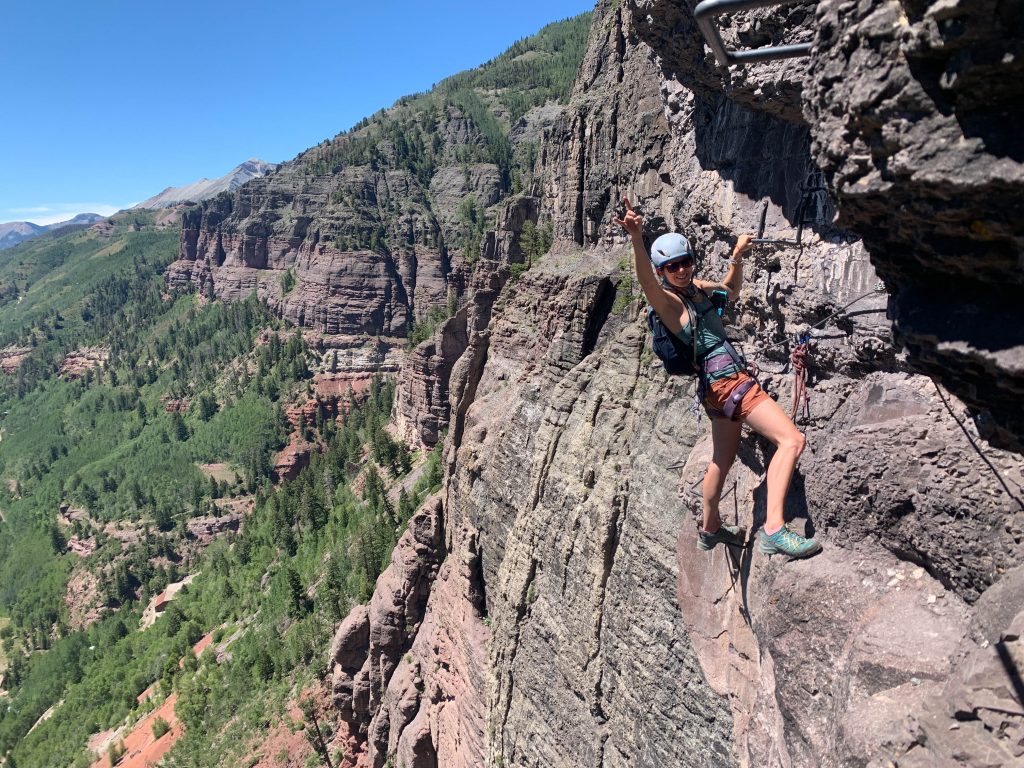
Coming to the vertical, exposed section certainly got my heart racing. At times, the moves from rung to rung took my breathe away. To me, rock feels more stable than smooth metal rungs, but overall it was a total thrill!
For the un-initiated, yes, there are quite a few scary bits, including one section that traverses a vertical cliff with 400 feet below you. However, if you take your time and pay attention, and understand rock systems, this is a safe experience.
Local Tip: After a certain point, you cannot turn around. There are signs at this point so weigh your decision carefully to continue.
What Kind of Experience Do I Need?
In order to attempt the Telluride Via Ferrata on your own, you’ll want ample outdoor rock climbing experience under your belt. At the very least you should only attempt this fantastic novelty adventure if you:
- Understand fall factors and how to mitigate them
- Know how to properly build anchors and understand the concept of redundancy
- Have scrambling experience and have dealt with exposure, or steep drops right next to you before
- Have the proper safety gear
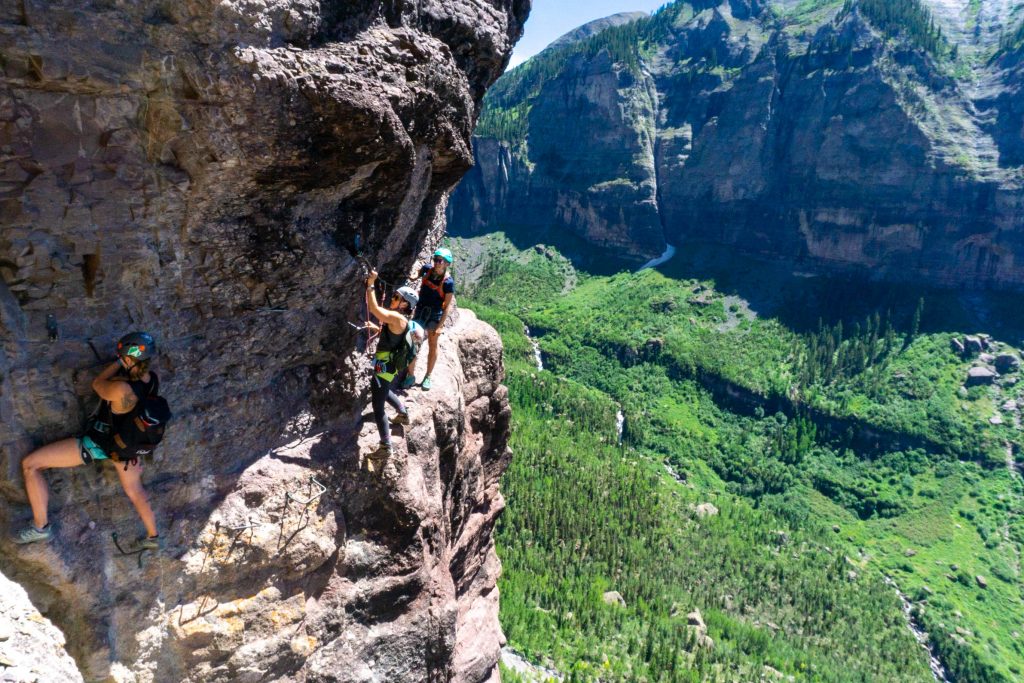
Of course, if you’re going in a group, be sure to trust the person in charge. Ask them about the above line items before you head out. As I mentioned before, my gal pals and I all did this for my bachelorette.
A few of them have hardly been on outdoor rock. We put them between myself and my other super-experienced friend to make sure everyone was as safe as possible.
Should I Hire a Guide for the Telluride Via Ferrata?
If you answered “no” to any of the above questions then you should absolutely hire a guide for the Telluride Via Ferrata. In fact, most groups we saw were guided.
We witnessed everyone from little kids to older adults going on a guided adventure up the Via Ferrata. There’s certainly no shame in hiring a guide. You’ll have plenty of opportunities to learn how to do things properly, and you might find some of the un-protected walking sections a little less vertigo-inducing.
However, since this is a beginner Via Ferrata without much fall factor risk (except in a few key spots), it’s certainly doable if you understand the nature of what you’re doing and how your movement could affect the danger of a fall.
What Gear Do I Need for the Telluride Via Ferrata?
You’ll need several key pieces of gear for the Via Ferrata. Overall, the experience takes around 2 and a half to 3 hours to complete, so pack your bag accordingly. Otherwise, you’ll need to following specialized gear to do the route:
- Sturdy shoes. Hiking shoes or approach shoes work great. Boots are okay too, but they are a little clunky.
- Water, first aid kit, sunscreen, hat, snacks, and your other basic hiking gear
- A climbing-specific helmet.
- Climbing harness
- A Via Ferrata tether. You can also make your own (see the bottom of this post for a how-to).
- 3 locking carabiners. HMS preferred. 2 for the tethers and an extra just in case!
- Gloves (optional)
Can I Rent Gear for a Via Ferrata?
I never recommend you rent climbing gear. First of all, you don’t know who used it last and what they did with it. Safety gear is meant to keep you safe, so it’s always best to buy new when it comes to gear that protects you agasint a deadly fall.
You can opt to rent gear at the San Juan Mountain Guides in nearby Ouray.
If you opt to hire a guide for the Telluride Via Ferrata, they will provide you with all the gear you need. What makes borrowing guided gear okay? Simply put, an experienced guide knows the history of the gear. They will replace anything that is even remotely too used so you can stay safe.
Practical Info About the Telluride Via Ferrata
You’ll find the amazingly breathtaking Via Ferrata at the end of town. Simply take the main drag (Hwy 145) through Telluride until it terminates at a dirt parking lot. Any vehicle can make it here.
Park your car towards the upper lot to be closer to the dirt road that zig-zags up the hillside. You’ll see a stunning waterfall and the Via Ferrata traverses the cliffs to your left.
You can continue up Black Bear Pass (the dirt road at the end of the lot) and try to park right at the Via Ferrata, but the road is a little rough (too rough for a sedan) often crowded, and there are only about 3 parking spots at the Via Ferrata Trailhead.
We opted to walk the road, about a mile or so. Once you reach the obvious water fall basin, you’ll continue left up the road until the next switchback. Here you’ll find some mining equpiment, this is the start of the route. Gear up at the base.
Other practical info:
- Round-trip distance: 3 miles, 4.5 miles with road walking.
- Elevation Gain: 1,243 feet, add about 200 vertical feet more by starting at the parking lot.
- Difficulty: Difficult, requires technical gear, but mellow if you’re used to this kind of terrain (a little loose in spots).
- Approximate time: 3 hours
- Dog-Friendly: No
Hiking the Telluride Via Ferrata
Keep in mind, there is really on one way to do this technical hike, from top to bottom. At the time of this post, the COVID-19 regulations require you to do it this way. However, don’t forget to look backwards at the beautiful scenery. Plenty of photo ops abound!
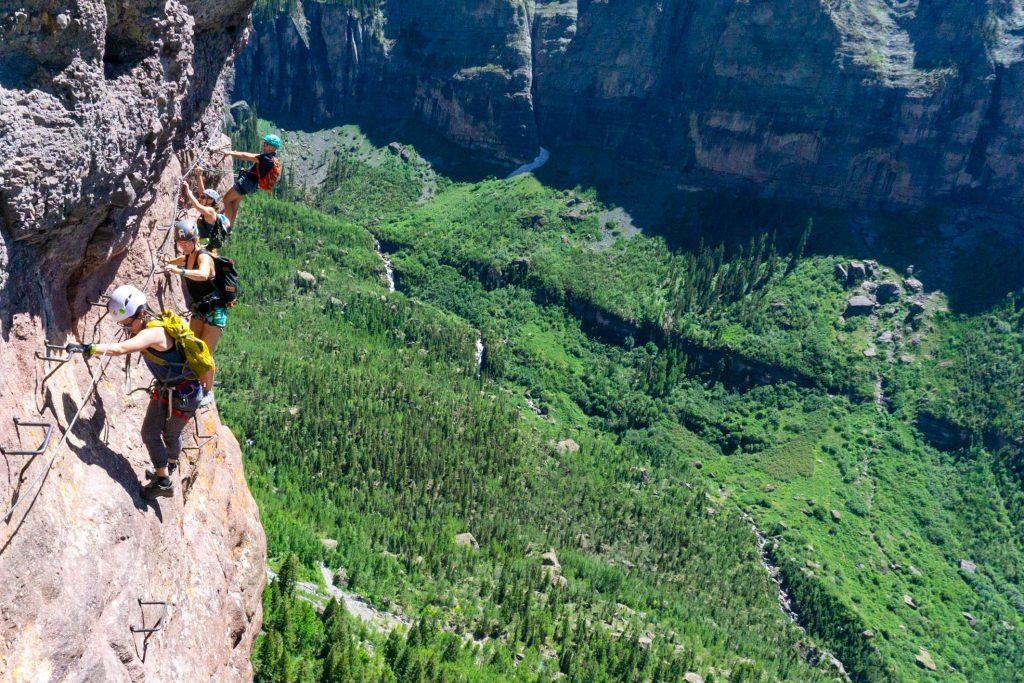
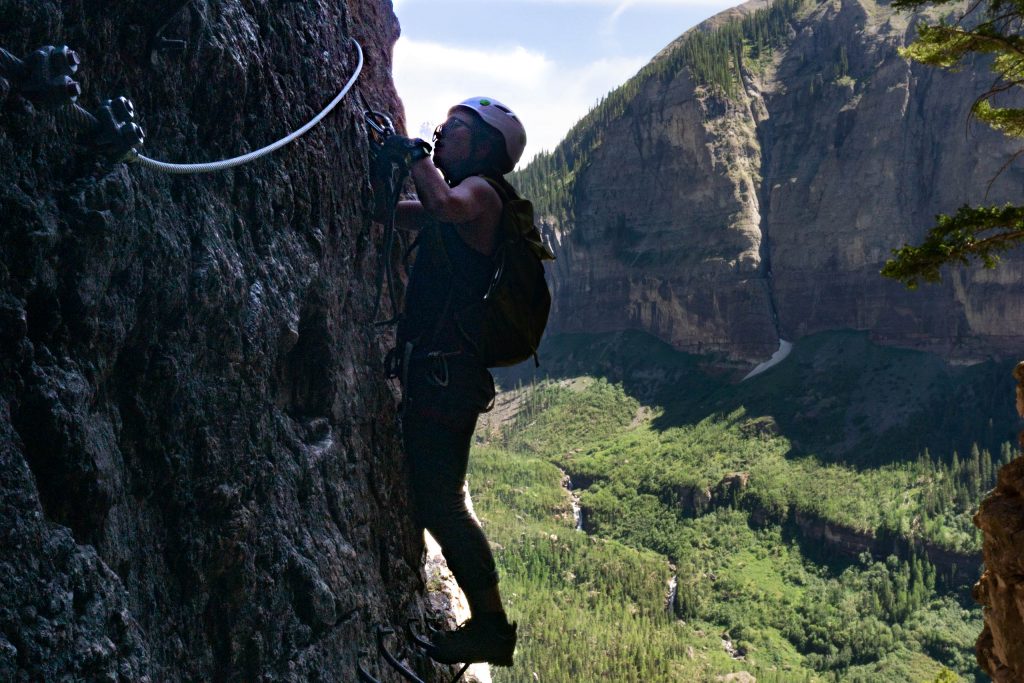
Make your way up the loose climbers trail until you reach a ledge. You’ll walk along the ledge for most of the journey, occasionally stopping to clip into fixed cables.
You’ll get plenty of practice with the cables before the main event. Clip both of your locking caribiners to a cable with the gates out. Lock the gates and walk along, sliding the carabiners with you.
When you reach a spot where the cable is bolted to the wall, unlock and move on cable to the other side. Lock it (gates out is easier) and then move the second cable. This is how you will do virtually the entire route.
Eventually, you’ll reach a big ledge. The exposure will take your breath away. There is no turning back from this point, so be sure you’re ready to rock!
From here the terrain is mostly difficult and exposed. You’ll primarily use rungs for your hands and feet. Two highly technical, exposed sections await you! This is some serious fun, even for seasoned climbers.
When you encounter a spot where you are moving vertically (up or down) clip one tether end to a rung and the other to the cable. This will help eliminate any risk of high-factor falls. HMS carabiners are ideal, we had some trouble with our D-shaped carabiners.
Eventually, the trail mellows out and you’ll descend a gully with mine remnants back to the road for a loop trail.
Nearby Attractions
Telluride is a fantastic area with lots of amazing hiking, scenic driving and more. Here are a few noteworthy attractions nearby:
- Bridal Veil Falls is steps from the Via Ferrata and a must-see, even if it’s just to bask in the cool mist on a hot summer’s day.
- Enjoy some of Colorado’s most scenic alpine lakes with Blue Lakes, Ice Lake, and Island Lake.
- Go for a drive along the jaw-dropping Million Dollar Highway, one of Colorado’s most scenic drives.
- Grab a bite to eat at one of the many mom and pop eateries in Telluride. The Smuggler’s Brew Pub, Gnar, and Brown Dog Pizza are a few of my favs.
- Go for a relaxing soak in one of Colorado’s premier hot springs.
When to Use a Proper Via Ferrata Tether
Alright, brace yourselves, we are about to get real science-y. If you don’t want to spend a hundred dollars on a Via Ferrata tether system you can make your own. But before you start, you’ll need to understand why the tethers are important aside from stopping a fall (duh).
First, the tether system is highly dynamic. This means, if you fall, the tethers stretch to gently catch your fall. This puts an added cushion on the system. The idea is to stretch the forces of the fall over a distance which avoids nasty things like breaking your pelvis, organ damage, or breaking your safety systems and peeling off the wall.
For Via Ferrata that have a lot of vertical climbing, a proper rated tether system is essential. This is because cables are often bolted at intervals of 20 to 30 feet apart. If you were to fall on a vertical section, you will slide down to the last cable bolt, which could be quite a ways below you!
For those familiar with factor falls (falling multiple distances past your anchor – in this case, the cable attachment points), vertical-based Via Ferrata can have insane factor falls, up to 8. YIKES!
Considering that a factor 2 fall is considered a big no-no, you can see why extremely dynamic tethers are important for vertical Via Ferrata.
The Telluride Via Ferrata is primarily horizontal, or a traverse. There are several places where the route gets vertical for 8 to 12 feet. You can clip one end of your tether to the rung in order to mitigate your risk.
The Telluride Via Ferrata is one of only a few Via Ferratas in the world where a proper tether isn’t required thanks to the primarily horizontal terrain.
If you slip and fall, you’re only falling a matter of a few feet, not 10s of feet. This puts less force on your gear, meaning your system should by dynamic, but not as dynamic as a specialized tether.
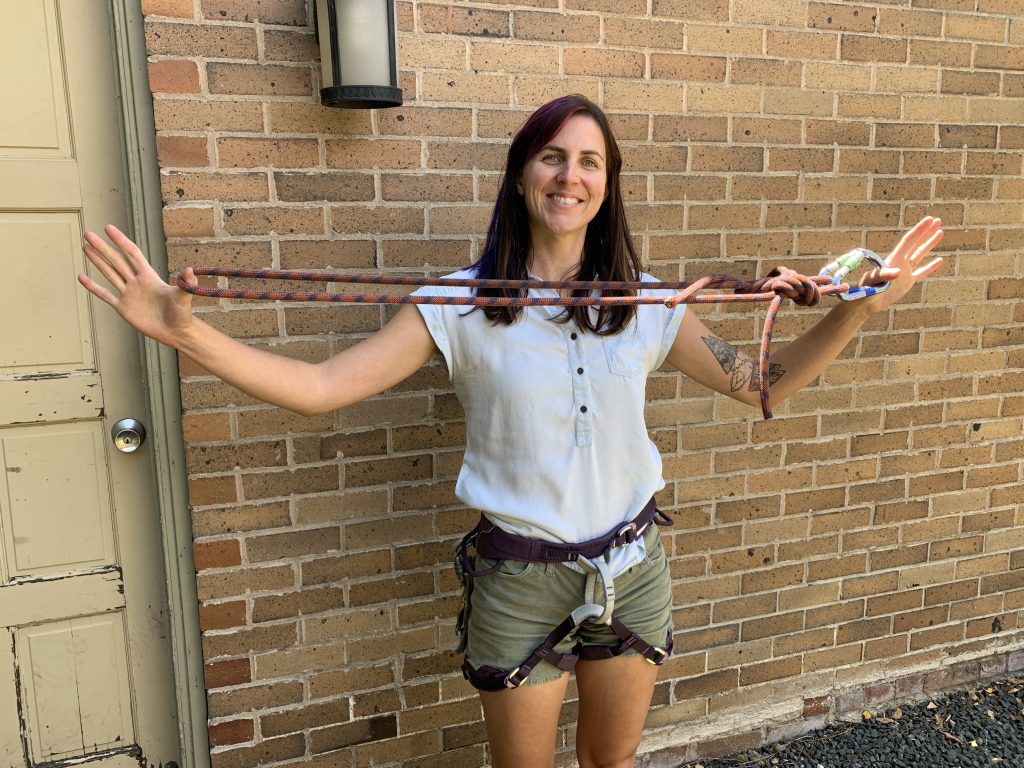
How to Make Your Own Via Ferrata Tethers
When it comes to making your own Via Ferrata tethers, there are a few key things to keep in mind. First, you must use dynamic or stretchy material that’s rated for climbing.
This means Dyneema, nylon, or Techweb runners are not acceptable. Even using static cordolette would not be enough. The material is too static an if you were to fall, it could cut itself and break or break the Via Ferrata itself. If this doesn’t send shivers down your spine, then you should probably think twice about doing this route.
We used retired climbing rope. Choose a rope that is perfectly safe to climb on and actually came from cutting out “bad bits” of rope. If you climb regularly, then you’ve probably got some spare rope lying around somewhere.
Climbing rope is dynamic and built to catch a fall – even a big one. You should not use a rope you picked up at Home Depot. Only dynamic, thick climbing rope should be used.
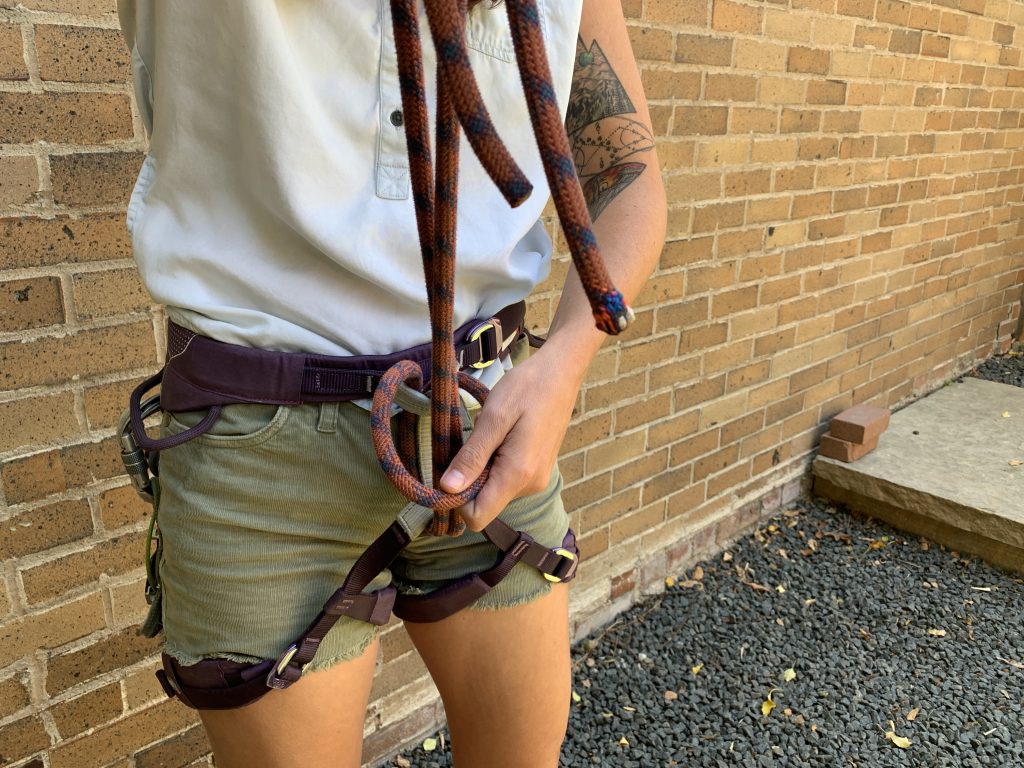
You’ll need two tethers, so your system is always redundant. We created 2 figure 8 knots on a bite at each end of the tether. These self-tightening knots had a locking HMS caribiner through both ends.
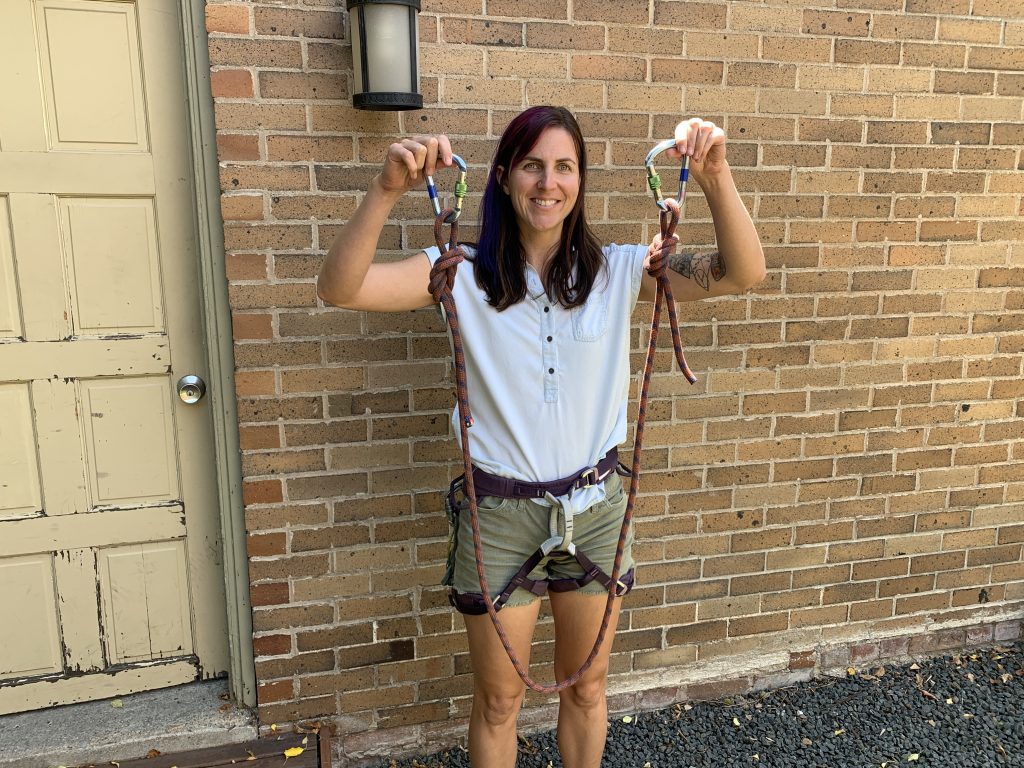
Put the Tether on Your Harness
Cut the rope to be between a single and a double-length sling when folded in half. Be sure to include the length required to make the knots. Tying the knots before cutting helped gauge length. This length worked well since you don’t trip over it, but it is long enough to handle moving across the cables.
Burn the ends of the rope closed and keep at least 8 inches of tail on the knots. Next, find the mid-point of the rather and create a bite (bend) in the rope.
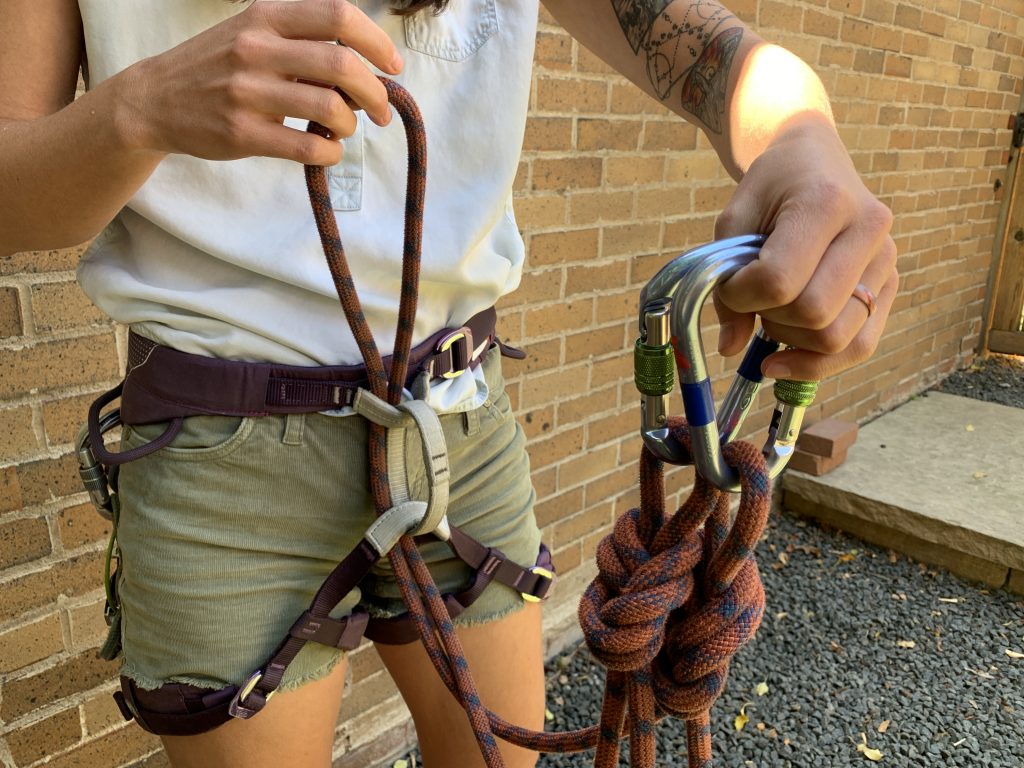
Slide the bend through both of your hard points on your harness and girth hitch the system to your harness.
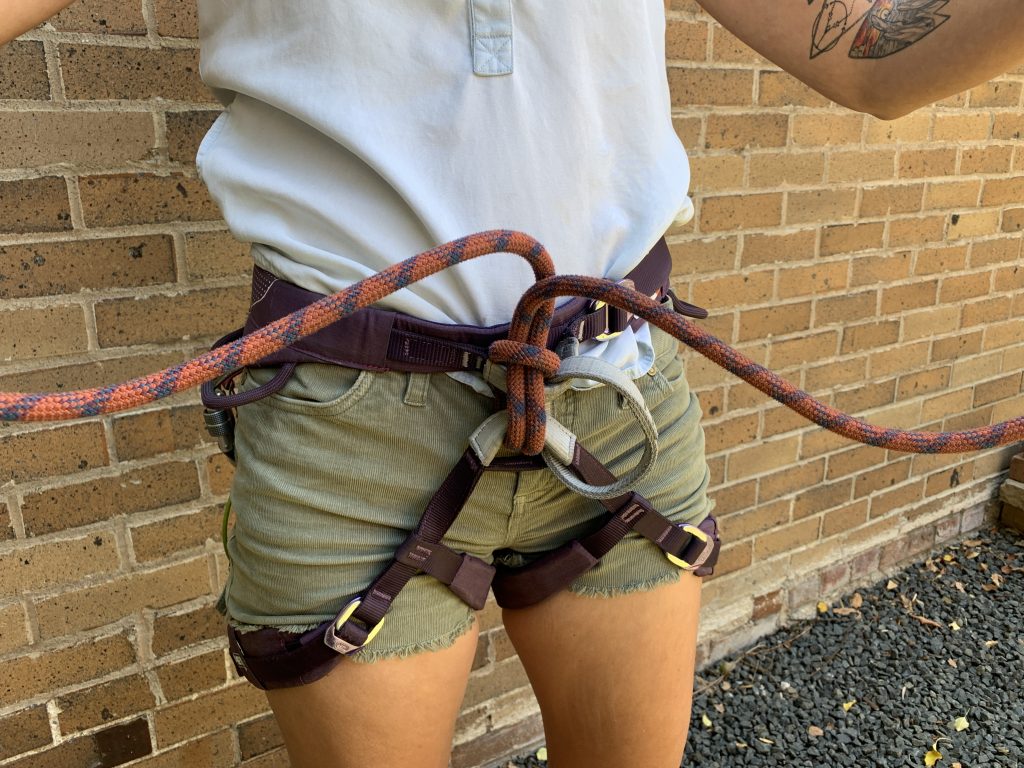
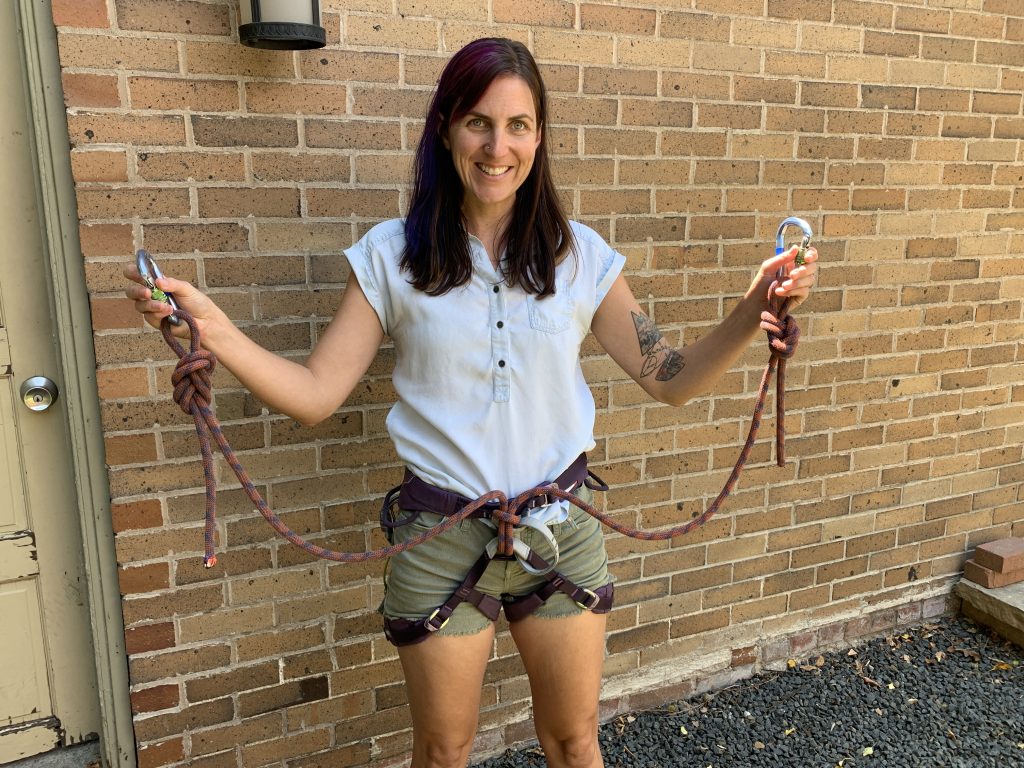
Voila! Now you have a redundant DIY Via Ferrata tether that you can use for mellow, traverse-based Via Ferratas!
This high-octane adventure is certainly a bucket list Colorado activity. Even if you aren’t comfortable giving this a go on you own, the Telluride Via Ferrata is certainly a family-friendly adventure with the help of a guide. So go on and get out there this summer with a fun-filled day in Telluride!
Catch me on YouTube!
Want more secret backpacking trips? Ultralight hacks that every hiker can adapt? Experience the top outdoor destinations in the world without the crowds? If you want to get insider knowledge of all things outdoors, then you’ll wanna subscribe to my YouTube channel, where I am giving away my DECADES of knowledge as an outdoor professional. I’ll see ya there!
Additional Must-Do Colorado Adventures
Looking for more awesome Colorado outdoor adventures? I’ve got a whole blog dedicated to getting outdoors in the great Centennial State. Here are a few of my favs:
- The Local’s Guide to Visiting Rocky Mountain National Park
- Colorado’s Bucket List Hikes
- Incredible Backpacking in Colorado
- Jaw-Dropping Free Camping in Colorado
PIN THIS POST