Last Updated on September 5, 2025 by foxintheforest
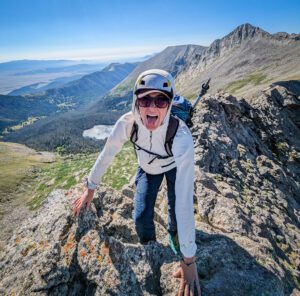
The Crestone Traverse is known as one of the 4 Great Traverses in Colorado. This means it’s supposedly one of the best 14er routes in the state. But does the Crestone Traverse live up to the hype?
We’ll dive right into what makes this route such a thrill-seeking adventure.
Having climbed over 65 mountains I’m pretty picky when it comes to Colorado scrambles and peaks. I’ve actually the Crestone Needle multiple times and done every route on the mountain. You’ll get expert advice on everything you need to know to have a rockin’ good time on the Crestone Traverse.
About this Guide to the Crestone Traverse
Inside this local, expert guide to the Crestone Traverse you’ll find:
- Pratical info and route facts
- The best time to climb
- Hot info about backpacking the route vs doing it in a day
- How to access the trailhead
- An in-depth look at what to expect
- A mega-list of resources for even more amazing Colorado climbs
What is the Crestone Traverse?
The Crestone Traverse is a class 5 ridgeline (ish – more on that in a second) traverse that goes between Crestone Peak (14,266′) and the Crestone Needle (14,196). It is one of the hardest-named routes on any Colorado 14er.
It’s approximately 14 miles long and you’ll be gaining (and losing) 5,300 vertical feet. It’s absolutely an experts-only route due to the mileage, difficulty, route finding, and exposure. The Crestone Traverse is not for beginners.
Practical Info about the Crestone Traverse
There are quite a few things to know about the Crestone Traverse. First and foremost, this is a BIG day – even when you backpack. You’ll be gaining and losing a pass as well as doing plenty of scrambling on class 5 rock with extreme exposure.
Here’s a look at some numbers to help you get oriented.
Round-trip distance: 14 miles from the upper parking lot (4×4 required)
Elevation gain: 5,300 feet from the upper trailhead
Lower trailhead: Add 5.4 miles round-trip and 1,110 feet of gain. You’ll be walking on a well-trafficked, crappy road.
Min elevation: 9,850 feet or 8,800 feet from the lower lot
Max elevation: 14,299 feet (Creston Peak)
Difficulty: Extremely difficult. Mostly highly exposed Class 4 rock with a few Class 5 moves thrown in for good measure.
Estimated time: Most people tackle this route as an overnight or 2-night journey. From South Colony Lakes its about a 10-hour tent-to-tent day (add 3 hours if you’re planning on doing the route in a day from the upper TH)
Dog-friendly? Absolutely not
Special gear? Helmet required. Strongly recommend approach shoes. Some groups may want to shortrope, but there is really no way to protect the crux.
Highlights: Extremely exposed scrambling. Stunning views. Amazing summits.
Low-lights: Ascending and descending Broken Hand Pass. Navigating down the Crestone Needle is extremely difficult if you’ve never done the standard Crestone Needle route
There are two ways to access the Crestone Traverse. The Cottonwood Creek Drainage or South Colony Lakes. South Colony Lakes is the preferred way. Although you’ll be gaining and descending the dreaded Broken Hand Pass (aka “Broken Ass Pass”), you’ll overall do less mileage and have less gain than if you’re coming from Cottonwood Creek.
Local Tip: The trail up Cottonwood Creek is rugged and not well-traveled.
How Hard is the Crestone Traverse?
The Crestone Traverse is one of the hardest Colorado scrambles that do not require ropes. The good news is, the rock is really solid, so for how difficult it is, it feels secure (unlike, say, the Elk Range).
Most people will find the Crestone Traverse to be difficult – even for well-seasoned scramblers. It should only be attempted by people who have ample scrambling experience and are very comfortable with route finding.
The route finding on the Crestone Needle and the Traverse is pretty involved. A lot of the terrain here looks the same.
It is a long route that requires you to keep your head on a swivel to stay found. From an endurance perspective, it’s very challenging. But, it’s very doable.
I’m an alpine rock climber (meaning I climb with ropes on trad gear in the alpine) and I did not find the Crestone Traverse to be that hard. It was a long and tiring day with plenty of tedious work, but not scary or hard. HOWEVER I am extremely comfortable with highly exposed scrambling and prior to doing the Crestone Traverse, I had done the standard route up the Needle.
Is the Crestone Traverse Scary?
Most people will find the Crestone Traverse to be very difficult and extremely scary. The final headwall was a blast, but a fall here is absolutely going to kill you and you’re basically free-soloing. The average scrambler, even with lots of experience, will find this section pretty terrifying.
For me personally, the scariest part of this climb was the boulder-y bulge move down lower. I almost fell here. The area sees a lot of shade, so ice is common – even in summer!
Local Tip: If you have a lot of alpine climbing experience, it will feel like an average approach to a climb with some added extreme exposure. The headwall felt like a really easy runout.
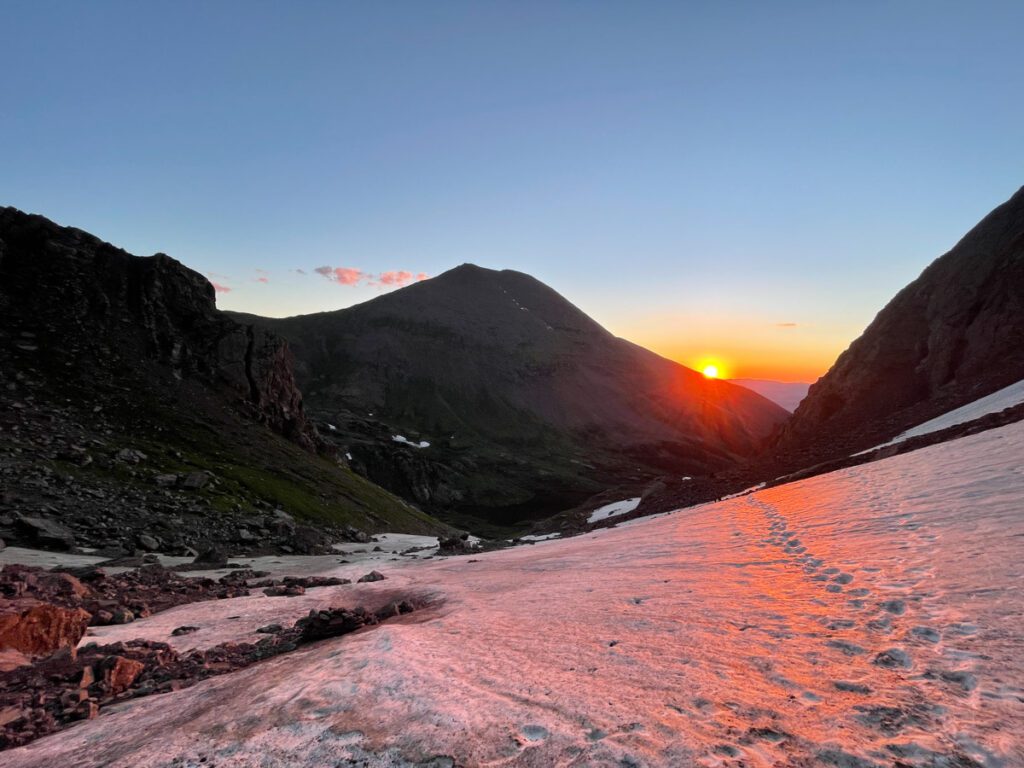
The Best Time to Climb
The best time to climb the Crestone Traverse is going to be August – September on a day when there are no threats of thunderstorms.
Thunderstorms plague the mountains here every day in the summer and because you’re completely exposed with no bailout options, having a clear weather day is essential.
I’ve climbed Broken Hand Pass in the snow and when it’s dry. To be honest with you, the snow makes the going a bit easier. So if you don’t mind slogging around an axe and spikes for the entire traverse, then this is certainly an option. However, summiting the Crestone Peak via the Red Gully sucks without crampons.
You’re better off dealing with the crumbling, crap dirt on Broken Hand Pass than attempting this route when there’s still snow.
We almost got stormed on with a 3 am start from South Colony Lakes. It was tough to keep up the hustle coming down the Needle after such a long day. If I had to do it all over again (and I would) I would pick a clear-weather day.
Accessing the Trailhead
You can reach the South Colony Lakes trailhead by taking CO 69 south out of Westcliffe. Drive 4.5 miles and turn right onto Colfax Lane. Drive for 5.5 miles and turn right and drive 1 mile to a junction. Continue straight on Road 120 for 0.3 miles to the obvious lower lot.
Local Tip: Signs have been put up directing you to South Colony Lakes, but be sure to save directions just in case.
After this point, the road gets really rough. You’ll continue up the road 2.7 miles to the parking area where there is a gate and a trailhead near a kiosk.
Local Tip: 4WD, high clearance is required. We’ve seen Outbacks tackle this road, but they definitely left parts of their car on the road and were frequently on 3 or 2 wheels.
Should I Climb the Crestone Traverse in a Day or Backpack?
Taking on the Crestone Traverse in a day is certainly a bold move. Can it be done? Yes, but should it?
It will be difficult to see the shortcut trail by headlamp (I’ve missed it before doing the Needle) and it adds quite a bit of time to your day.
We did this as an overnight and really appreciated having a head start from South Colony Lakes. Most people opt to do this route in 2 nights to give their bodies a break, but it’s certainly doable as an overnight.
Local Tip: If you’re coming from the lower trailhead, definitely backpack and spend the night. There is limited camping at the trailhead as well.
Backpacking at South Colony Lakes: Rules and Regulations
As one of the best Colorado 14ers, the Crestone Group has been over-loved through the years. As a result, the camping here has gotten a little out of control. There have been talks about permitting it, and it will likely happen here soon.
You are REQUIRED to carry a WAG bag if you plan on camping at South Colony Lakes. This is a special bag that you poop in and carry with you. There are no trash facilities at the trailhead, so you’ll be packing your poop to the nearest trash can in town.
Local Tip: The resident ram population is extremely aggressive and intense. It’s not uncommon for camps to be ransacked by ram looking for salt. Hang your food in odor-proof storage. You’ve been warned.
Is the Crestone Traverse Crowded?
We were the only other group on the Traverse the day we did it, but the Crestone Needle was a madhouse. South Colony Lakes is one of the best backpacking spots in Colorado, so it tends to be a very crowded area.
The area is pretty fragile, so visit responsibly! Be sure to pack out all trash, don’t let your dog run amok (leave them at home if you’re doing the Traverse), and carry out all human waste.
The Crestone Traverse Route
You’ll start from the trailhead making your way up an old road. This road sucks – lots of loose rock – buh!
You’ll reach a junction after 2.5 miles you’ll see a small spur trail that leaves the old road – take this trail! It’s a shortcut. It can be really easy to miss by headlamp.
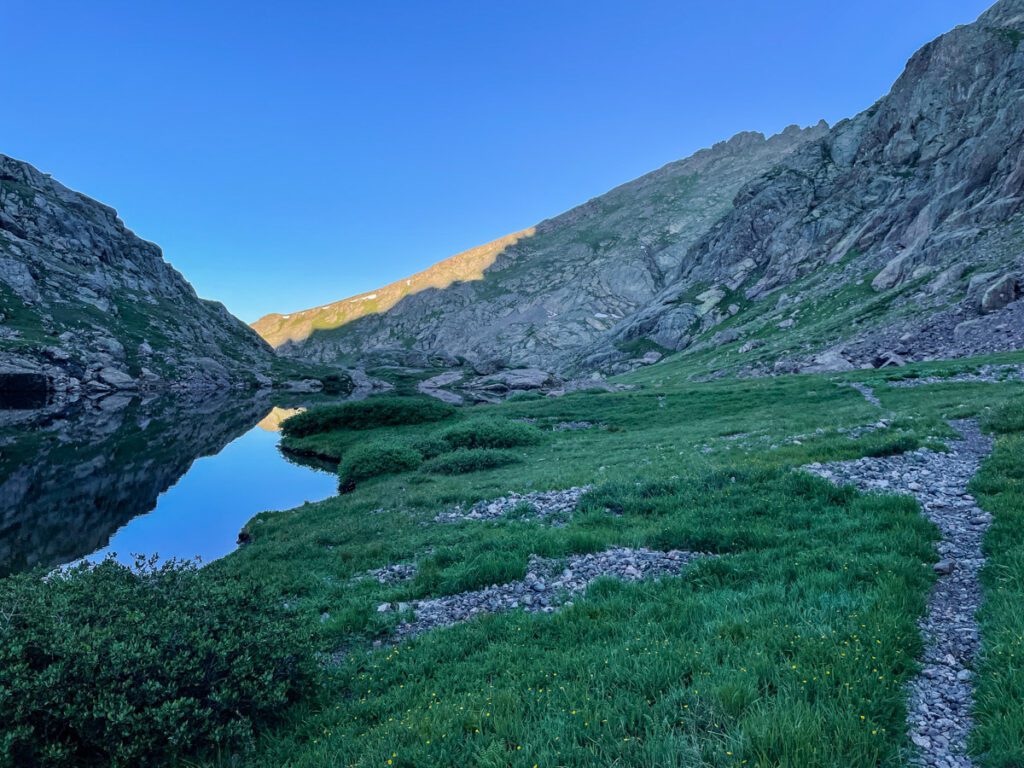
The spur trail goes up towards the South Colony Lakes Basin. You’ll start to see camping on the left side of the trail. If you’re backpacking, stop here as these are well-established sites with easy access to water.

Reaching Broken Hand Pass
After you break through the trees past the camping, you’ll cross a creek and make your way up a steep, rocky hillside. There are a few social trails here (thanks to the ram) so pay attention.
You’re aiming for the big, crappy scree slope out in the distance. This is Broken Hand Pass. It’s loose, rough, and really not a great time.
Pick your way up the pass, squeezing through a quick Class 3 section of rock. Once you reach the ridge, you can drop poles here, but I wouldn’t. I’ve had a marmot eat my poles twice, despite putting them upright in the dirt.
The worst part of the Crestone Traverse is about to start. You know how you made your way all the way up the crummiest pass ever? Now you get to go down the back side and undo all of that hard work.
It’s just as loose and crappy, so enjoy the ride.
Once you reach the backside of the pass, you’ll join up with a trail, head right on this trail around a few ponds and lakes.
Summiting Crestone Peak
After much tundra walking you’ll reach the Red Gully of Crestone Peak. Bypass the steep rock and enter on the right-hand side – navigating up some somewhat grassy slopes until you meet the gully.
Pick your way endlessly up through the Gully. We did our best to stick to the sides and on solid rock.
The gully was absolutely filled with snow, so we had to bust out the axes a few times and it got pretty sketchy once or twice.
Typically there are some cairns. You’re generally aiming for the path of least resistance, which means crossing the gully every now and again.
At around 13,700 keep an eye out for a pile of cairns on the right side of the gully – this is the start of the Crestone Traverse and you’ll be coming this way after summiting Crestone Peak.
Eventually a steep notch will appear. Aim for this as it’s your exit point from the Red Gully. turn left and scramble up a short pitch of exposed rock ledges to gain the summit.
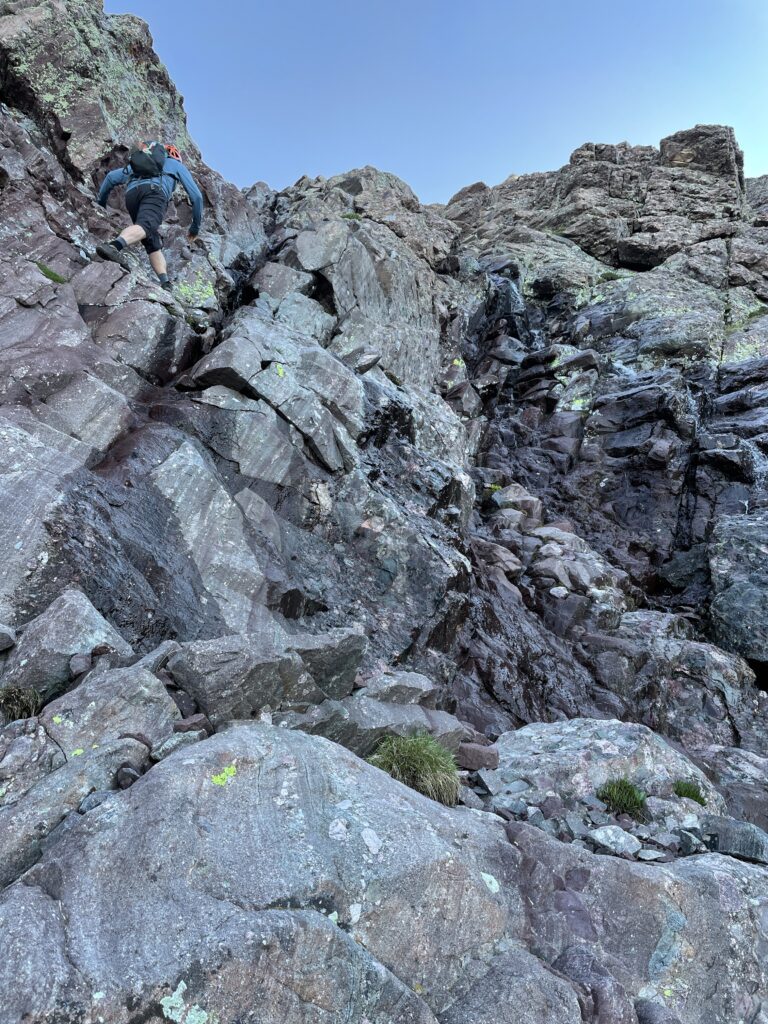
About the Crestone Traverse Scramble
Return the way you came until you reach that cairn pile at 13,700. From here you’ll start the Crestone Traverse.
At first, it’s pretty tedious, you’ll be crossing and dropping slightly – following cairns as they cross gully after gully. There is an obvious rock rib with a grassy ramp going up the side. Follow the ramp up and over.
From here you’ll be faced with another red gully (not the same as Crestone Peak). Look for a small notch on the opposite side, following cairns as you go. Aim for this notch as you climb upward.
You’ll enter yet another gully, where your goal is to follow cairns and trend up junky rock. This part starts to feel a bit like Groundhog Day. There’s one more rock rib once you surmount this gully. Traverse down slightly to reach the next rib. From here you’ll work your way up.
Just when you think you can’t take one more damn gully, you’ll see the nub of a black gendarme. Just one more rib to go!
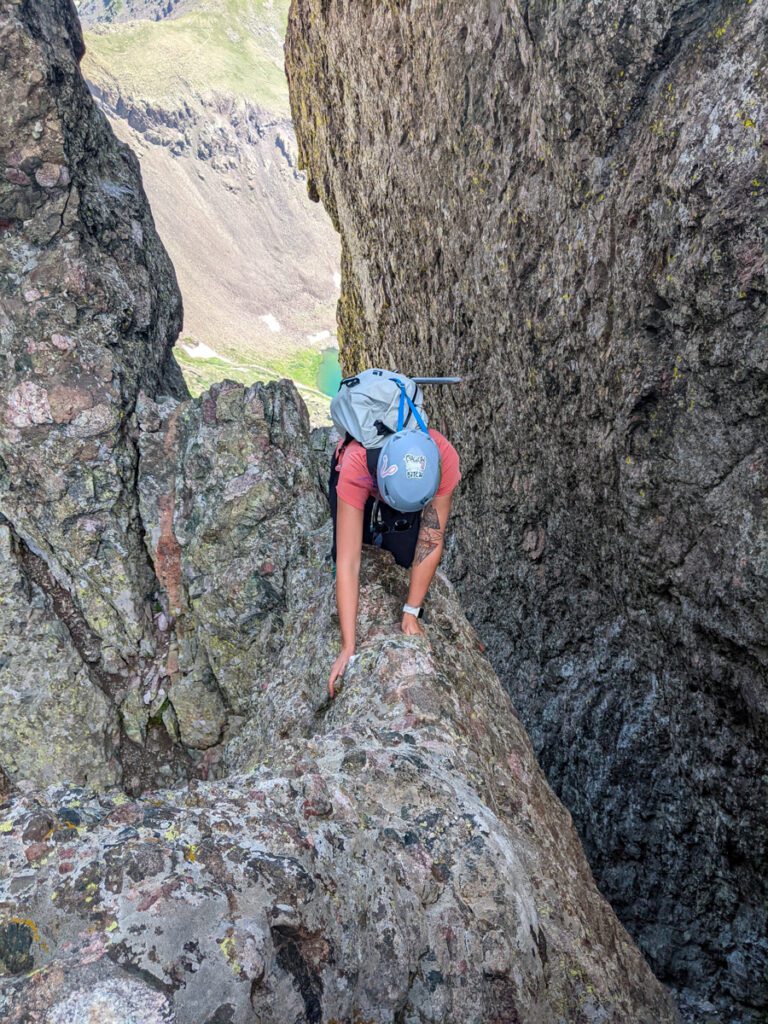
The Boulder Problem
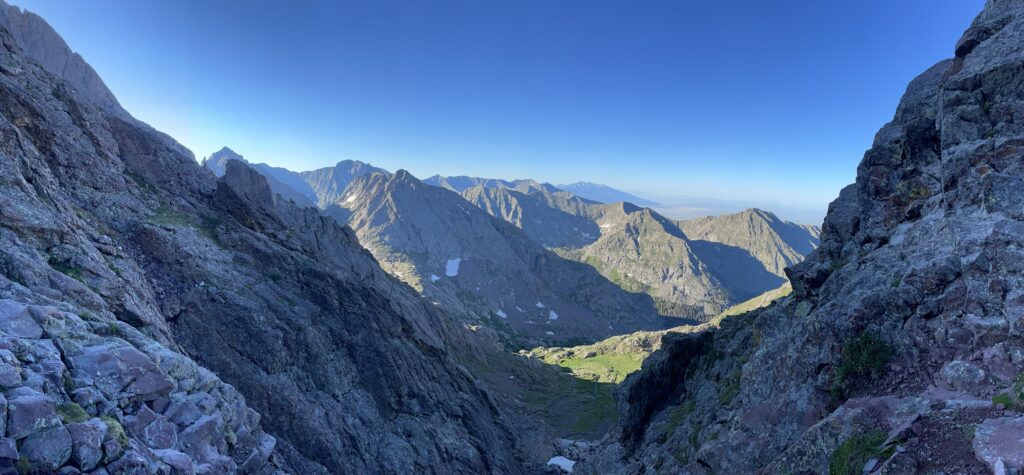
Once you reach the top of the last rib, you’re almost on the ridge proper. No the actual fun begins. Yes, you’re 2/3rds of the way through the traverse, and yes, most of it sucked. But hey. The fun part is here! And yes – it was worth the slog to get here.
You’ll work your way around the right side of the black gendarme. At it’s base is a bouldering problem. When we did this there was ice and I lost my footing, almost taking a pretty big tumble that would have certainly ended in a helicopter ride.
Test the holds before you commit. This is one 5.3 move to get on top of, but a spotter will be helpful since a fall is nasty here.
There’s a great handhold you can use and don’t be afraid to show off your best beached whale moves.
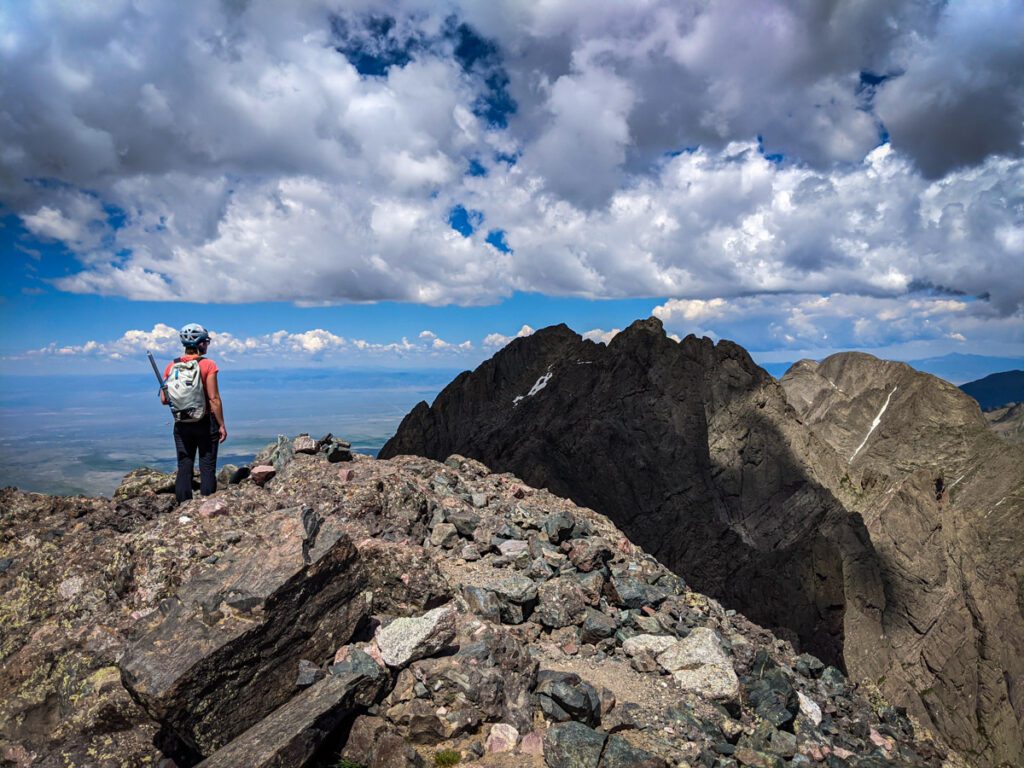
The fun scrambling continues and you’ll reach a stellar knife edge. Scoot around this knife edge and take in the exposure because it’s about to get serious.
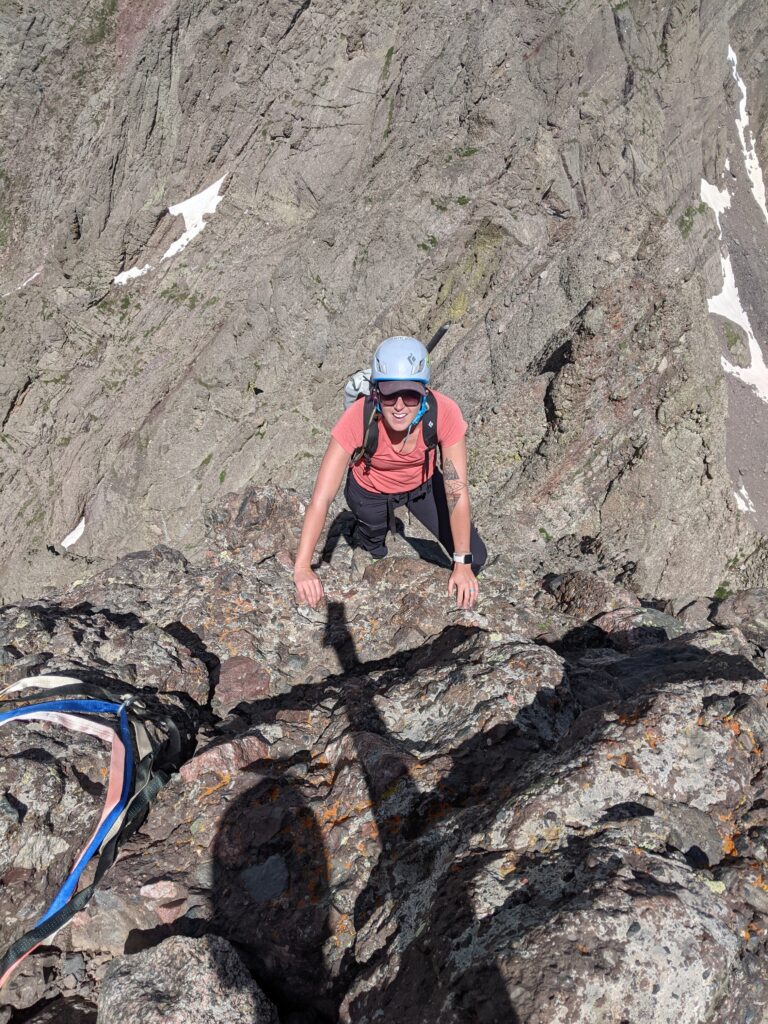
The Airy Headwall
After you scoot around the knife edge, you’ll have one more bit of scrambling before the headwall opens up in front of you. Aim for the white rock you see in the distance.
You’ll go up one more small gully (WOO) and reach a grassy ledge. You’ll start the headwall from here.
In general, you’ll climb a steep, exposed class 4 wall that will have you either crying in butt-puckering fear or hooting with delight.
We chose the ladder.
The far left near the edge has the best rock quality but it’s INSANELY exposed. You can see straight down to South Colony Lake below.
This is the freakiest part of this climb for many people. We loved it, but we are very used to this type of exposure.
I could have done something twice this big and was a little disappointed in how short it was.
Once you reach a rappel station, you’re done with the climb.
Local Tip: Some of my friends took climbing shoes for the headwall – this is an excellent idea if you’re nervous and want to feel more connected to the rock. I would highly recommend doing this if you don’t have approach footwear.
Descending the Crestone Needle
If you haven’t done the standard route up the Crestone Needle, descending this confusing labyrinth will be the crux of your day.
It’s a long way back with ample scrambling and about 100 opportunities to get lost and cliffed out.
Study this route carefully as it is really hard to know where you are going.
I strongly suggest summiting the standard route up the Crestone Needle before attempting the Crestone Traverse. This enables you to be familiar with the terrain here.
Local Tip: Download the GPS from 14ers.com. This is absolutely essential as there are several areas where climbers get cliffed out every year. See the “Key GPS Coordinates” section for details.

Map of the Crestone Traverse
Here’s a look at the route from South Colony Lakes. The route is in purple.
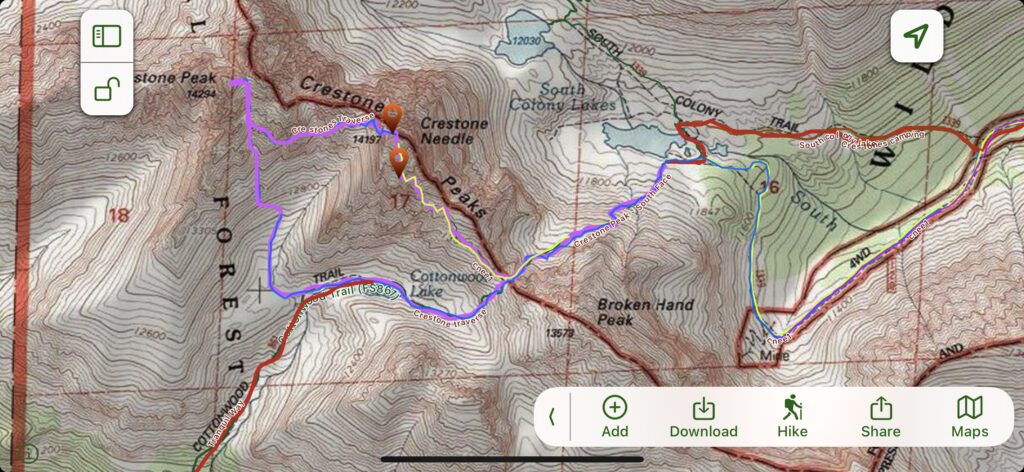
Key GPS Coordinates to Know
There are a few key GPS coordinates to have loaded on your map.
- 37.96505, -105.58382: Entrance to the Crestone Traverse
- 37.96477, -105.58073: Crestone Traverse Red Gully (NOT the Crestone Peak Red Gully)
- 37.96527, -105.57815: Black Gandarme
- 37.96187, -105.57528: East Gully on the Crestone Needle, DO NOT descend past this point
Is the Crestone Traverse worth it?
As far as scrambles in Colorado go, it isn’t my favorite, but it’s certainly in my top 5. (Music Mountain is my fave). Overall it was totally worth it simply because the scenery is utterly stunning and the rock is really solid with great holds.
However, there are only a few fun sections of this rather long climb. It was a TON of effort for a short burst of excitement.
Crestone Peak kind of sucks (sloggy), and most of the traverse is managing gully and rock rib after rock rib. The Crestone Needle is one of my all-time favorites but it’s much more fun to go up than come down.
Overall I’d give this route 3 stars. A 4-star experience, 2.5-star climbing.
Safety and Climbing Tips
There are a lot of things you should know before climbing a Colorado 14er, but here are a few specific things that pertain to the Crestone Traverse in particular.
- Study the route! This is one of the most complicated routes to navigate – especially descending the Needle. Climbers get stranded here every summer.
- Wear a helmet. The rock may be solid, but your noggin isn’t. Not to mention, there are a lot of features hiking the Needle and they love to kick rocks down without warning.
- Wait for your weather window. This route is a huge commitment with nowhere to hide if the weather gets bad. Start early (like 2-3 am from your tent) to avoid weather issues.
- The rams are agro. They will happily charge you on the trail to Broken Hand Pass and there is really nowhere to go, so keep your head on a swivel.
- Only attempt this route if you have PLENTY of scrambling experience under your belt.
What to Pack
Don’t leave home without:
What to wear:
- Sunshirt
- Noncotton socks
- Hiking footwear with good traction that you are comfortable wearing all day.
- Non-cotton shorts for hiking
- Or non-cotton, pants for hiking. Convertible pants are great too!
- Non-cotton shirt for hiking
What to pack:
- Hiking day pack. I love the REI Flash 22 for an affordable day pack.
- Water and snacks for the car – it’s always nice to have a treat at the end!
- Sunscreen, sunhat, sunglasses
- First Aid Kit
- Electrolyte powder – optional but nice to have!
- A water bladder capable of carrying at least 2 liters of water or two 1 L SmartWater Bottles
- Camera
- Camera clip to strap to your pack (optional)
- Beanie
- Glove liners
- Fleece layer
- Puffy layer
- Hiking poles (optional)
- A toilet kit: shovel, WAG Bag (if you plan to travel above treeline), hand sanitizer, TP/baby wipes, a small plastic baggy to pack out TP and sanitary items
- Pee funnel – optional
- Pee rag – optional.
- Headlamp
- GPS navigation
- emergency communication device
- Wind/rain layer
- Pocket knife
*NOTE These are affiliate links. Meaning I get a small kickback from every purchase, no matter the purchase, at no additional cost to you. This is a small way you can show support for my channel and it means a lot, so thank you!
Additional technical gear:
- Microspikes (if there’s snow)
- ice axe (if there’s snow)
- approach shoes – strongly recommended
- climbing helmet
- climbing shoes (if you don’t have approach shoes, or you’re nervous about the headwall)
Catch me on YouTube!
Want more secret backpacking trips? Ultralight hacks that every hiker can adapt? Experience the top outdoor destinations in the world without the crowds? If you want to get insider knowledge of all things outdoors, then you’ll wanna subscribe to my YouTube channel, where I am giving away my DECADES of knowledge as an outdoor professional. I’ll see ya there!
Other Incredible Colorado Scrambles You Need to Know About
Looking for more type 2 fun in Colorado? I’ve got a few resources you’ll want to check out: