Last Updated on September 9, 2025 by foxintheforest
The Hermit Road in the Grand Canyon is a gateway to all kinds of awesome adventures for any ability. From simple shuttle stops at breathtaking viewpoints to incredible backpacking opportunities, Hermit Road has a lot to offer.
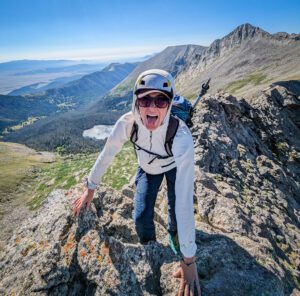
I’ve been exploring the Grand Canyon for the past 6 years and my specialty is the off-the-beaten-path locales and secret gems of the Grand Canyon. Sure, Hermit Road is not secret, but there are plenty of lesser-trafficked adventures to be had here. So if you’re looking to get the inside scoop about how to visit the Grand Canyon like a pro, not a tourist, then you’re in the right place.
About this Guide to Hermit Road and Hermits Rest Trail in the Grand Canyon
Inside this expert guide to Hermit Road and the Hermit Trail you’ll find:
- Hot info on the best time to visit to beat the crowds
- An in-depth look at the best way to visit Hermit Road, including a look at what’s best for your flavor of adventure.
- Everything you need to know about hikes along the Hermit Trail, including mileage, difficulty, and any red tape.
- Additional resources for planning an epic trip to the Grand Canyon
Best Time to Visit Hermit Road without the Crowds
If you want the most solitude at Hermit Road, you have a couple of options. First, visiting the Grand Canyon in winter is always a quieter time. December, January, and February are also the only months where private cars are allowed on Hermit Road. This is a quieter time of year, but there are still people out and about during the day and much of the Hermit Trail is covered in snow and ice, making it a bigger challenge.
If you’re visiting in the spring through fall, then early in the morning during the week is your best bet, like in March at the Grand Canyon. For the busy (and HOT) summer months, plan on starting at sunrise to beat the heat. I don’t think this is the best month to visit the Grand Canyon though.
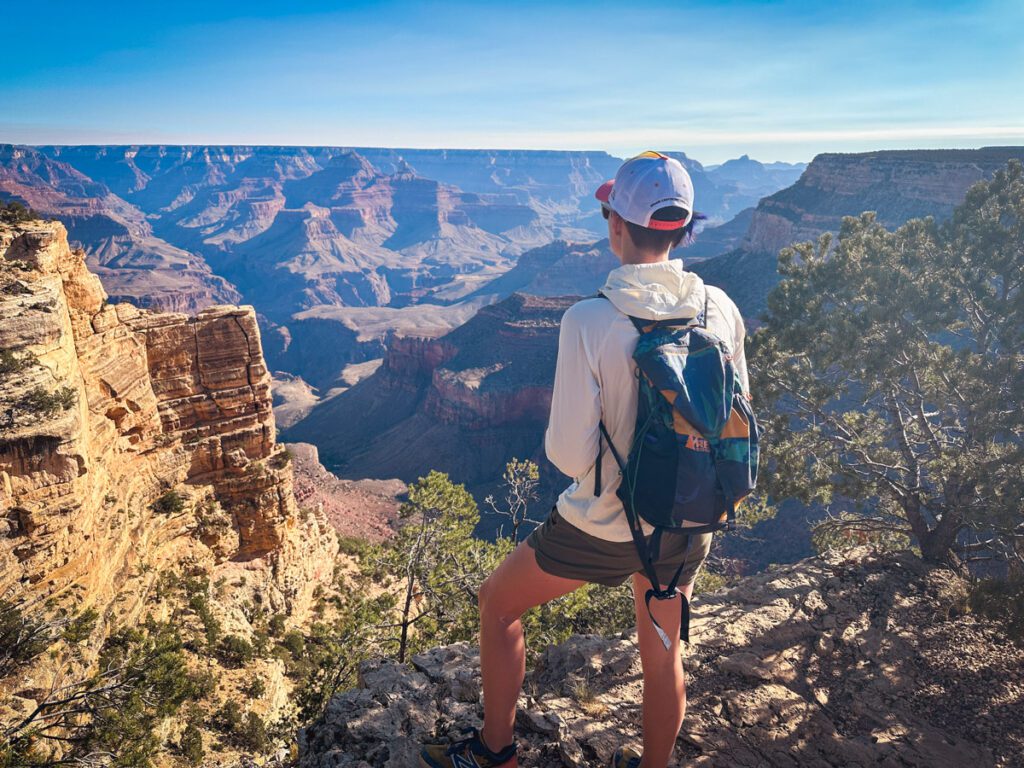
We started this epic Grand Canyon hike out to Hermit’s Rest (and Dripping Spring) at around 8 AM on a random Monday in mid-October. It was so quiet until around noon. Typically I get up earlier for hikes – especially in the canyon, but since we had been backpacking near Horseshoe Mesa and the Tonto Trail the day prior, we were keen on sleeping in.
Sunset can also be a great time to travel down Hermit Road – just know that the busses stop running, so you’ll be walking out and back.
Pro Tip: If you don’t want to walk, there are a few Grand Canyon sunset tours that include a stop here.
Is Hermit’s Rest Worth It?
Actually, I was pleasantly surprised by this area. Hermit Road is one of the best things to do in the Grand Canyon and is well-known, but it still maintains a sense of quiet – especially if you’re not on a shuttle. We never felt things were over-crowded and there was a lot on offer at Hermit’s Rest.
You can bike the road, hike some rim trails, or go all-out on a backpacking adventure down the Hermit Trail. With so much to do along this stretch of the Grand Canyon, it felt like a place I could (and will) come back to!
Pro Tip: This area probably isn’t as impressive if you are going during the peak season (late spring through early fall) during peak times (anytime after 9 am). Since long bus lines and the touristy crowd will be out in full force.
What You Need to Know About Hermit Road
Hermit Road is located west (and heads north) of the Grand Canyon Village and Bright Angel Lodge. It’s easy to access to the shuttles or the road (winter only) from the parking in this area. The trail is also easy to spot – just follow the signs.
Hermit Road CLOSES to ALL private vehicles from March through November. The only way to access the road is:
- Private tour (pricey) during a Grand Canyon tour from Phoenix
- Bike tour or bike rental (road only, no shade, quite sunny, but a fun alternative to walking)
- Shuttle bus
The road is 7 miles long one-way and there are several stops at various scenic overlooks (more on that below). It takes roughly 3 hours if you’re visiting by shuttle and hopping on and off to see the entire Hermit Road.
Permits and Entry Fees
You do not need permits or reservations for Hermit Road unless you’re backpacking – in which case you’ll need to nab a backcountry permit for the Grand Canyon (Hermit Campground or Hermit Rapid Campground).
However, since you’ll be inside national park boundaries there is a $30 entry fee per vehicle.
Pro Tip: Planning on visiting for multiple days or planning a Grand Canyon road trip? Consider snagging an America the Beautiful Annual Park Pass for free entry.
Can You Drive to Hermit’s Rest?
You can only drive your vehicle to Hermit’s Rest between December and February, otherwise you must take a shuttle, bike, or walk.
The shuttle system is super simple to use – we had no problem using it on our return journey from Hermit’s Rest. There are 9 stops at scenic viewpoints, but the shuttle only stops at 4 on the return journey.
Pro Info the About Hermit Trail
Once you reach Hermit’s Rest there is a small store with some snacks and souvenirs, bathrooms, and the Hermit Trail.
Once you’re at the Hermit Trail, you can start your hikes below the rim of the Grand Canyon. Just be aware that Hermit’s Rest is the last spot with reliable drinking water that doesn’t need to be filtered.
There are several hiking options from here – most of which require an overnight. But if you’re an avid hiker with plenty of experience you can make your way down the steep trail to the river and back in a day. There is a more “moderate” hike to a dripping spring, which is another option if you don’t want to do so much elevation loss (and gain!!!) in a day.
The Best Way to Get to Hermit’s Rest
There are three distinct ways to get to Hermit’s Rest. But in my experience, the best way to explore this area is to hike along the rim trail (7.8 miles one-way) to Hermit’s Rest, then take the shuttle back. This let’s you get the best views of the area and enjoy a really quiet trail along the way.
Pro Tip: If you’re looking to backpack or hike to the river in a day, I’d recommend taking the shuttle bus out to Hermit’s Rest (it’ll stop 9 times) and then walking back if you still have some energy.
Hiking the Rim to Hermit’s Rest
The great part about hiking the rim trail to Hermit’s Rest is that you get the opportunity to see some of the best views in the Grand Canyon and enjoy the solitude of rim.
Start your hike at the shuttle transfer station and look for the marked signs for the Rim Trail.
We did this not too early in the morning (with realllly sore hips from carrying 50lbs on our back the previous few days) and encountered very few people. You also got a sense for what most of the rim feels like.
Mileage: 8.2 miles one-way (the NPS says it’s 7.8)
Best For: Casual day hikers who don’t want to dip below the rim, families with kids that want a hike that isn’t too strenous, trail runners, avid backpackers/trail runners looking for a rest day activity.
Shuttle Services
The shuttle leaves from the Hermit Road Transfer Station and stops at all 9 viewpoints along the way. The Red Line is the Hermit Road Shuttle Bus.
You can access this shuttle station from the Blue Line (Village Route) as well and transfer here.
The shuttle starts at 5 am until one hour after sunset.
The shuttle stops at each of the stops on the way to Hermits Rest, with a new shuttle coming every 10 minutes or so (or every 30 minutes from 5-6 am and one hour after sunset).
You can hop on and hop off at your leisure, making this an ideal choice for those who want to hike some and enjoy a ride for the rest!
On the way back, the shuttle only stops at Hermits Rest, Pima Point, Mohave Point, and the Transfer Station.
Best For: People who don’t want to hike, but want to see the viewpoints. Backpackers/runners who have a long day at the Hermit Trail. Hikers who want to hop on and off the bus as they wish.
Biking the Hermit Road
Another option is to bring or rent a bike and bike Hermit Road. E-bikes are allowed and you can rent bikes from a variety of places in nearby Tusayan or inside the park itself. Just be aware that there is no shade along the tarmac and the road gets hot quickly!
Best For: People who want physical activity, but don’t want to hike. Those looking for a unique experience in the Grand Canyon.
Driving Hermit Road
You can only drive Hermit Road from December through February. This is the ideal choice in the winter (if the conditions allow for it) since you can enjoy the rim with the comfort of heat and a break from the relentless wind.
Pro Tip: There is no shuttle during the winter months.
Best For: Winter visits
Viewpoints Along Hermit Road
There are 9 distinct viewpoints along Hermit Road. Most of the viewpoints have guardrails, although a few are not that well protected. The Canyon Rim Trail also doesn’t have guardrails, so if you’re squimish or have young kids be aware!
Pro Tip: For what it’s worth, I’d feel comfortable with having my toddler here. Although I am an expert at navigating desert terrain, and I’m a climber. My daughter has been brought up around spaces with precarious drops and knows not to wander off.
Trailview Overlook
Take a look at the never-ending switchbacks of the world-famous Bright Angel Trail along this iconic view. You can also spot the historic district of the village along the rim. We had fun watching the never-ending train of hiker ants along this viewpoint.
0.7 miles along the trail (paved)
Maricopa Point
Maricopa overlooks an old copper (then uranium) mining site along the Grand Canyon. The views to the north are pretty impressive here, but your journey is just getting started!
0.7 miles from Trailview Overlook (paved)
Powell Point
Situated near Maricopa, this pyramid-like structure is a monument to John Wesley Powell – a (douchey) explorer who fled from genocide charges and hid by taking large expeditions in the late 1800s down the Colorado River. As you can probably tell, I’m not a fan of his, but if you’re a history buff, you’ll appreciate this monument.
0.5 miles from Maricopa (dirt trail)
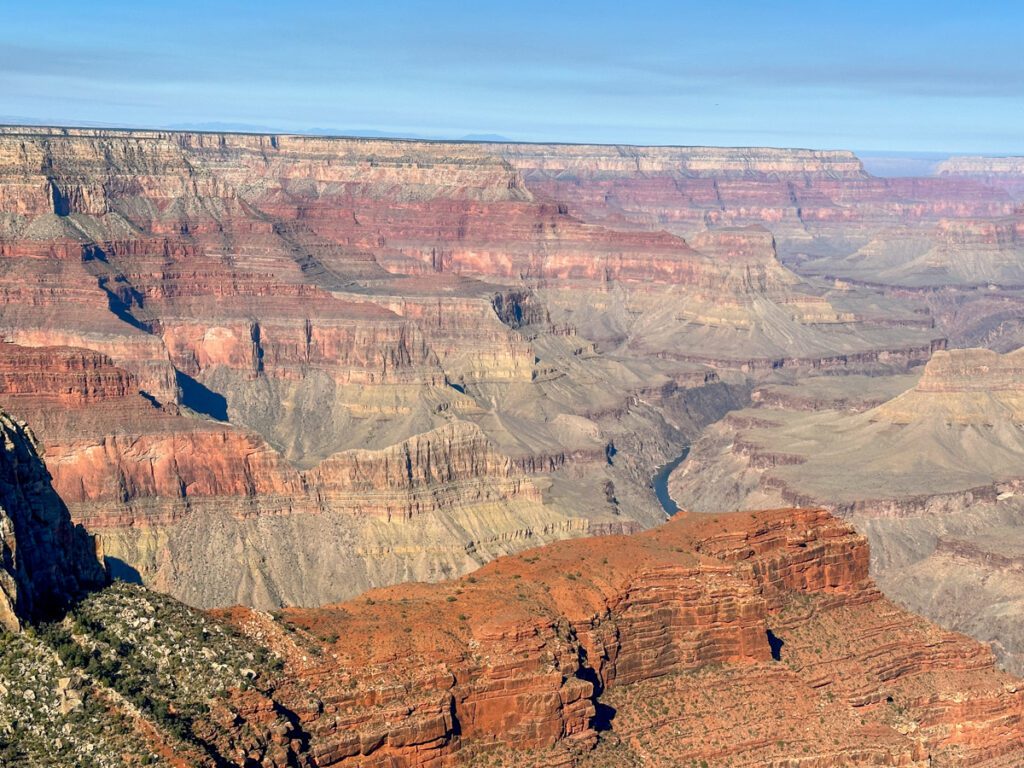
Hopi Point
Hope Point has to be one of my favorite Grand Canyon views. You get a lot of drama and can really get a sense of just how vast the Big Ditch is. You get close to the final layers before the river, which are quite steep and impressive.
Pro Tip: If you’ve got a keen eye, you can spot the Tonto Trail that winds its way for over 90 miles along a shelf before the drop to the river.
0.3 miles from Powell Point (dirt)
Mohave Point
If you’re looking for a little more vastness in your viewpoint, then Mohave Point is an excellent choice for sunrise or sunset. You don’t have buttes to block as much of your view. Bring your tripod to this stunning viewpoint.
0.8 miles from Hopi Point (dirt)
The Abyss
Take a step towards the edge at the Abyss Overlook. As one of the steeper overlooks in the Grand Canyon (Toroweap Overlook on the North Rim would be the other vertigo-inducing drop), this one really gives you a sense of just how steep the canyon can be – second to actually walking down there of course!
1.1 miles from Mohave Point (dirt)
Monument Creek Vista
I wasn’t as impressed with the Monument Creek Vista, but this marks the point where the Greenway Trail begins. Completed in 2018, this paved portion of the Canyon Rim Trail can be shared by bikers, while the road diverts from the canyon’s edge a bit.
0.9 miles from The Abyss (dirt)
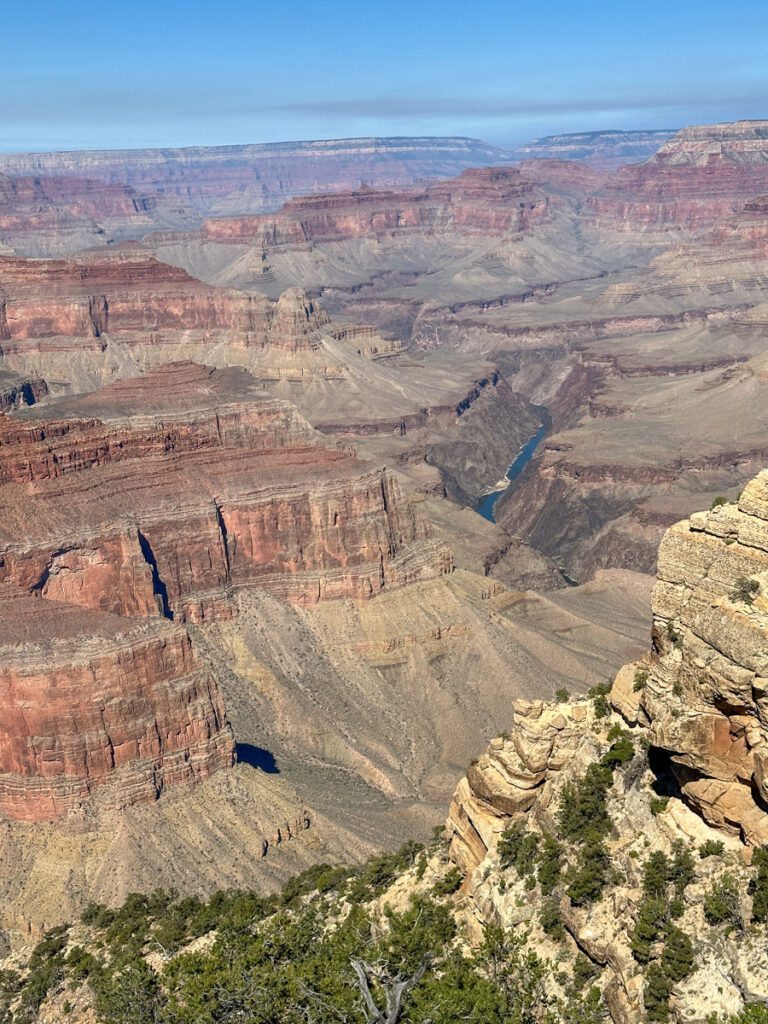
Pima Point
Time for some river action (on a windless, quiet day, you can actually hear the rapids). This view gives you a long stretch of river to stare at and ponder – it’s also a great option for sunrise and sunset photography.
1.7 miles from Monument Creek (paved and dirt, trail leaves the rim and heads into the forest)
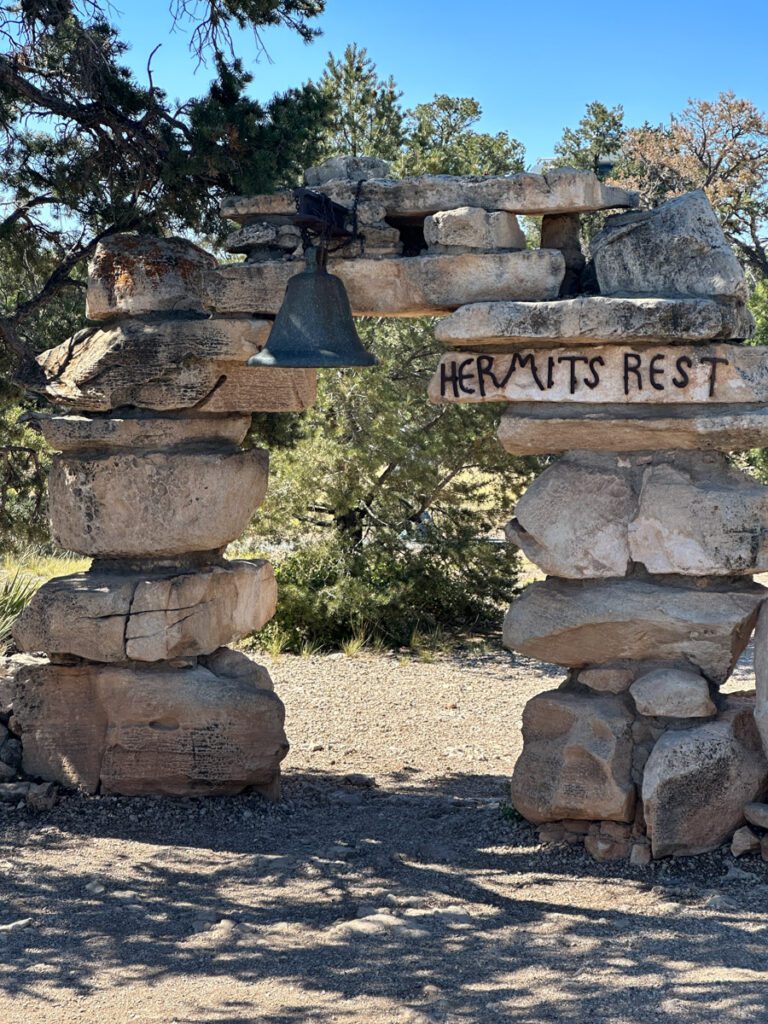
Hermits Rest
Mary Colter – a famous architect (and woman!!) built Hermits Rest in 1914. It has old miner cabin vibes and today it’s got a small gift shop and snack bar (think pre-packaged treats). It’s also where you can find the Hermit Trail (0.5 miles from the building) and a lot of below-the-rim hikes.
Pro Tip: Buying a snack? Pack out your trash!
1.1 miles from Pima Point (paved and dirt trail)
Hikes from the Hermit Trailhead at Hermits Rest
A lot of my favorite Grand Canyon hikes can be found at Hermits Rest. I’ve got a small lineup for you of can’t miss hikes that don’t have the crowds of the rim-to-rim corridor. Sure, there are more people here and the trails are a bit more challenging, but it’s easy to find some solitude along these routes.
Hiking the Hermit Trail
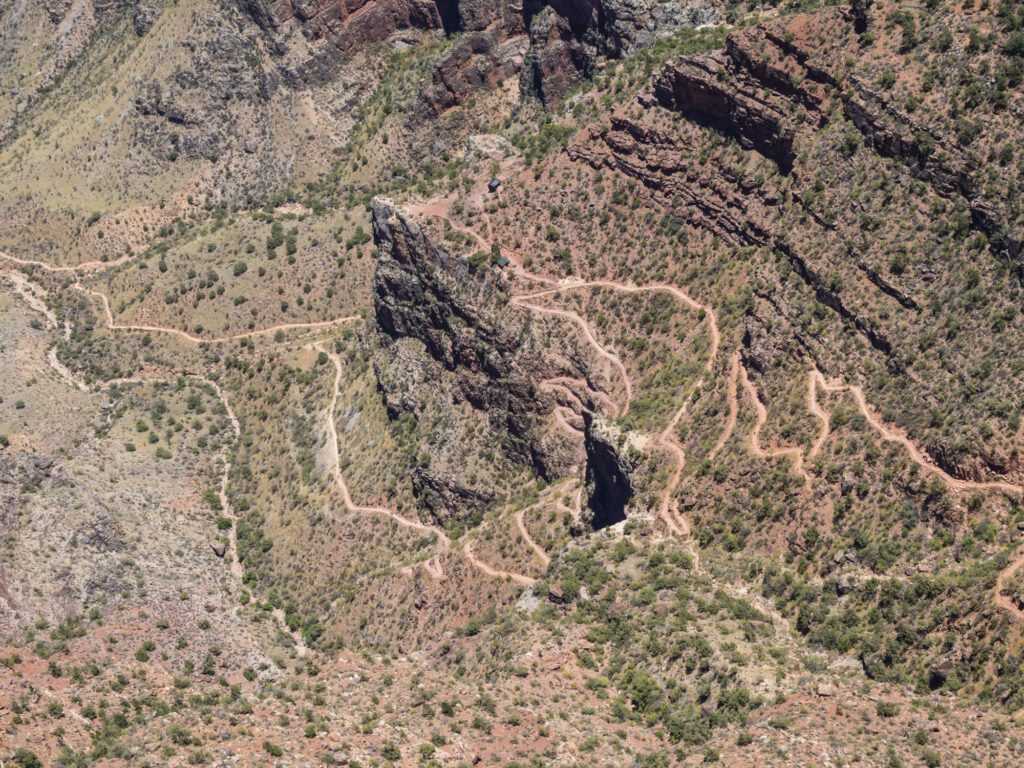
The Hermit Trail makes its way all the way to the river via either the Granite Rapids or the Hermit Rapids (shown here). Either route is extremely hard and is usually done as an overnight trip – less experienced backpackers will want 2 nights.
But for the intrepid hiker it is possible to make the steep journey down and back up in a day, but be prepared for MONUMENTAL elevation gain (and loss) as well as long mileage.
Pro Tip: If you are doing this in a day, bring a water filter and get up-to-date water info. Also, start as early as possible to avoid over-heating.
Mileage: 17.5
Elevation Gain: 5,013 feet
Difficulty: extremely difficult, should only be attempted by folks who have prior desert hiking experience and experience with steep gains in a day.
Estimate Time: 9 to 10 hours, budget more if you’re hiking on a hot day as you’ll likely have to stop for several hours in the shade. Most people take 2-3 days to do this hike!
Pro Tip: For those coming from rim-to-rim experiences, this trail is more rugged and rocky. There also isn’t reliable potable water. Plan accordingly.
Santa Maria Overlook
Sometimes called the Santa Ava Maria Overlook, this route takes a dip below the rim to just near the Ava Maria Spring. If you have a filter, you can refill water here while you enjoy 180-degree views of the inner canyon.
It’s a great option that’s steep (but short). This overlook gives you a feel for what hiking in the inner canyon can be like.
Mileage: 4.5 miles
Elevation Gain: 1,751 feet
Difficulty: moderate for the Grand Canyon, difficult for most.
Estimate Time: 3.5 hours
Hiking to Dripping Spring
This is the day hike I would recommend if you’re looking for something more moderate that dips below the rim. It’s a 6-mile jaunt, with plenty of steep grades, and it goes to a small spring. Springs are quite spectacular in the Grand Canyon.
Of course, this doesn’t have the “oasis” vibe that some of the springs and chasms down by the river have, but it is quite scenic.
Pro Tip: Some of this trail can be a little exposed (ie walking along a cliff band) that might be intimidating for the uninitiated. We didn’t have issues, but I’ve spent a lot of time in the canyon and I’m an avid mountaineer and rock climber.
Mileage: 6 miles
Elevation Gain: 1,132 feet
Difficulty: Challenging for most, moderate for those who have experience with steep trails and exposure.
Estimate Time: 4 hours

Boucher Trail
Another doozy that’s mostly used as a multi-day adventure, the Boucher Trail is even less developed than the Hermit Trail – you’ll often be using your hands and scrambling in sections of this trail. It’s not well-marked and it can be difficult to follow. But it’s a blast for the well-seasoned canyon backpacker.
Pro Tip: Combining this with a section of the Tonto Trail and coming back up the Hermit Trail is an excellent multi-day backpack.
Mileage: 19.8 miles
Elevation Gain: 5,626 feet
Difficulty: Expert only. A multi-day trip that requires permits
Estimate Time: 2-3 days, add more if you’re combining the Hermit Trail for a loop.
Backpacking the Hermit Trail
A lot of people opt to backpack the Hermit Trail – often combining it by returning via Bright Angel or doing the Boucher Hermit Loop.
Backpacking Permits
Backpacking permits are available via a lottery system 5 months in advance through recreation.gov. Obtaining backpacking permits for the Grand Canyon (post coming soon!) outside of the corridor is not an easy task, since the system is built to keep people safe.
However, having gotten many backpacking permits in the Grand Canyon over the years, this area fills up just as fast as the main corridor – therefore, you’re going to want to plan ahead and enter the lottery.
Hermit Trail to Bright Angel Backpack
Often touted as one of the best backpacking routes in the Grand Canyon, Hermit Trail to Bright Angel is an excellent option as a step up from the rim-to-rim corridor. You’ll get a lot of classic Grand Canyon experiences along this trail, including dry camping along the Tonto Trail. The views are just as amazing as the challenge!
Mileage: 22.8 miles
Elevation Gain: 5,242 feet
Difficulty: Extremely difficult. Experienced backpackers who are familiar with water management only.
Estimate Time: 3-4 days.
Important Water Sources
Water is available at the following locations along the Hermit Trail:
- Spring-fed water station near the vault toilets on the gravel road near Hermits Rest
- Santa Maria Spring – year-round (2.5 miles)
- Dripping springs – side trail. It would take a hot minute to filter here. Ideal for Boucher Trail use
- Hermit Creek – perennial – check the backcountry office for the latest info.
All water below the rim must be purified before drinking!
Recommended Hiking Gear
Looking to hike in the Grand Canyon? Here’s a look at everything I take with me for a day hike in the Grand Canyon. Yes, it’s a lot. But there are more ways to get in trouble here than your average hiking locale.
- Plenty of water – I like to use a water container for the car. Budget at least 4 liters per person per day, more if you’re out in the summer months.
- Sunscreen, sunhat with a wide brim, sunglasses
- Sunshirt
- First Aid Kit with tweezer (for cacti)
- Noncotton socks
- Breathable footwear that you feel comfortable wearing all day
- Non-cotton shorts for hiking
- Non-cotton, lightweight pants for hiking. Pants protect you against aggravating foliage.
- Non-cotton, breathable t-shirt for hiking (the sun can really beat you up if you wear tank tops, so be aware)
- Electrolyte powder
- A water bladder capable of carrying at least 2 liters of water.
- A Nalgene bottle for extra water
- A water filter for longer hikes.
- Salty snacks
- Camera
- Camera clip to strap to your back
- Beanie – the desert can get cold at night so warm clothes are great to have
- Glove liners
- Fleece layer (fall through spring)
- Puffy layer (fall through spring)
- Hiking poles (optional)
- A hiking pack. I love the REI Flash series for something mutli-use and economical
- A toilet kit: shovel, WAG Bag (most national parks require this), hand sanitizer, TP/baby wipes, a small plastic baggy to pack out TP and sanitary items
- Pee funnel – optional
- Pee rag – optional
- A plastic baggy for trash (wrappers, fruit peels, etc). I like to use compostable dog waste bags.
- Headlamp
- GPS navigation
- emergency communication device
- Wind/rain layer
- Pocket knife
Desert Hiking Tips
Hiking in the desert may look simple, but it’s a really unforgiving environment. Here are my biggest tips for hiking in the desert.
Avoid the heat of the day. Hike in the early morning or the evenings to avoid the heat. The inner canyon is frequently 10-30 degrees warmer than the rim!
Don’t bust the crust. If you see raised, black bumpy soil – it’s alive! And it’s crucial for desert erosion protection. Less erosion, more plants. More plants, more food for the hearty inhabitants that call this place home. Always stick to the trail and travel on durable surfaces such as slick rock.
Protect yourself from the sun. The sun here is brutal and heat exhaustion kills people in the canyon. Bring light, sun-proof layers. I’ve backpacked here without a hat once (bad packing job) – it was insane trying to keep my face out of the sun, without a hooded sunshirt I would have been donezo!
Research water! The Grand Canyon has extremely limited water and deceiving mileage. 12 miles here is not 12 miles anywhere else (and this is coming from someone who frequently does 6,000 feet of gain in the high alpine). Plan appropriately and always bring more water than you think you’ll need.
Catch me on YouTube!
Want more secret backpacking trips? Ultralight hacks that every hiker can adapt? Experience the top outdoor destinations in the world without the crowds? If you want to get insider knowledge of all things outdoors, then you’ll wanna subscribe to my YouTube channel, where I am giving away my DECADES of knowledge as an outdoor professional. I’ll see ya there!
Additional Grand Canyon Resources
Looking to navigate the Grand Canyon like a total pro? Check out these amazing resources to plan the trip of a lifetime!
- The Best Time to Visit the Grand Canyon if You’re into Big Hikes (coming soon)
- North Rim vs South Rim: Which is Right for You?