Last Updated on September 5, 2025 by foxintheforest
Soaking in the sprawling view of the Grand Canyon is an iconic experience on many bucket lists. But for a unique perspective of this incredible landscape, the Rim to Rim Grand Canyon hike takes you deep into the canyon to a place most people will never see. In fact, only 5% of visitors to the Grand Canyon go below the rim, and only a small percentage of those make it all the way to the river.
My specialty in the Grand Canyon is off-the-beaten-path, hidden gems outside of the Rim-to-Rim Corridor. So instead of me telling the story, I’m handing things off to my long-time writer for Fox in the Forest, Kate.
She’s helped me out for a few years and is an absolute outdoor expert. But what makes Kate’s Rim-to-Rim experience so unique is that she (wasn’t) a big-time long-distance hiker. Kate did the Rim to Rim trail in a day – which is AMAZING! This took lots of preparation and learning on her end. She grew tremendously through this journey, which is truly inspiring!
She’s amped to give you a real, honest look at the Rim to Rim hike and what it took to prepare for such a challenging feat. Take it away Kate!
About this Guide to the Rim-to-Rim Grand Canyon Hike
Inside this pro guide to the Grand Canyon Rim to Rim, you’ll find expert advice about:
- What is the Grand Canyon Rim to Rim?
- Grand Canyon South Rim vs North Rim comparison
- Suggested Grand Canyon Rim-to-Rim hike itinerary
- Best time to hike the Grand Canyon Rim to Rim
- Training for the Grand Canyon Rim-to-Rim hike
- Rim to Rim Grand Canyon safety
- Grand Canyon camping & lodging options
- Additional Grand Canyon travel planning resources
What is the Grand Canyon Rim to Rim?
If you’re looking to see as much of the Grand Canyon as you can, the Rim to Rim is one of the most amazing things to do in the Grand Canyon.
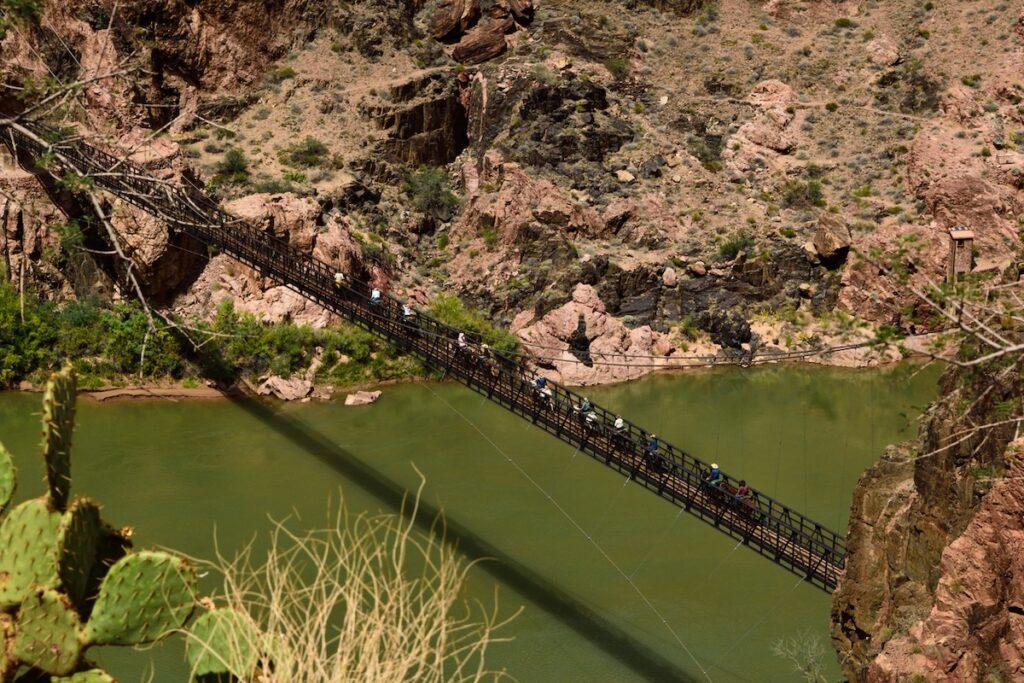
The Rim to Rim consists of starting at one rim of the Grand Canyon (south or north) and hiking all the way down to the river then up to the opposite rim.
This can be done by combining either the Bright Angel Trail or the South Kaibab Trail with the North Kaibab Trail.
The Rim to Rim is one of the top hikes in the Grand Canyon, but it is a serious undertaking that requires training and preparation.
The exact trail stats will depend on your choice of route and which rim you start on, but the Rim to Rim Grand Canyon is between 21-23.5 miles with somewhere from 4,460-5,850 feet of elevation gain.
It is possible to do the Rim to Rim in a day (if you’re prepared), but many people choose to backpack it over a few days.

Practical Info
The Grand Canyon Rim to Rim is an epic hike, and here is everything you need to know about the trail details and logistics.
Distance: 21-23.5 miles point to point
Elevation Gain: 4,460-5,850 feet
Difficulty: Extremely challenging
Estimated Time: 12-15 hours in a day or 2-3 days as a backpacking trip
Dog Friendly: No, dogs are not allowed below the canyon rim
Permits Required: Not if day hiking, but backcountry permits are required for camping below the rim
Fee: $35/vehicle for a 7-day pass or National Parks Pass accepted.
Water Available: Check this Grand Canyon NPS page for the current status of water stations.
Grand Canyon South Rim vs North Rim Comparison
The North Rim vs South Rim of the Grand Canyon are very different, so here’s a quick rundown of the two rims.
South Rim
The South Rim is typically what people think of when picturing the Grand Canyon. It features some of the best Grand Canyon viewpoints, but along with that comes serious crowds.
This is the area of the Grand Canyon that the majority of visitors go to.
North Rim
The North Rim is more secluded, and you’ll find fewer crowds here by far. Only 10% of visitors to the Grand Canyon visit the North Rim, according to the NPS. It is also at a higher elevation (around 8,000 feet), so it is closed during winter. So, you can’t check out the best north rim hikes then.
Trailhead Transportation
The South Rim and the North Rim are approximately a 4.5-hour drive from each other, so you’ll need to either have someone pick you up or book a ride on the Trans-Canyon shuttle service to get from where you end the Rim to Rim back to where you started.
Rim to Rim Grand Canyon Suggested Itinerary
There are many different ways to do the Grand Canyon Rim to Rim. You have two choices of trails from the South Rim – the South Kaibab Trail and the Bright Angel Trail.
These trails connect with the North Kaibab Trail to the North Rim.
Pro Tip: Most of the Bright Angel Trail will be closed until April 14, 2024, for construction.
There is no water on the South Kaibab Trail so Bright Angel Trail to North Kaibab (or vice versa) is typically a better itinerary for someone doing the Rim to Rim for the first time.
However, my group took the South Kaibab Trail to the North Kaibab Trail, but we made that choice because we did the South Kaibab downhill and mostly in the early morning darkness, so it wasn’t too hot yet.
Here are a few suggested itinerary options for the Rim to Rim Grand Canyon, whether you want to do it as an extreme day hike or go backpacking in the Grand Canyon.

Rim to Rim in a Day
Due to logistics with the North Rim opening later than planned, when I did the Rim to Rim in a day, we took the South Kaibab to North Kaibab route, starting on the South Rim and ending on the North Rim.
There is more elevation gain going in this direction, but the South Kaibab is shorter than Bright Angel.
Pro Tip: It’s best to do the Rim to Rim in a Day while the North Rim of the Grand Canyon is accessible.
Early October is an ideal balance for weather (mainly temperatures) and still having services on the North Rim. The North Rim is typically open from May 15 through October 15 each year.
Distance: 21 miles
Elevation Gain: 6,181 feet
Another option for the Rim to Rim in a day is starting on the North Kaibab Trail on the North Rim and ending on the Bright Angel Trail to the South Rim.
This has less elevation than going the opposite direction but is a few miles longer than taking South Kaibab.
Distance: 23.5 miles
Elevation Gain: 5,574 feet
Rim to Rim in 1 Night
If you want to do the Rim to Rim as a quick backpacking trip, you can hike down to the river and spend the night at Bright Angel Campground or Phantom Ranch, then hike out to the other rim the next day.
Pro Tip: Phantom Ranch books out 18 months in advance via an extremely competitive lottery system. Be sure to have a backup plan!
Rim to Rim in 2 Nights
For a longer trip, you could spend a night at 2 different campgrounds below the rim. A longer trip splits up your mileage and gives you some extra time to enjoy a few noteworthy side trips.
- Night 1: Cottonwood Campground (6.8 miles below the North Rim)
- Side Trip: Ribbon Falls is an awesome side trip about 1.3 miles below Cottonwood Campground. It’s only about 0.3 miles from the main North Kaibab Trail, so it doesn’t add that much mileage to your second day, and it’s absolutely worth it to see both the upper and lower sections of this unique waterfall.
- Night 2: Havasupai Gardens Campground (4.8 miles below the South Rim)
Rim to Rim in 3 Nights
Savor your time in the Grand Canyon with a night at each campground below the rim.
- Night 1: Havasupai Gardens Campground (4.8 miles below the South Rim)
- Night 2: Bright Angel Campground (at the river)
- Night 3: Cottonwood Campground (6.8 miles below the North Rim)

Do I need Permits to Hike the Rim to Rim in the Grand Canyon?
Backcountry permits are required for all camping below the rim of the Grand Canyon. Permits are available 5 months in advance through a lottery system.
Your lottery application gives you a specific time you can book your trip. Since this is the most competitive permit to obtain in the Grand Canyon, you’ll want to opt for the lottery.
Permits for the Rim to Rim in the Grand Canyon fill up during the lottery period throughout the year. Your lottery application puts you in a draw for a timeslot.
If you don’t end up winning a time slot (I’ve personally never had issues, but I’ve heard it happens), then you have a special period of time where your lottery application enables you to reserve your camping before permits open to non-lottery applicants.
Meaning, you’ll get awarded an opportunity to book in advance just for signing up.
The Grand Canyon Backcountry Permit System is a bit confusing. You can only book specific itineraries through recreation.gov.
Anything that’s out of the norm or a bit more aggressive requires you to call the Grand Canyon Backcountry Office to book. Your lottery time slot gives you access to a dedicated line for lottery time slots.
Pro Tip: If you’re hiking the Rim to Rim in a day, you do not need a permit.
When to Hike the Rim-to-Rim Grand Canyon
Determining the best time to visit the Grand Canyon to hike the Rim to Rim is really important – both in terms of time of year and time of day.
The Best Time of Year to Hike the Rim-to-Rim
The North Rim is only open from May 15 – October 15, so you’ll have to do your Grand Canyon Rim-to-Rim hike during that time frame.
However, the summer will be dangerously hot, so the optimal time to hike the Rim to Rim Grand Canyon is in mid to late May or early to mid-October.
October is probably more likely to be cooler because it usually is already pretty hot in the Grand Canyon by mid-May.
I did the Rim to Rim on May 15 (the first day the North Rim was open), and we still experienced heat warnings where it was going to be over 100° at Phantom Ranch at the bottom of the canyon.

Best Time of Day to Hike in the Grand Canyon
One of the keys when hiking the Rim to Rim in hot weather is to avoid the hottest part of the canyon – what’s known as “The Box,” where the canyon walls reflect the heat – during the hottest part of the day.
If you’re hiking the Rim to Rim in a day, ideally, you want to be out of “The Box” before 10 am. This means you typically need to get an alpine start before sunrise.
When I did it, we started at 1:30 am! We knew it was going to be hot when we started in the middle of the night and didn’t even need our puffy jackets (!!!).
I was super glad we started so early since it was already very hot by the time we made it through “The Box.”
The reflective hiking umbrellas some of us carried to provide shade and sun protection were truly lifesavers, and I don’t know if I would have made it through the second half of the hike in the heat without mine. Several park rangers even stopped to say we were smart for bringing the umbrellas!
Training for the Grand Canyon Rim to Rim
Training is crucial for a successful hike of the Grand Canyon Rim to Rim, and I would NOT recommend hiking the Rim to Rim without training.
You should build up your hiking mileage and be sure to include plenty of elevation gain – believe me, you don’t want to be looking up at your hike out of the canyon without feeling prepared.
A basic training plan for the Grand Canyon Rim-to-Rim hike will start a few months before your hike, increasing your mileage and elevation gain each week.
If you’re planning to do the Rim to Rim in a day, make sure to do at least a couple of long hikes of at least 20 miles so your body is used to hiking all day.
Pro Tip: If you don’t live near hilly terrain, you can train on a stairmaster, at a stadium, or on an inclined treadmill.
The week before your actual Rim to Rim Grand Canyon hike should be a de-load week, where you just do a few short hikes to make sure your body is well-rested going into this big hike.
Pro Tip: During your training, you should also dial in your hydration and electrolyte needs and the snacks that work best for you on the trail.
Mental Preparation
Mental training is also a key part of preparing for the Rim-to-Rim Grand Canyon. This is an intense physical challenge, and your mindset needs to be strong to push through the hardest parts.
Challenging yourself on the trail before your Rim to Rim hike will help you build your tolerance for uncomfortable and tough times in the Grand Canyon.
If you can find a place in your area where you can do training hikes that end with an uphill section, that will be useful in understanding what it will feel like having to do significant elevation gain when you’re already tired.
Grand Canyon Rim-to-Rim Safety
It’s important to be aware of the dangers inherent along the Grand Canyon Rim-to-Rim hike before you attempt to tackle it.
If something happens to you deep down in the canyon, an evacuation will be difficult and take a long time, so you need to do everything possible to prevent needing a rescue.
- Heat: It can get extremely hot in the Grand Canyon, and unprepared hikers fall victim to heat illness often. Be sure to wear breathable, sweat-wicking clothing, a sunshirt, sunglasses, a hat, and other sun protection. Plan your hike to avoid the hottest temperatures in the hottest part of the canyon.
- Dehydration: Going hand in hand with heat is dehydration. You’ll lose a lot of water sweating in the heat, and you need to replenish that. Carry plenty of water with you (at least 3-4 liters) and fill up whenever you get the chance. Check the Grand Canyon NPS site to learn where water supplies will be on/off, and bring a backup water filter. Also, make sure to add electrolytes to your water to keep your salt levels in balance and avoid hyponatremia.
- Wildlife: Rattlesnakes and scorpions both call the Grand Canyon home, so watch your step and keep an eye out to avoid getting bitten or stung.
Rim to Rim Grand Canyon Camping & Lodging
You’ll find many places to stay at or near the Grand Canyon, though your options are more limited at the North Rim than the South Rim.
Grand Canyon North Rim Accommodations
- North Rim Campground: Open from May 15-October 15. The campground is about a half-mile walk to the North Kaibab Trailhead.
- Grand Canyon Lodge North Rim: Open from May 15-October 15. A shuttle runs twice each morning to the North Kaibab Trailhead.
- Jacob Lake Inn: About an hour outside the park, Jacob Lake Inn is one of the only nearby places to stay. Even if you don’t stay here, be sure to grab some of the yummy cookies for a snack!
Grand Canyon South Rim Accommodations
- Mather Campground: Open year-round. Some sites are available by reservation, and some are available on a first-come/first-served walk-in basis.
- Grand Canyon Village Lodges: Several lodges are located in Grand Canyon Village where you can shuttle to South Kaibab trailhead.
- Dispersed Camping: You can disperse camp in Kaibab National Forest just outside the park.
- Hotels in Tusayan: The town of Tusayan is about 15 mins from the South Rim and has several hotel options.
Desert Packing List
This packing list is designed for day hikes.
- Plenty of water – I like to use a water container for the car. Budget at least 4 liters per person per day, more if you’re out in the summer months.
- Sunscreen, sunhat with a wide brim, sunglasses
- Sunshirt
- First Aid Kit with tweezer (for cacti)
- Noncotton socks
- Breathable footwear that you feel comfortable wearing all day
- Non-cotton shorts for hiking
- Non-cotton, lightweight pants for hiking. Pants protect you against aggravating foliage.
- Non-cotton, breathable t-shirt for hiking (the sun can really beat you up if you wear tank tops, so be aware)
- Electrolyte powder
- A water bladder capable of carrying at least 2 liters of water.
- Salty snacks
- Camera
- Camera clip to strap to your back
- Beanie – the desert can get cold at night so warm clothes are great to have
- Glove liners
- Fleece layer (fall through spring)
- Puffy layer (fall through spring)
- Hiking poles (optional)
- A hiking pack. I love the REI Flash series for something mutli-use and economical
- A toilet kit: shovel, WAG Bag (most national parks require this), hand sanitizer, TP/baby wipes, a small plastic baggy to pack out TP and sanitary items
- Pee funnel – optional
- Pee rag – optional
- A plastic baggy for trash (wrappers, fruit peels, etc). I like to use compostable dog waste bags.
- Headlamp
- GPS navigation
- emergency communication device
- Wind/rain layer
- Pocket knife
NOTE: These are affiliate links. Meaning I get a small kickback from every purchase, no matter the purchase, at no additional cost to you. This is a small way you can show support for my channel and it means a lot, so thank you!
Catch me on YouTube!
Want more secret backpacking trips? Ultralight hacks that every hiker can adapt? Experience the top outdoor destinations in the world without the crowds? If you want to get insider knowledge of all things outdoors, then you’ll wanna subscribe to my YouTube channel, where I am giving away my DECADES of knowledge as an outdoor professional. I’ll see ya there!