Last Updated on September 5, 2025 by foxintheforest
If you’re looking to jump into the wonderful (and funky) world of technical slot canyons, look no further than Baptist Draw. Located in the San Rafael Swell of Southern Utah, Baptist Draw offers an excellent introduction to canyoneering.
You’ll get a bit of everything – stunning narrows, plenty of high stemming, chimney climbing, tight squeezes, and a stunning rappel.
As an avid rock climber, mountaineer, and budding canyoneer, you’ll get top-notch advice about everything you need to know for a fun-filled trip into the depths of Baptist Draw. I’ve been canyoneering and exploring the San Rafael Swell for nearly a decade and I’m a pro at navigating this landscape so you’re in good hands.
Not to mention, this is one of my absolute FAVORITE technical slot canyons – so I’m even more excited to share all of the juicy insider knowledge with you.
About this Guide to Baptist Draw
Inside this exclusive guide to the Baptist Draw slot canyon you’ll get hot info about:
- How to reach the trailhead
- Practical information for planning your day
- Skills and gear required for the canyon
- Nearby camping
- Additional things to do nearby
Where is Baptist Draw in Utah?
You can find Baptist Drwa in the southwest quadrant of the San Rafael Swell. I’m not going to lie – it’s difficult to get here. Lots of tedious dirt road driving – but it is the Swell after all!
The “trailhead” (read, just a dirt pullout with immediate scrambling) can be found at the end of Chute Canyon Road, deep in the Swell.
Trailhead Access
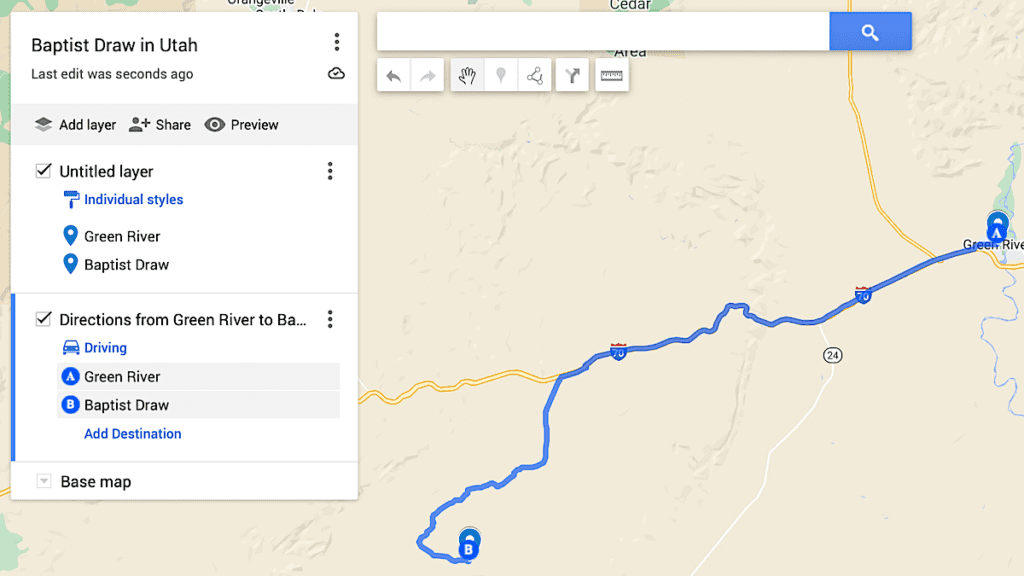
To reach the trailhead. Google Maps doesn’t always give you great directions in this area and there is no cell service out here, so be sure to save step-by-step copies and check your route prior to heading to the trailhead. You will need a 4WD high-clearance vehicle to reach the trailhead.
From I-70 you’ll take exit 131 about 29-30 miles outside of Green River. Go south off of the freeway. This is an underpass exit and it’s easily missed.
There is a crisscross of roads here and many washes to pass. The road here is graded, but after rains, the road can be impassible.
Stay on the road following signs for U24 Goblin Valley/Temple Mountain for roughly 10.2 miles
At mile 10.1 you’ll reach a signed junction for Reds Canyon / Tan Sleep. Take the right fork heading away from Temple Mountain Road and Goblin Valley.
Follow the road for 0.9 miles to the signed Mckay Flat Junction. You’ll reach another fork in the road. To the right (north) is incredible dispersed camping (no services, pack it in, pack it out, my friends). In order to reach the trailhead, you’ll head left (south).
Follow this road for 3.8 miles to a cattle guard. just 150 yards south of the cattle guard you’ll see an unmaintained road (more like a 2-wheel track) to the left/east.
Now is when you’ll want 4WD with high clearance. The road gets a bit rough here. When we did it we had no trouble with a 4Runner and all-terrain tires. Our friends had a Subaru Outback they didn’t mind banging up and they made it but had to take a few tricky detours (read: not for the uninitiated).
Follow this track for 2.8 miles to an un-named fork. Take the left fork to the east and drive another 0.6 miles to the “trailhead” which is just a clearing with no markers.
There is camping all along this mesa – so discerning camping from the road can be a bit tricky. It’s exposed and windy here though.
Practical Info
What makes Baptist Draw so great is that it’s a good bang for your buck. The approach is relatively short, the slots are incredible, and there isn’t much BS to manage.
With that being said, this is still a technical canyon. I did this when I was 7 months pregnant. We were with a group – half of us were experienced and the other half it was their first time.
I was tired at the end, but not as exhausted as when I climbed 1,000 Feet of Fun nearby. There were times when the canyon was honestly frightening – this was at the upper limit of what I could handle while carrying a baby in my stomach.
Distance: 4.2 miles (short loop – recommended), 7.4 miles for the long route (it was pretty meh according to my friends).
Elevation Gain: 1,000 feet of loss, you’ll regain all of it. A little bit more for the long route.
Estimated Time: 4-7 hours. Budget more for the long route. We were a mixed group, I wasn’t exactly hiking fast and it took us around 5 hours.
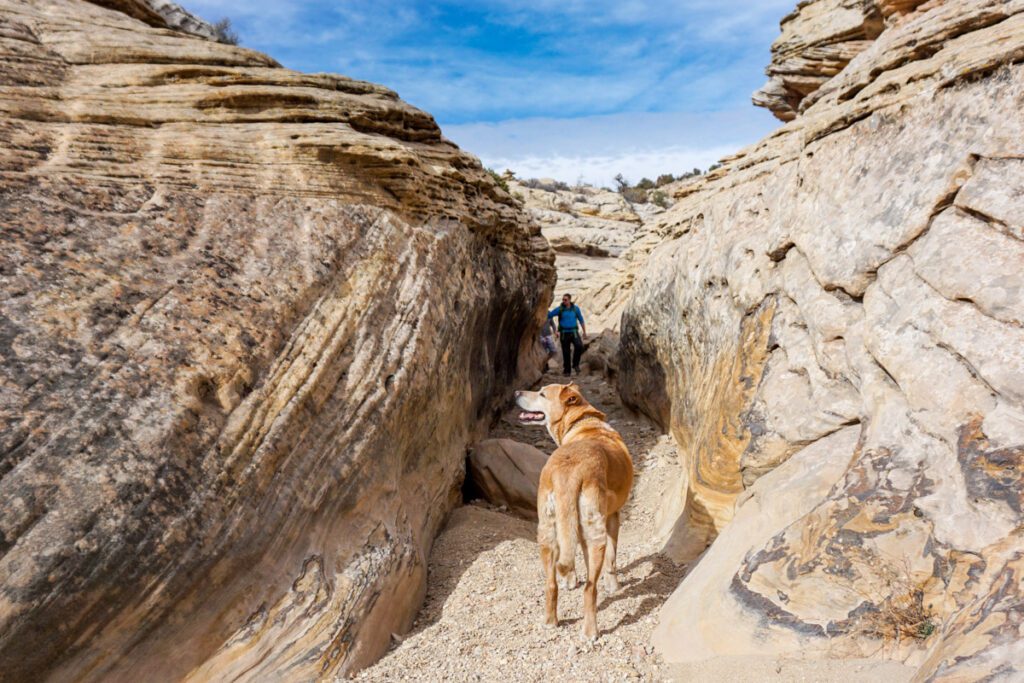
Dog-friendly? NO. Rappels are required, leave your dog at home (don’t let Roadtrip Ryan fool you – he’s a badass and nearly every dog is not going to be able to do this canyon). The first time we went, we had our dog and had to turn around pretty soon into the canyon.
Difficulty: For the uninitiated, this is a challenge, but as far as canyons go, it’s an easier slot canyon thanks to bolted anchors.
Technical Rating & water: 3B, grade 2. Water can absolutely be present, especially in Upper Baptist. The water line is extremely high and would require swimming. In one spot you would have to swim under a chockstone, so beginners should do this canyon when there’s no water present.
Rappels: 2-4 the longest is 25m
Gear: 50m rope (minimum), helmet, tat/rap rings (some semi-optional, shorter rappels aren’t bolted), harness, third hand, 2 non-locking carabiners (in case rappel chains are unusable), A PAS or double length runner (nice to have for setting up the rappels).
Kid Friendly? Older kids, yes if they are with an experienced group. They should be comfortable scrambling, chimney climbing, and stemming, and not be claustrophobic.
Season: Spring, summer (HOT), and fall. Avoid this canyon in winter, as it’s mostly impassible this time of year.
Flash Flood Danger: Extreme
Warnings!
This is not a beginner desert hike. In fact, it is NOT a hike at all. It’s a technical canyon. You’ll need ropes, a harness, and a helmet, as well as ample anchor and climbing knowledge. If you don’t have these skills, don’t come here or check it out with someone who is well-versed in canyon safety.
NEVER attempt to visit Baptist Draw with rain in the forecast. It’s extremely dangerous and a flash flood will kill you. The drainage area feeding this canyon is mega-wide (!!!) – cast a wide net (look at the weather 20 miles all around you) before attempting to run the canyon.
Epics, accidents, and rescues are common here because people get in over their heads or don’t do their homework. I’m not one to gatekeep, and assuming the risk of canyoneering is your own choice.
Is Baptist Draw Hard?
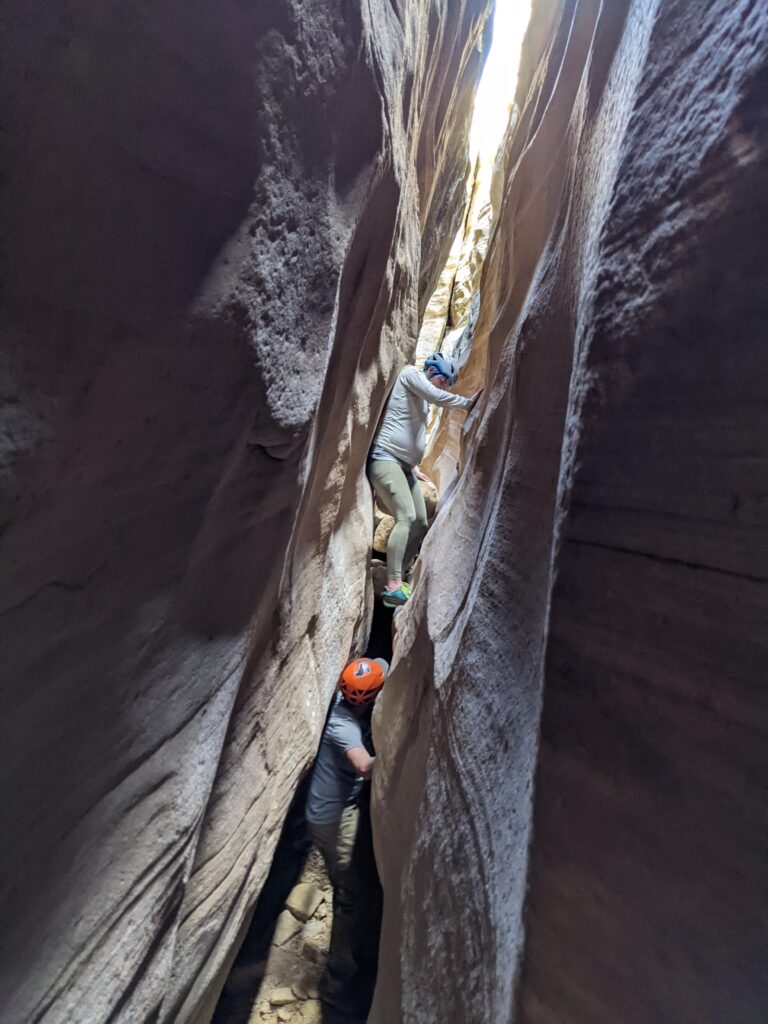
For a beginner slot canyon, no. It’s relatively easy. Like I said, I did this 7 months pregnant. There was one section that was particularly narrow, high up, and slick from a lot of traffic.
This particular section was a little frightening for me. I couldn’t get my feet high enough to gain traction because of my belly. I needed a partner assist (legit stepping on people’s shoulders) and I couldn’t go back the way I came. To me, this was the crux of the route by far and really tested my abilities in my body.
Everyone who had never done much canyoneering struggled here. A few people freaked out a bit. It was a bit of a grunt fest for those who had plenty of canyoneering experience as well.
The route is made easier by the fact that the rappel anchors are bolted. There are two that do not have bolts. One would be considered optional and isn’t even mentioned in most reports, and the last rappel on the Lower Chute Canyon (skippable IMO) has no anchor.
What Skills Do I Need Before Doing Baptist Draw?
You’ll need to be comfortable with the following techniques to venture in here:
- chimney claiming (back against the wall, feet on the opposite wall)
- Stemming
- A few people busted out the elevator move, I never had to.
- Bridging (helpful in a spot or two but not required)
- Rappelling
- Anchor inspection
- Basic anchor building (most are slung boulders, others are raps with rings)
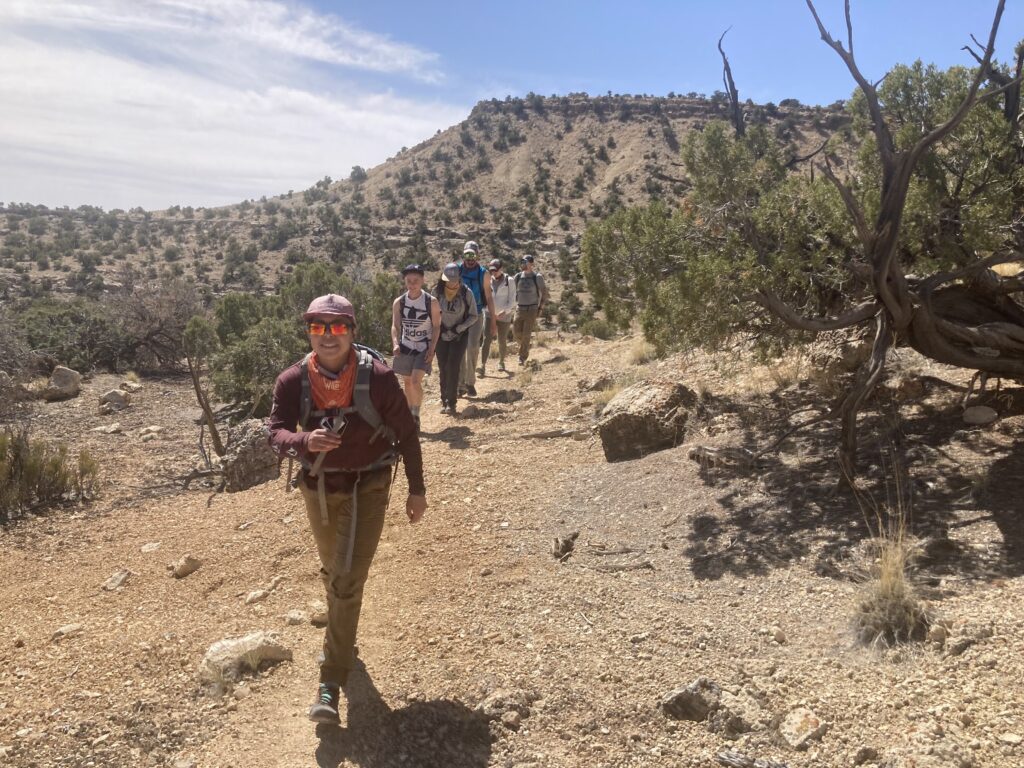
Reaching Baptist Draw
From your car aim for the tippi-looking hill. Make your way down the mesa edge (there is a trail if you can find it – easier to see on the way up) aiming for the the right of the tipi hill, across the first drainage.
Baptist Draw is the canyon on the other side of the tipi hill. Hike down to the start of the canyon (N38° 42′ 11″, W110° 47′ 43″).
Pro Tip: Look backward and take photos so you can navigate your way back out!
Inside Baptist Draw
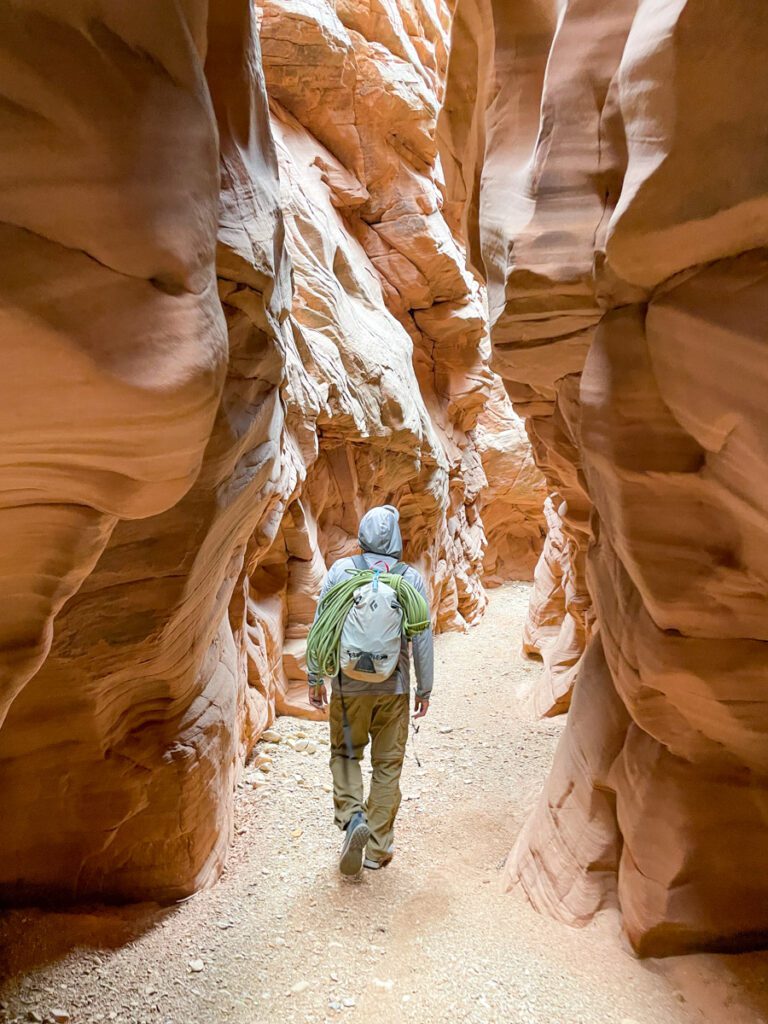
The canyon starts short and mellow. It’s a beautiful start and the sun feels so good! It quickly deepens though and starts to get narrow.
There are a couple of small downclimbs to warm up your muscles. You’ll eventually reach a small rappel. Some of these may be downclimbable, but we opted to rap simply because it’s a bit safer.
There’s another short rappel a little ways on into to bowels of the canyon.
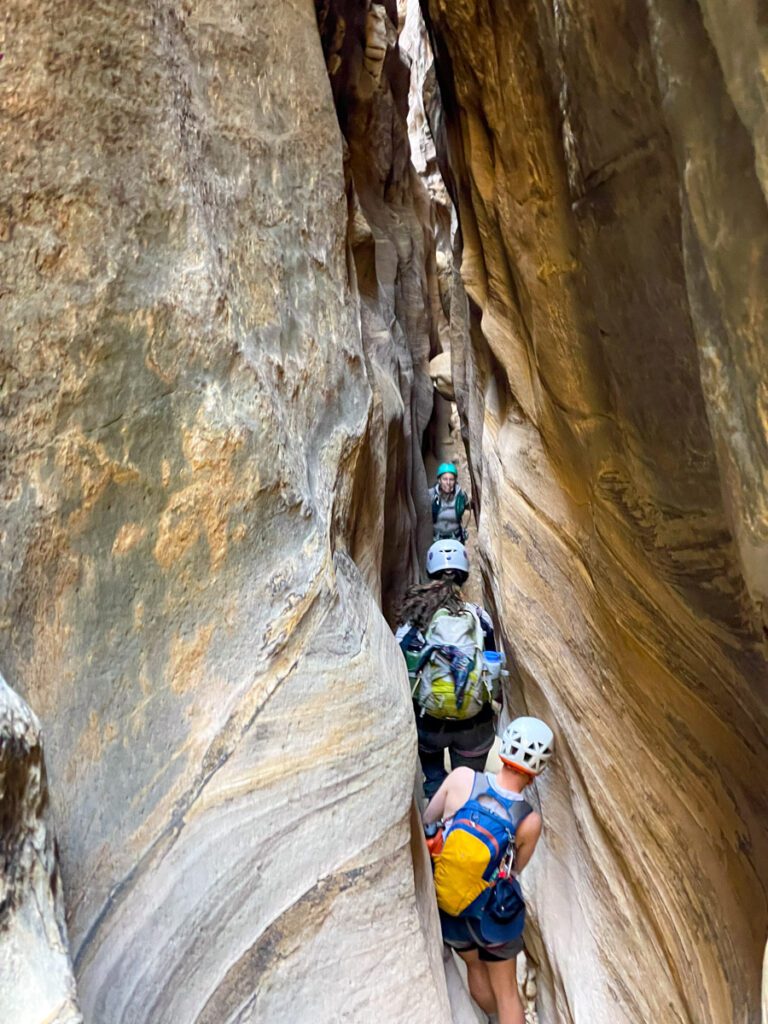
From here, it starts to get squeezy. Most people will need to remove their packs. My big belly was able to make it, but it was tight in spots!
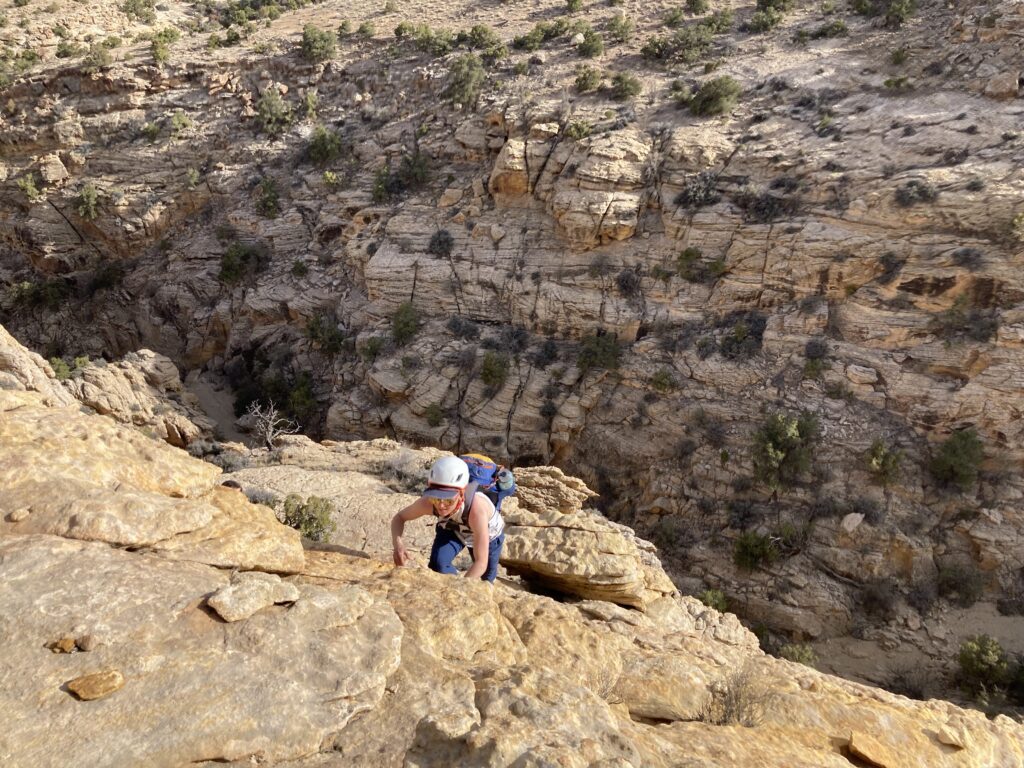
Eventually, you’ll reach a small chockstone with a very narrow pour-off. At this point, you’re roughly 10 feet off the deck. There is a squeeze fin of rock – that could certainly wedge you in (that was my biggest fear). However, you can toss your pack and retrieve it later. Almost everyone will want to remove their bags.
This area is tough, mostly because it’s slick so it’s hard to get purchase – even in approach shoes. The moves are awkward and everyone but one person struggled here. I certainly had my moment. I needed to stop on people’s shoulders to get through – but again, my range of motion was limited (learned this the hard way).
Afterward, it stays pretty narrow until Baptist Draw widens substantially and you’re faced with the big rappel.
Largest Rappel
The 25m rappel dives into the Baptist and Chute junction. In true San Rafael Swell fashion, the area is just beautiful!
You’ll spot a 3-bolt rappel anchor on the right side of the rock. I found a PAS system to be a nice piece of insurance to reach the anchor. Especially since a few of us sat there to set up the beginners we had with us.
The rope pull is simple and a 60m rope gave us plenty of length.

The Baptist Draw and Chute Canyon Split
Now you make a choice, head to Upper Chute Canyon, which offers stunning narrows and fantastic scrambling, or head down the canyon to Lower Chute. Lower Chute is far more open with plenty of sand, but it has one extra rappel.
Our group split at this point. My partner, a friend, and I headed back towards the car via Upper Chute (shorter) while my bestie and experienced friend took the rest of the beginners down Lower Chute because they wanted more rappelling.
My friend has been in plenty of canyons and informed me that Lower Chute was a bit more of a slog, with some sketchy, loose class 4 scrambling to get out and regretting not urging the group to the beauty of Upper Chute.
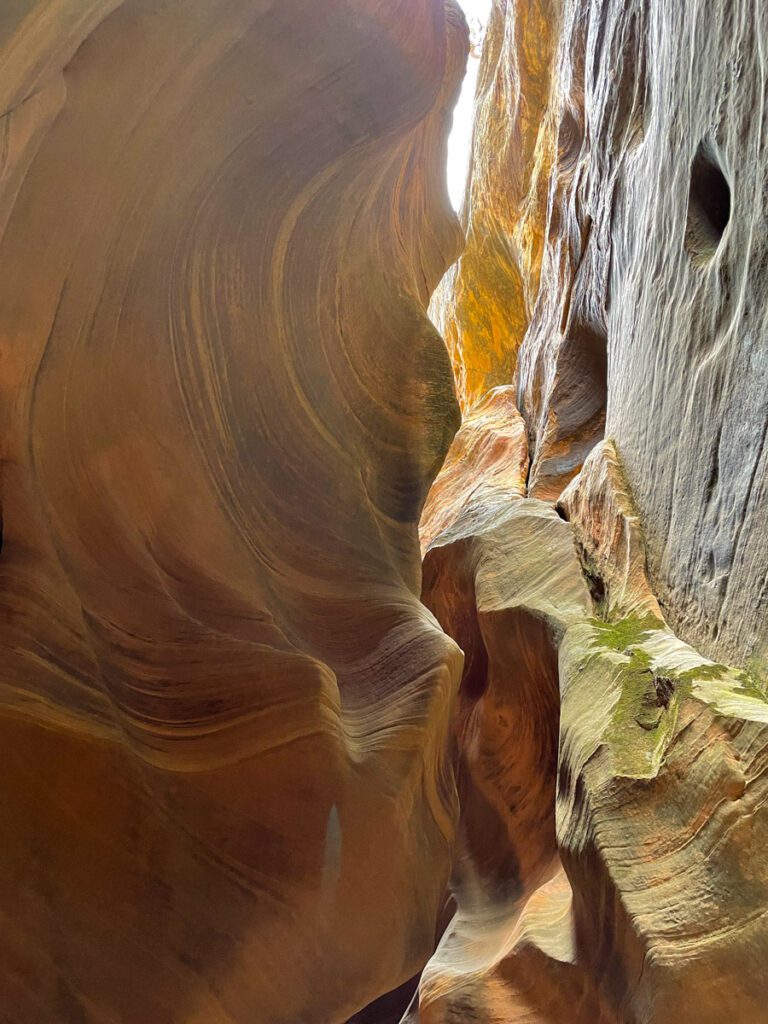
Up Upper Chute Canyon (preferred)
Enjoy the wide, sunny view, because Upper Chute quickly becomes dark, windy, and narrow again. Honestly, I’ve been in quite a few slot canyons, and these are some of the most beautiful narrows I’ve ever seen.
Pro Tip: Be sure to look up and check out the insanely high water line – freaky!
Eventually, the canyon opens up and there is a good, easy climb out on the left-hand side.
Pro Tip: If you pass another junction canyon, you’ve gone too far.
From the exit, you’ll work your way back to the initial drainage that you cross in the very beginning and back to the car.
Down Upper Chute Canyon
The long route goes down Upper Chute Canyon and it’s mostly wide, with that classic big canyon view (think Eardly Canyon). There are a few large boulders to navigate and one requires a 17ft rappel. The rappel is set back quite a ways, so you’ll want plenty of extra rope to sling a giant boulder.
The tedious rock hopping and sand walking continue with the occasional pool you may need to navigate. After about 2 to 2.5 hours of walking – about 3 miles), you will reach a side canyon (N38° 40′ 59″, W110° 48′ 50″), take the right (west) side canyon, and pick your way back to the mesa.
You’ll find the exit on the north (right) side of this feeder canyon. Once you reach the top of the hill, you’ll cross a drainage and climb a mesa you should see your vehicle. If not, you’ll encounter the road in to link back to your car.
Pro Tip: Take a GPS pin of where you park so you can navigate back to your car if you take this route.
Nearby Camping
There’s ample camping at the “trailhead” but as far as the San Rafael Swell goes (and the bar is high my friends), it’s not that great.
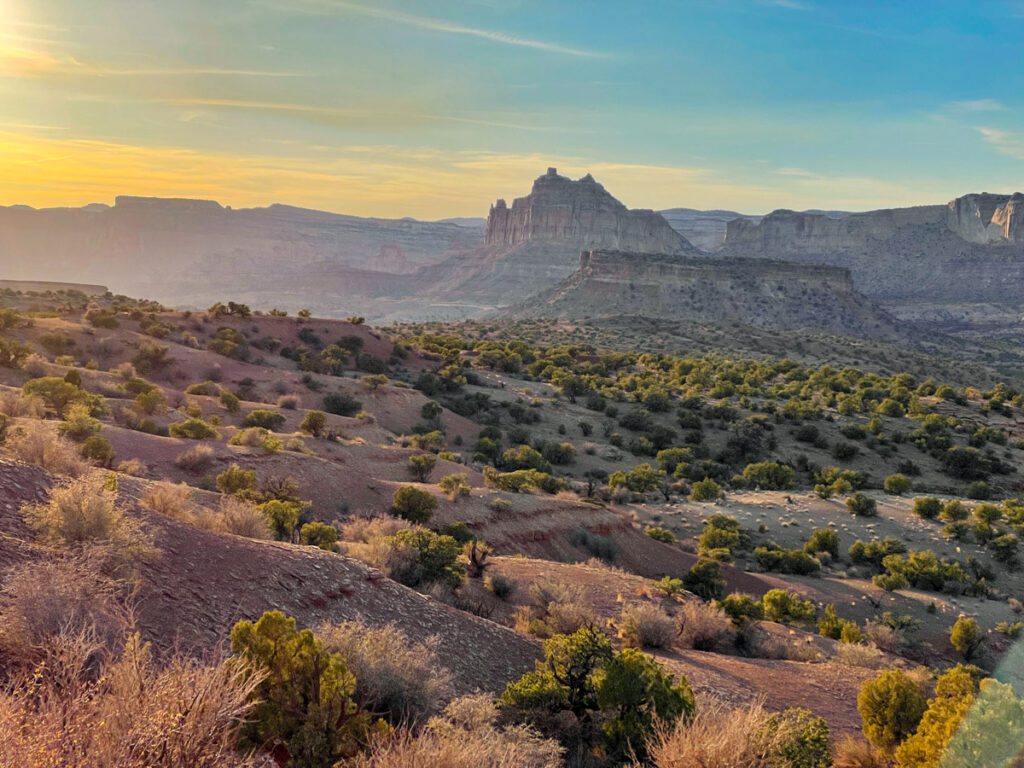
When we were here there were big winds in the forecast. The mesa was getting pummeled and we saw people’s camps being tormented. If you head back the way you came and continue towards Red Canyon Loop you’ll find some amazing camp spots on a spur road on the right-hand side of the road around 30 minutes from the trailhead.
Pro Tip: Red Canyon is an amazing spot to catch a sunset! Thank me later!
WARNING
There are no services and no cell service out here. If you’re in a group – the Garmin to Garmin text ability is amazing.
Be sure to ONLY camp in previously established camp sites. Come prepared to be self-sufficient. This means packing out all of your trash (including toilet paper). Consider using a WAG bag system. Bring plenty of potable water for your stay.
What to Pack
Here’s a look at what to bring with you in Baptist Draw.
Technical Gear:
- 50 – 60 m rope or a 25 m rope with a tagline (block and tackle is pretty easy here)
- double-length runner for use as a PAS
- 20 ft webbing/tat
- harness
- helmet
- approach shoes
- rap rings (2 is fine)
- 2 non-locking caribiners in case anchors aren’t in great shape, also can be used for your PAS
Other gear:
- Plenty of water – I like to use a water container for the car. Budget at least 4 liters per person per day, more if you’re out in the summer months.
- Sunscreen, sunhat with a wide brim, sunglasses
- Sunshirt
- First Aid Kit with tweezer (for cacti)
- Noncotton socks
- Breathable footwear that you feel comfortable wearing all day
- Non-cotton shorts for hiking
- Non-cotton, lightweight pants for hiking. Pants protect you against aggravating foliage.
- Non-cotton, breathable t-shirt for hiking (the sun can really beat you up if you wear tank tops, so be aware)
- Electrolyte powder
- A water bladder capable of carrying at least 2 liters of water.
- Salty snacks
- Camera
- Camera clip to strap to your back
- Beanie – the desert can get cold at night so warm clothes are great to have
- Glove liners
- Fleece layer (fall through spring)
- Puffy layer (fall through spring)
- Hiking poles (optional)
- A hiking pack. I love the REI Flash series for something mutli-use and economical
- A toilet kit: shovel, WAG Bag (most national parks require this), hand sanitizer, TP/baby wipes, a small plastic baggy to pack out TP and sanitary items
- Pee funnel – optional
- Pee rag – optional
- A plastic baggy for trash (wrappers, fruit peels, etc). I like to use compostable dog waste bags.
- Headlamp
- GPS navigation
- emergency communication device
- Wind/rain layer
- Pocket knife
NOTE: These are affiliate links. Meaning I get a small kickback from every purchase, no matter the purchase, at no additional cost to you. This is a small way you can show support for my channel and it means a lot, so thank you!
Catch me on YouTube!
Want more secret backpacking trips? Ultralight hacks that every hiker can adapt? Experience the top outdoor destinations in the world without the crowds? If you want to get insider knowledge of all things outdoors, then you’ll wanna subscribe to my YouTube channel, where I am giving away my DECADES of knowledge as an outdoor professional. I’ll see ya there!
Additional Info on Adventures in Southern Utah
Looking for more wild and whacky off-the-beaten-path adventures? I have you covered.