Last Updated on October 31, 2025 by foxintheforest
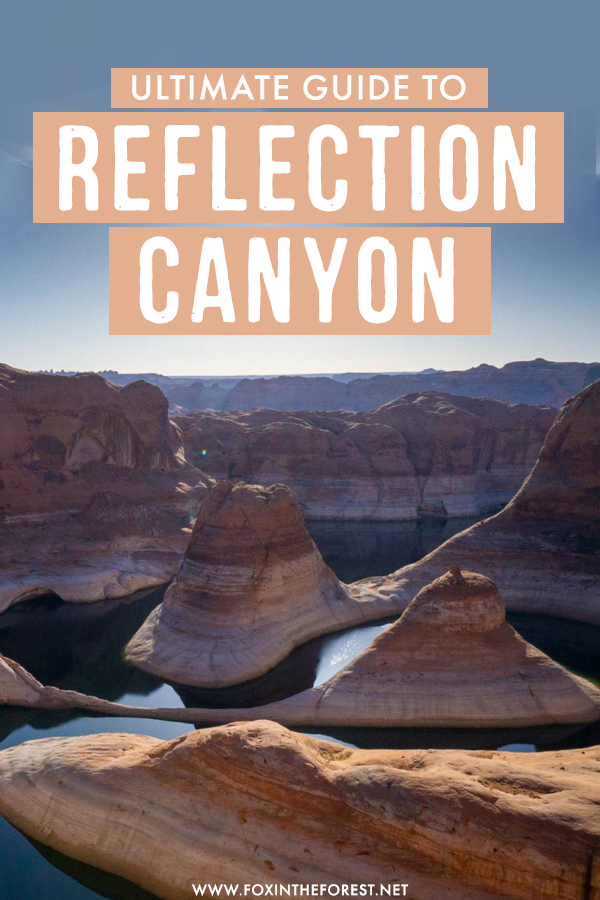
Reflection Canyon is a monumentally epic backpacking adventure that takes you into the heart of Glen Canyon Recreation Area. This winding, snake-like canyon features brilliant blue waters and stunning slick rock formations.
But the journey is anything but easy. In fact, this difficult backpacking route requires off-trail navigation skills, a water carry, and plenty of bone-crushing slick rock hiking.
Despite the challenge, people flock to this canyon simply to photograph the sunrise. Personally, there is a lot more to Reflection Canyon, Utah than just snapping a simple sunburst photo. This area is jaw-dropping – including a super-secret campsite I’m excited to share with you!
Inside this guide to Reflection Canyon, we’ll go beyond the basic “how to reach the photo opp spot” and you’ll get in-depth knowledge about making the most of your Reflection Canyon hike. No other guide on the internet talks about just how incredible this place can be if you step away from the one area where everyone takes pictures.
You’ll get notes on the best campsite at Reflection Canyon and how to really make the most of your time here. As a long-time desert backpacker, hiker, and climber I’m a seasoned pro at getting outside.
It’s my mission to get you outside like a pro, not a tourist. So let’s dive into one of the best hikes in Utah and how to visit Reflection Canyon like an expert.
About this Guide to Reflection Canyon
You’ll always get the best advice for your adventure. This guide to backpacking Reflection Canyon covers:
- The best time of year to visit
- how to get to the Reflection Canyon “trailhead”
- Permit information
- Practical info for the Reflection Canyon Hike
- Understanding the history of Glen Canyon Recreation Area
- Must-know info about Reflection Canyon
- How to reach Reflection Canyon
- Camping at Reflection Canyon
- Photography tips
- Packing list
- Additional planning resources
PS. You’ll find some affiliate links in this post. If you click on a link and purchase something, I et a small kickback at no additional charge. You get badass gear recs, and I can save for retirement. It’s a win-win. Learn more about my privacy policy.
When is the Best Time to Visit?
Most people opt to visit Reflection Canyon in May and September. Personally, I think that’s a HUGE mistake. You’ll need to carry all of your own water, and there is zero shade anywhere along the trail or otherwise.
May through mid-October is insanely hot months to visit Reflection Canyon. Temperatures can feel 10-20 degrees higher than what they call for since you’ll be exposed and in the sun. Not to mention, the monsoons roll through and make Hole in the Rock road impassible in a hurry.
Therefore, the best times of year to visit Reflection Canyon are from March to April or October. Personally, October is a gorgeous time to visit the Reflection Canyon. The water tends to be lower, which gives the scenery more drama and the winds are extremely low.
Spring also is a great time to visit. We went in mid-March and it was perfect. Although we lucked out, spring tends to be windy in the desert and that can get pretty obnoxious sitting in a sea of slick rock.
Pro Tip: Never visit Reflection Canyon during a rainstorm. Hole in the Rock Road can quickly become impassible, stranding you miles from anything in the middle of the desert.
Winters are cold and certainly require 4-season gear. I wasn’t bold enough to try it, but a friend of mine hiked to Reflection Canyon in January and said it was beyond cold, but she had the place to herself.
How Do I Get to Reflection Canyon?
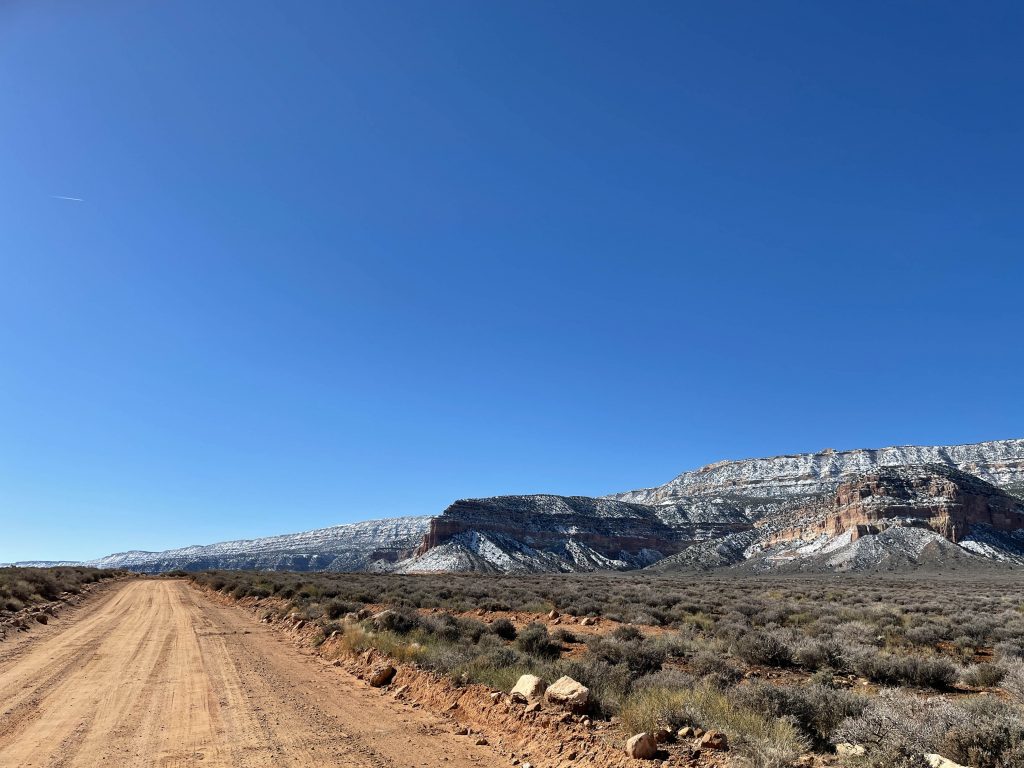
The road into Reflection Canyon is pretty brutal. Not because it requires high clearance (we saw a Tesla at the trailhead – bold move though) but because you’ll be traveling down 50-plus miles of washboard road. In short, it’s bumpy!
Local Tip: Driving faster down washboard road actually makes the road feel smoother.
About 5 miles southeast from Escalante on Highway 12 you’ll see a sign for Hole in the Rock Road, 50-Mile Bench. Take that bumpy, dirty mess until you reach the Reflection Canyon “trailhead.” The trailhead itself isn’t marked – it’s just a dirt pullout, so you’ll want to save a GPS for navigation.
It takes around 2 hours from the town of Escalante to get to the Reflection Canyon Trailhead.
You’ll pass a variety of offshoots for other areas (lots of awesome dispersed camping down these roads).
You don’t need high clearance – although I’d highly recommend it – especially if you’re looking for reliable dispersed camping. Your clearance requirement largely depends on the road conditions. At a minimum you’ll want a crossover SUV, but if you want to be sure you’ll make it to the trailhead a 4×4 is strongly encouraged.
We managed in our stock 4-Runner with all-terrain tires (and even towed our teardrop) just fine and didn’t encounter any obstacles that we couldn’t manage.
Be warned, if it’s rained recently the road can certainly flood out and will quickly become a sloppy, slippery mess. When we arrived the day before to hike at Spooky and Peak-a-Boo slot canyons it had snowed a few inches. It made for an interesting drive that a regular passenger car certainly could NOT have handled.
Pro Tip: Bring a full tank of gas, there are no facilities and help is a long way away. A tow out here will set you back around $1,500.
Do You Need Permits for Reflection Canyon?
Yes. If you want to hike to Reflection Canyon you’ll certainly need a permit. Reflection Canyon is inside of the Glen Canyon Recreation Area, which is a fee area. Although we didn’t pay fees (the visitor center was closed due to COVID), you may have to so come prepared with either $35 or an America the Beautiful Parks Pass.
You’ll also need a permit to spend the night along Hole in the Rock Road.
Don’t fret, both permits are totally free and unlimited. You simply walk in and nab them at the Escalante Visitor Center in Escalante before you head down Hole in the Rock. This is also a great place to use the bathroom, fill up your water reservoirs, and get the latest conditions on other nearby Escalante hikes.
How Long is the Reflection Canyon Hike? And Other Useful Info
The exact mileage of the Reflection Canyon hike is largely dependent on which social trail you follow. Since there is no official trail, and navigating the slick rock will inevitably take some wandering and scouting, you’ll spend more time on your way in than on the way out.
In general, the hike itself is around 16 miles round trip. We found the trip to be pretty moderate – this was my first big adventure since shoulder surgery (3 months post-op) and I managed the terrain quite well.
Here’s a look at other important trail facts.
Round trip distance: 16 – 18 miles depending on your route
Elevation gain: Around 1,250 feet, most of it in the last 2 miles.
Estimated time: Overnight. It took us around 3.5 hours each way, but we average around 20 minutes per mile. Most people should expect it to take around 5 hours in and 4 back
Difficulty: Moderate to difficult depending on experience.
Dog friendly?: Dogs are allowed, but I would strongly discourage you from bringing Fido. You’ll need to pack in all of the water, pack out all of their waste, come prepared with paw protection, and understand that there is no shade from the relentless heat.
Kid-Friendly?: Older kids with backpacking experience, yes. Otherwise, no.
Red tape: You must use human waste disposal bags and pack out human waste. No campfires. Camping at the rim is extremely limited. NO DRONES
Highlights: Amazing views of Glen Canyon, Navajo Mountain, and desert scenery.
Is the Hike to Reflection Canyon Difficult?
Difficulty depends on your experience level and physical condition. Experienced backpackers will likely feel this is a moderate backpack (that’s how we felt anyway). There are no technical sections or insanely steep terrain to navigate, but you do need some more advanced skills to hike to Reflection Canyon.
What makes this trail difficult is the fact that there isn’t any trail or water. You’ll be navigating most of the time, choosing between different social trails all while carrying your own water in the blazing sun. But if you’re an experienced backpacker who’s well-prepared this is a moderate, fun-filled adventure you’ll love.
Newbie desert backpackers might want a bit more experience before taking on this remote and rugged adventure. I’d suggest checking out backpacking in the Needles District of Canyonlands first.
Remember Your History
Glen Canyon Recreation Area is an extremely contested space. This area is home to an impressive display of ancient Native American cultures dating back tens of thousands of years. The Navajo considered this area sacred and the Ute were frequent visitors.
Then in the 1950s the Glen Canyon Dam was developed, essentially destroying countless sacred and ancient sites. The opposite shore of Reflection Canyon (looking towards Navajo Mountain) is the Navajo Reservation.
Take some time to remember the tainted, painful history of the most beautiful places in the US when you visit. This is sacred, and stolen ground. So treat it with respect and leave only footprints.
Must Know Before You Go
Before you head out on your Reflection Canyon adventure, you’ll want to be well-prepared. First, you’re going to need to pack in all of your water. We used a 10L dromedary bag to carry our water and took a total of 14 liters.
Additionally, we kept cold drinks on ice at the car for when we returned. Even during a mild-weather, mid-March trip, we went through almost all of our water. Keep in mind that water weighs around 2.2 pounds per liter – it adds up quickly! Expect to carry a 30 – 40 pound pack.
Load your GPS coordinates – we used the Alltrails track and took a slightly more direct route back. You’ll be checking them often) and take plenty of mental notes as you make your way to Reflection Canyon.
Chances are, you’ll take a more direct route back. Be sure to have plenty of battery life on your GPS, paper map navigation is not an option since there are many features that don’t get picked up on topo maps.
Always check the weather. You’ll be exposed, so if a storm rolls in, there is no protection and tents conduct electricity. Also, keep an eye on the wind. You can’t stake down a tent (you’ll just have small rocks) and a blown away tent is a huge disaster.
As you hike along the slick rock, stay away from the bumpy, raised, black soil. This stuff is actually alive. Called cryptobiotic soil, it’s essential to prevent erosion in the desert.
Lastly, you’ll need to bring human waste disposal bags. These are special bags you poop in and pack out with you. You’re required to use them for number 2’s. There is also very little coverage here, especially at the main viewpoint, so take note when choosing your campsite.
Reaching Reflection Canyon
Okay. Let’s hike! You’ll leave the “trailhead” – read: dirt pullout – and head directly up a series of small benches. There is a general trail here that makes its way onto a wide, sandy bench with a large cliff face on your right.
Pro tip: One of my favorite desert hiking tips is to start early. Be at the trail by 8 am to beat the heat and relentless sun.
You’ll be more or less following this cliff face for the first 6 miles. Head towards Fifty Mile Point, a big rock knob in the distance. There are several different social trails and cow trails so use your GPS.
Eventually, you’ll pass through an area with an old fence and watering hole with piping (around 2 miles in). There is a small fence with a gate nearby too. Eventually, the trail will split. We took the right path going in and the left path on the way out. The left fork is certainly flatter and easier to manage. Both paths will eventually link up.
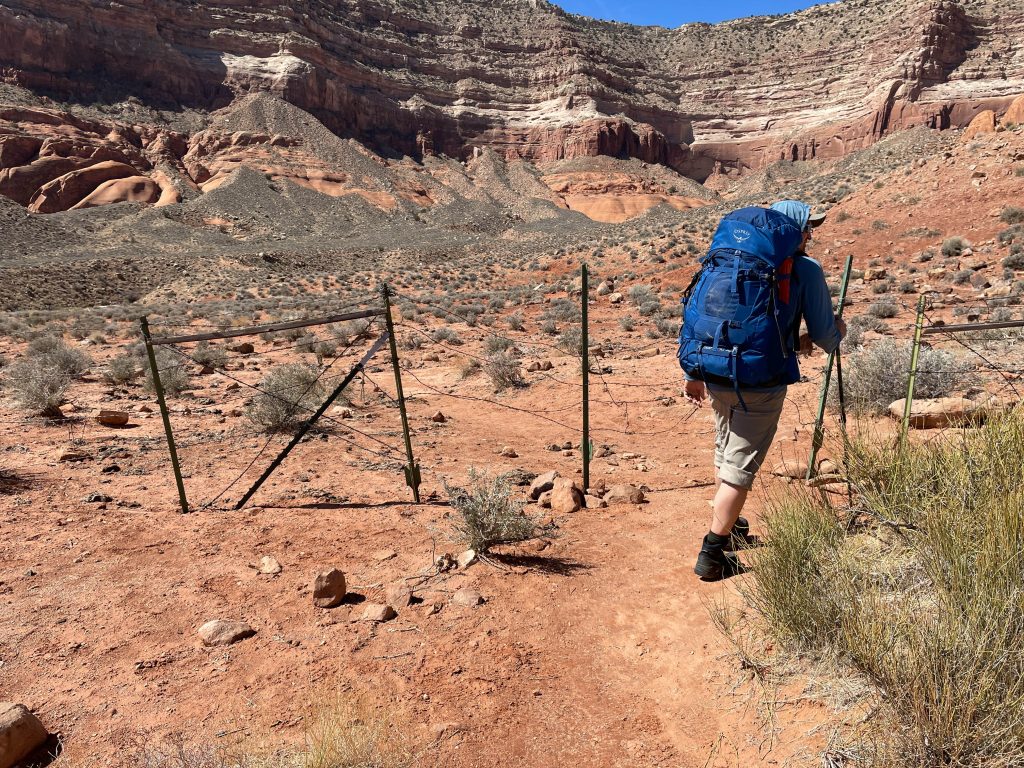
Pro Tip: Paths come and go out here, use your GPS and take the more worn path if you’re questioning yourself.
The trail is packed sand with plenty of brush but is generally flat and mellow. The views are fantastic! If you get lucky, you may even see the mountains and buttes dusted in snow.
Once you’ve passed Fifty Mile Point, you’ll head towards a blob of rocks that sit on a small hill. Here you’ll catch your first glimpse of Navajo Mountain off in the distance. If you’re feeling it, this is an excellent spot for a quick break. Just a mile or so more until the slick rock.
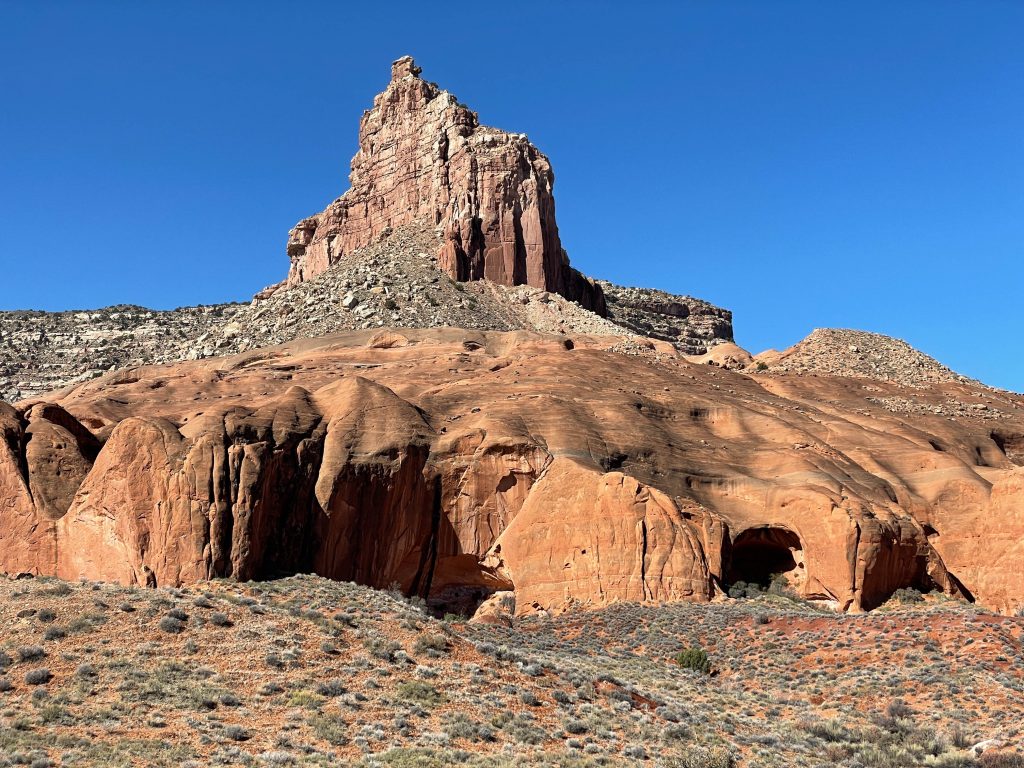
Hiking to Square Butte
From the Navajo Mountain lookout perch you should be able to see a square-faced butte in the distance. You’re going to continue along the dirt path until you get to the Square Butte. The network of social trails slowly makes its way towards an ocean of petrified dunes.
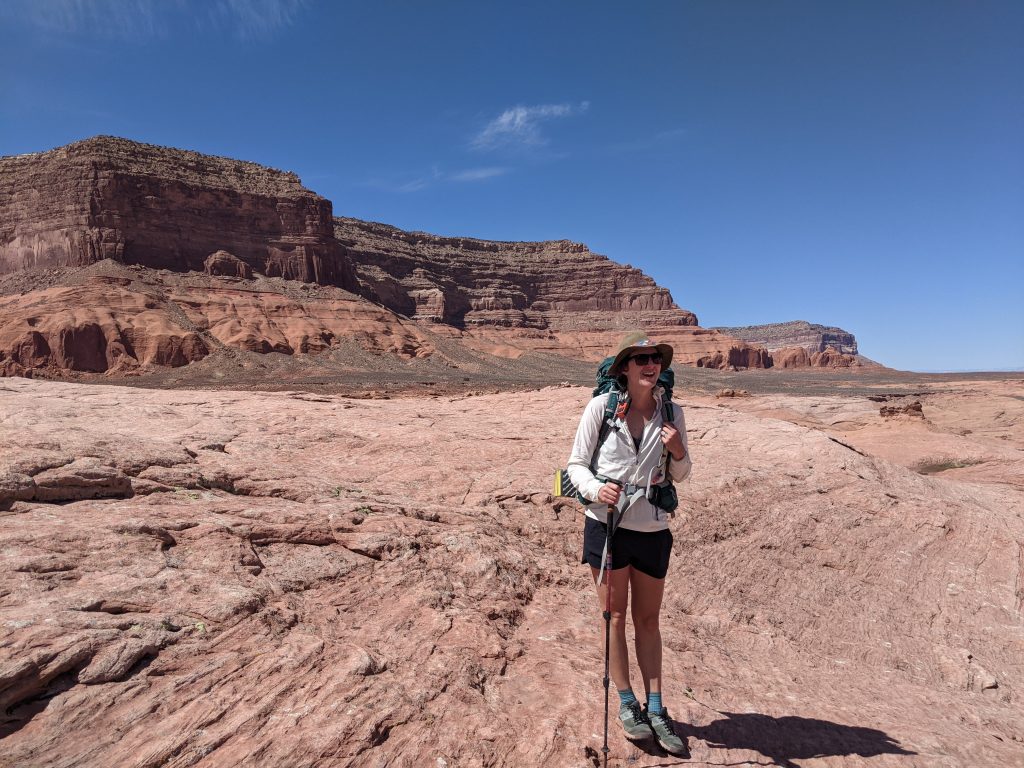
The Last 2-Mile Slick Rock Hike
GPS time!
Keep an eye out here for several cairns in a flat, bowl-like area that gently heads downhill. This is the easiest way to reach Reflection Canyon. You’ll bypass a lot of the ups and downs that make this section so tedious.
We followed one blogger’s directions to head towards a tall butte with a nipple of rock on the way in – don’t do this. It was exceptionally brutal and there are far easier ways to go.
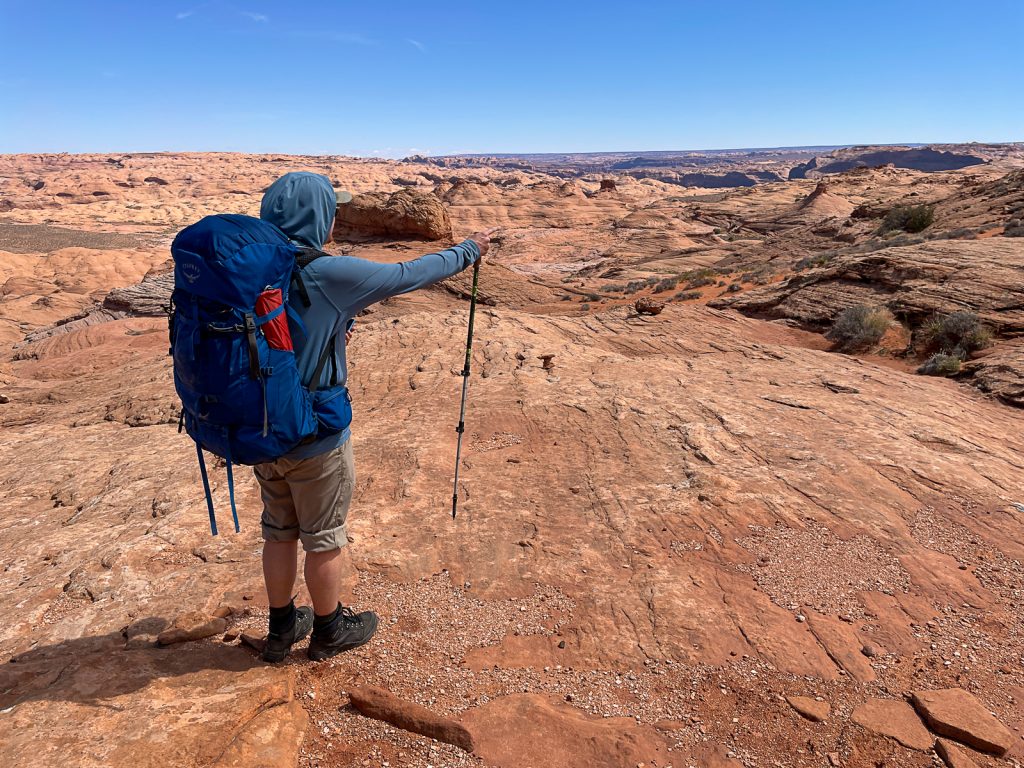
Certainly use it as a landmark, but you don’t need to hug the feature directly to the left, easier ways exist if you explore just a little bit.

Your best bet is to use your GPS to stay on course. Occasionally, you’ll see cairns lighting the way, but don’t rely on rock piles.
Things can cliff out here and the toughest section is at the very end, where you’ll walk your way along a steep section of slick rock (don’t worry, your feet should grip well with solid footwear) until you crest a small ridge and reach the viewpoint.
Chances are, through here, you’re going to take a few wrong turns or go a round-about way in and take a more direct line out. That’s what happened to us. It ended up working out because we found literally the best campsite at Reflection Canyon.
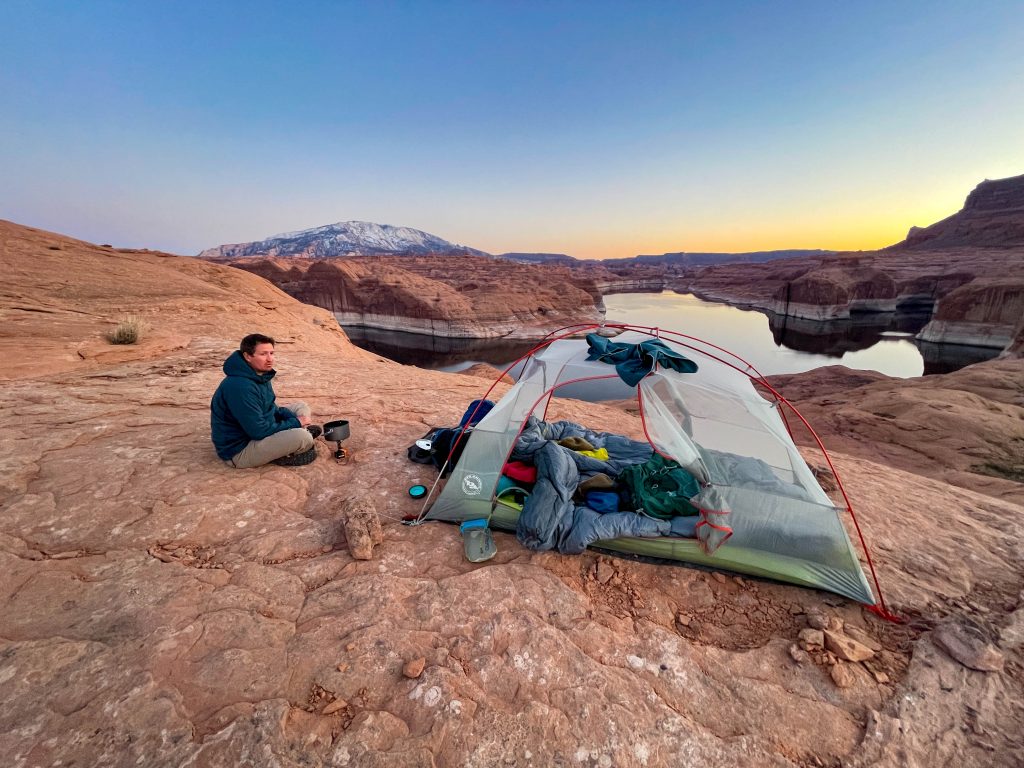
Camping at Reflection Canyon
One of the toughest things about this area is the lack of flat ground. In fact, it’s really tough to find a spot to pitch a tent, and everything that you believe might be flat actually isn’t once you reach it. But don’t work I’ve got you covered.
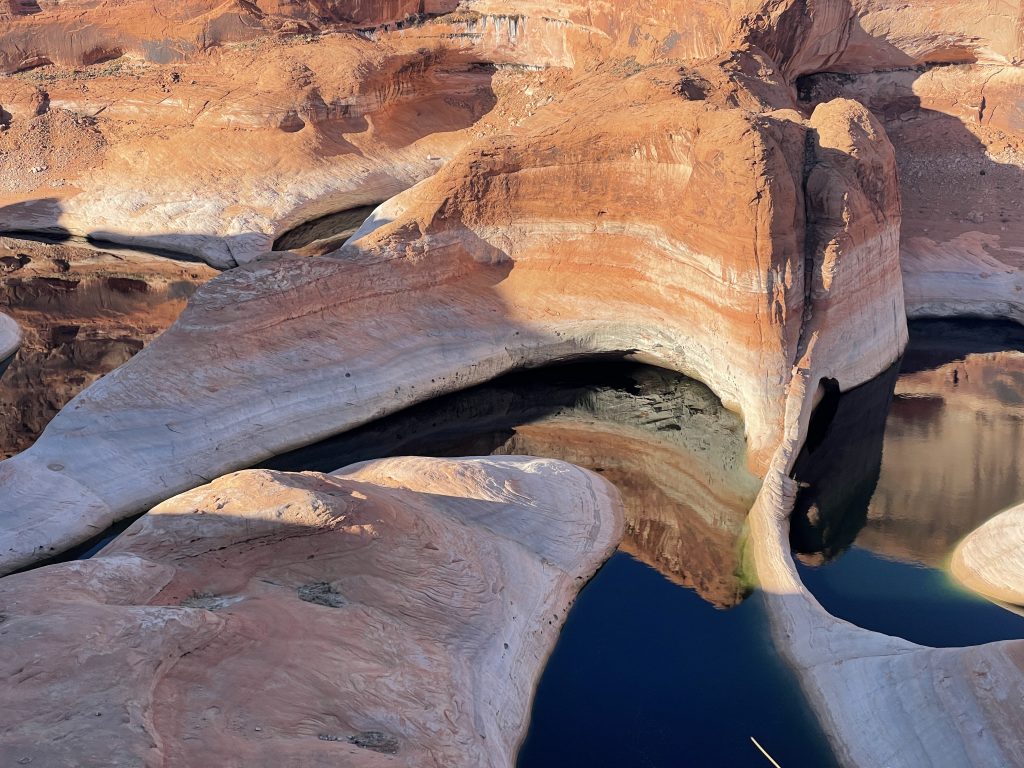
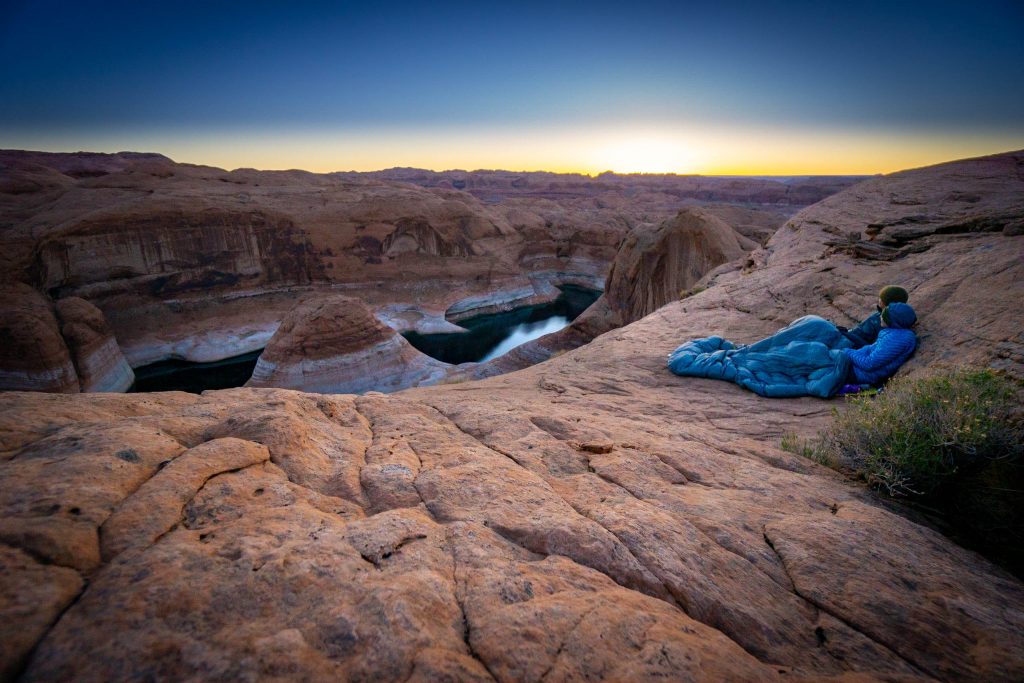
It’s definitely worth checking out the viewpoint, but you’re actually missing what we thought was the most beautiful view of them all. And the best part? You can camp there!
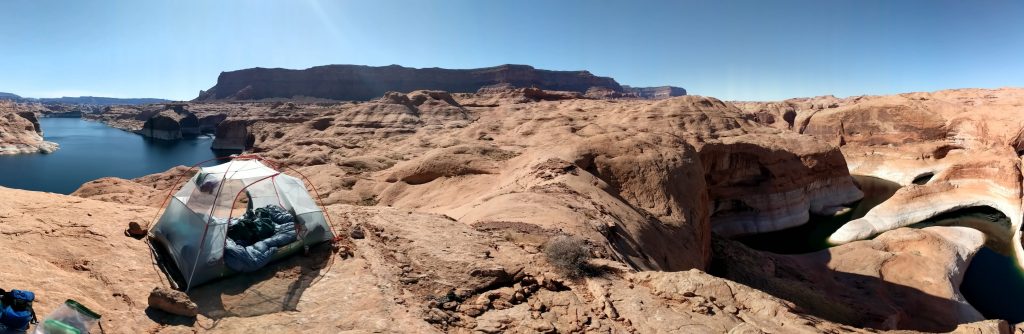
Once you crest the ridge and you can see Reflection Canyon, dig deep, you’ve got one final climb. Head right along the ridge of Reflection Canyon, making your way up a series of sloped rock steps. I won’t give too much away, but from here you have views of both Reflection Canyon and Lake Powell.
Simply find the small, flat bench (there are 2, one is suitable for one tent and the other could fit 2 tents). You can drop your packs and opt to continue to walk along the ridge for incredible views. We hiked all the way to the inlet of Reflection Canyon after we set up camp.
Pro Tip: Watch the weather. If it’s exceptionally windy then don’t camp on the ridge since the wind rips through here.
From here, it’s maybe a 7-minute walk to the main viewpoint, so if you’re chasing the photo that everyone takes, you can easily scoot over there for sunrise.
Pro Tip: The cliff walls are exceptionally steep and sloped, so watch your footing if you scoot towards the edge!
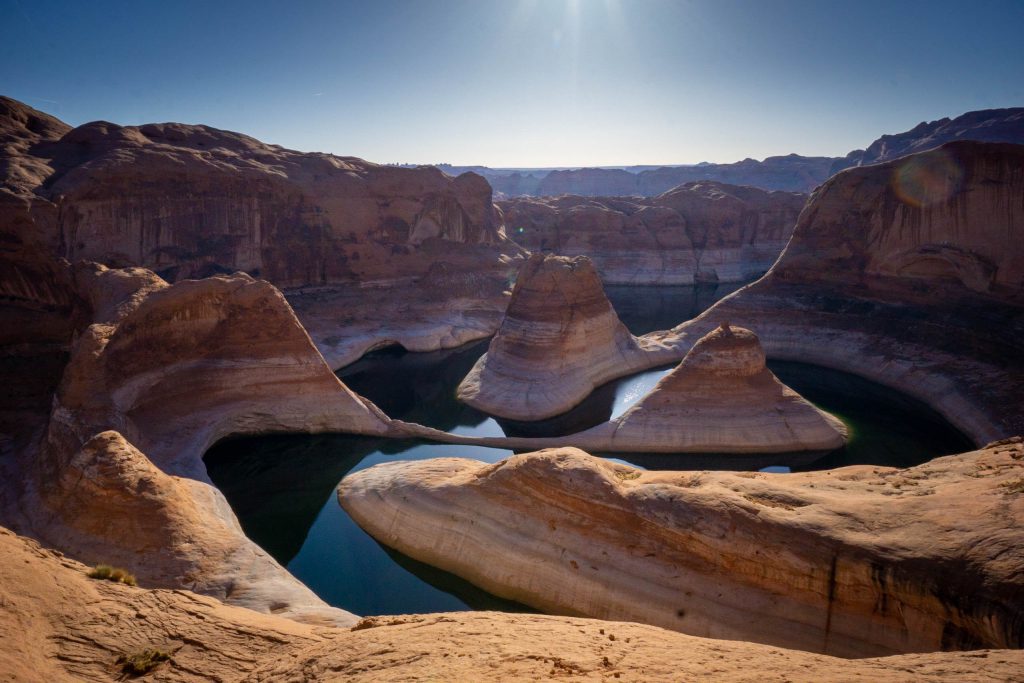
Photographing Reflection Canyon
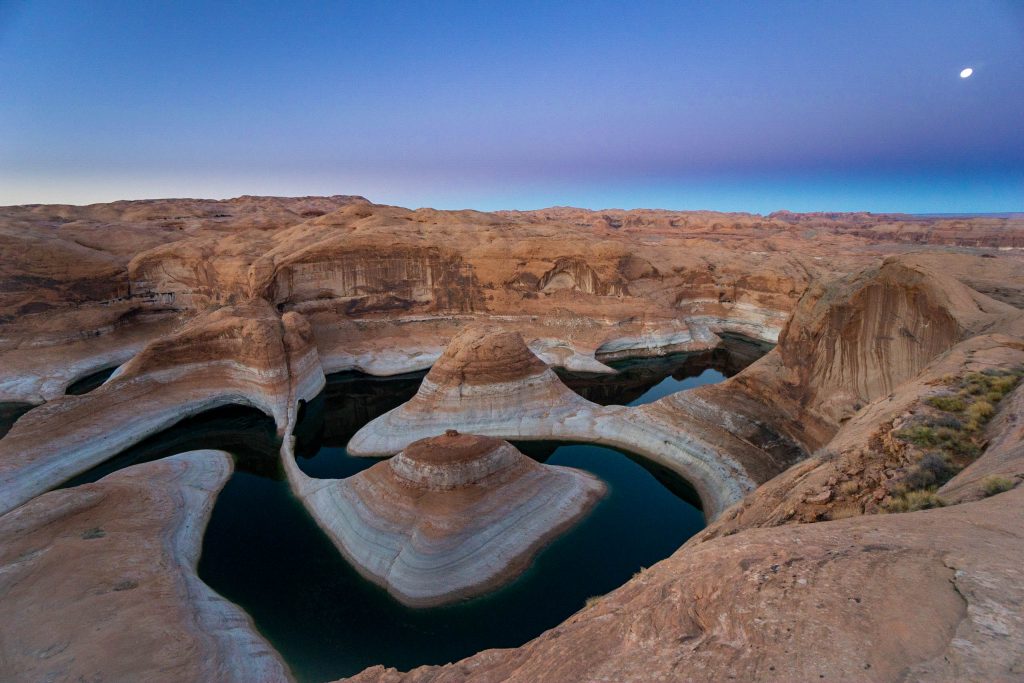
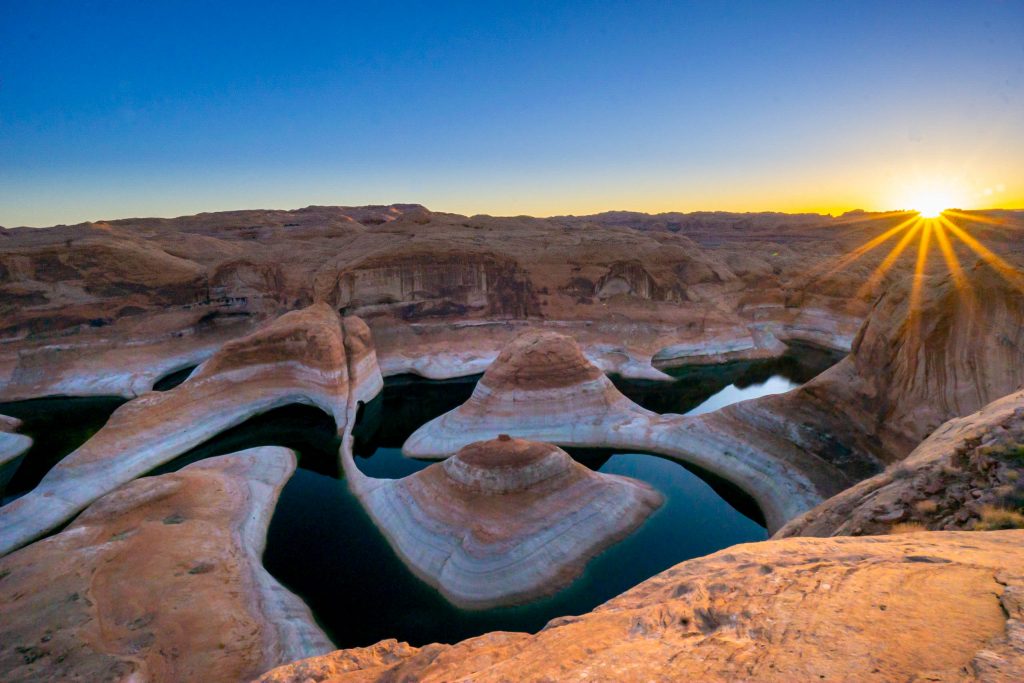
A lot of people come here to take the famous sunburst photo of Reflection Canyon for sunrise. I understand why, but the best time to photography Reflection Canyon is actually at sunset.
The lighting is far better (especially if you aren’t in the little viewpoint amphitheater) and we got lucky with a moonrise during our stay.
Also, the views can be a little tricky, thanks to steep, sloping canyon walls, so pack a proper tripod if you’re serious about photography. I didn’t have mine, and I regretted it.
One surprise about the canyon is that it’s rather large! A wide-angle lens helps really capture the vast quality of the canyon.
What to Pack
You’ll want to have proper backpacking gear for your trip to Reflection Canyon. Make sure you also bring:
- A tent without a rainfly. If the weather is nice but you still want some shelter this is a great way to shed weight.
- Warm hat, jacket, wind layer, socks, and buff. The desert can get just as cold as it is hot.
- 10 liter dromedary perfect for 2 people
- Sturdy footwear. I love my La Sportiva approach shoes. This hike is not suitable for sandals.
- Trekking poles. Super handy when hauling water.
- A sun hat
- A sunshirt. The REI Sahara Sunshade lets breezes in and keeps sun rays out.
- Sunscreen
- WAG bags
- Headlamp
- Inflatable pillow
- A sleeping bag. I love the Thermarest Vela (we have the double) to save weight.
- Sleeping pad (I use the Big Agnes Q Core Delux)
- Odor-proof bags with a dry sack for food. There are plenty of small critters who will munch through your food in a hurry.
- Stove, fuel, cooking utensils, lighter, and eating utensils.
- Water bladder
- Small, packable first aid kit with tweezers (for the cactus)
- Pro Tip: You can leave the water filter at home. There is no water on this trail.
Can I Hike to Reflection Canyon in a Day?
It would be one doozy of a day hike, but you can certainly manage to hike to Reflection Canyon. ina day. If you choose to do this, I’d highly recommend caching water under a small shrub, near the first 6 miles of trail (label it as a water cache and say “please don’t take/drink).
Can I Boat to Reflection Canyon?
If all of this sounds too exhausting, then you can certainly boat the canyon. Launch from the Bullfrog Marina (boat rentals possible) and then head out straight, towards the south.
Clear Creek Canyon is about 2.5 miles past the Escalante River Arm of the water between miles 68 and 69. Houseboats are NOT recommended.
We saw a boat and it looked like a blast. And – of course – it entertained us backpackers.
Catch me on YouTube!
Want more secret backpacking trips? Ultralight hacks that every hiker can adapt? Experience the top outdoor destinations in the world without the crowds? If you want to get insider knowledge of all things outdoors, then you’ll wanna subscribe to my YouTube channel, where I am giving away my DECADES of knowledge as an outdoor professional. I’ll see ya there!
Additional Utah Adventures
Planning a trip to Utah? Check out these amazing resources:
- Escalante’s Bucket List Hikes (coming soon)
- Canyonlands or Arches National Park, What’s Right for Me?
- How to Beat the Crowds at Bryce Canyon
PIN THIS POST