Last Updated on November 5, 2021 by foxintheforest
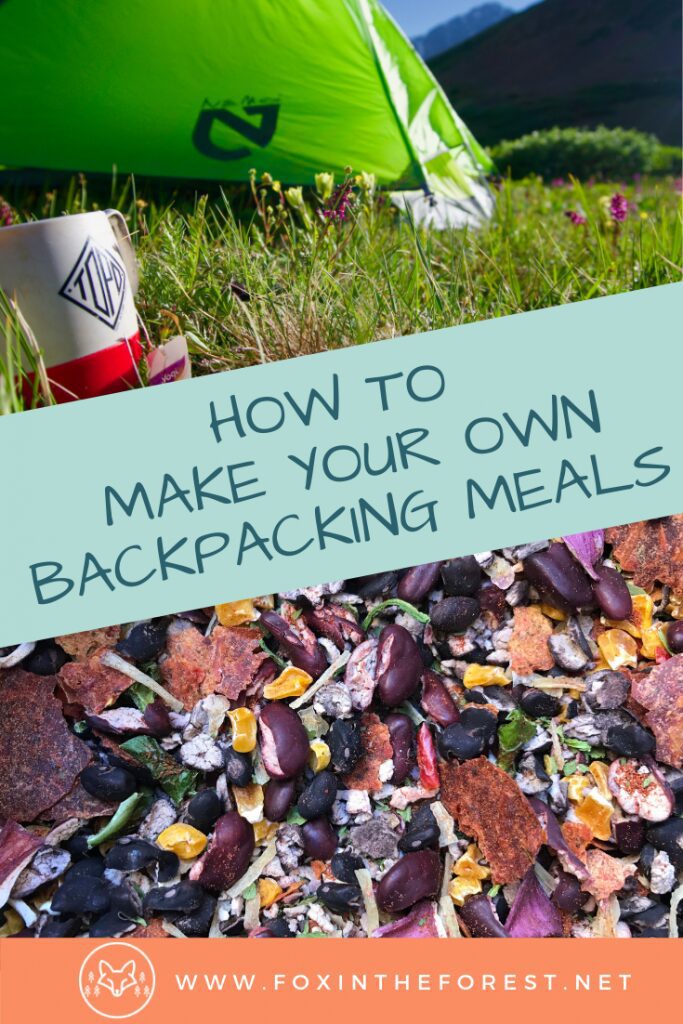
Trail food can make a lot of people pull their hair out. Pre-packaged meals are often expensive and can cost hundreds of dollars for what is essentially a salt bomb. It is quite simple to make your own backpacking meals. Trail food doesn’t need to be complicated. Here are a few DIY dehydrated backpacking meals, how to get started, and tips on taking your trail grub to gourmet status with minimal effort.
Using a Food Dehydrator for your DIY Backpacking Meals
Before we get started on the mouth-watering possibilities of food on the trail, invest in a food dehydrator. Choosing a food dehydrator and getting started with one is easy business. My favorite is the Chefman Food Dehydrator. I cut down a few tray liners for fruits, sauces, and other small items.
I saw a return on my investment within the first few months of use, so don’t let the price tag scare you. Dehydrators can make snacks, meals, and even dog treats! It’s well worth the money and easy to use, even if you don’t know how to cook.
The only requirement is time. Once you get the ingredients prepped (usually only takes a few minutes to half an hour), it’s simply a waiting game before culinary magic unfolds. The result is tasty DIY dehydrated backpacking meals that will get your mouth watering.

How to Make Your Own Dehydrated Backpacking Meals
After collecting an arsenal of ingredients, it’s time to work on creating a few meal staples. I gave away recipes for the best backcountry meals in a post over at TETON Sports. Backcountry burritos, loaded ramen, and homemade Italian red sauce anyone? But it doesn’t stop there. I’ve dehydrated some amazing curried lentils, salsas, and even experimented with some potato mashes.
I’ll let you in on a little secret, I started by using The Dehydrator Bible. This book not only taught me how to dehydrate various foods, but it gave me a springboard for most of my recipes. Most of these recipes require the addition of spice mixes and flavorings, but it’s an excellent resource for those looking to really dive in.
New to backpacking? Here are some helpful posts to get you started:
- Backpacking for beginners – what you need to know
- The ladies guide to peeing outside
- How to properly prepare for a backpacking trip
- Your guide to the best backpacking gear with budget-friendly options
How to Dehydrate Nearly Anything
Dehydrating your own backpacking meals requires you to dehydrate individual ingredients first. This process is fairly straightforward. First, you’ll want to cut the veggies into smaller bite-sized pieces. The smaller the veggies, the easier it is to rehydrate, so keep that in mind when cutting. Things like fruits can get a spritz with some lemon juice to preserve color. Anything that is previously frozen or canned can go straight into the food dehydrator. Simply dehydrate until food is easy to break or is leathery, but lacks any moisture.
Blanch (throw cut up veggies in a bath of boiling water for a few minutes, then dunk in a cold bath) any hard veggies. Examples of veggies that will need blanching include:
- Potatoes (best dehydrated when shredded)
- Celery
- Carrots
- Uncooked green beans
- Asparagus heads
- Broccoli
- Cauliflower
- Beets
A good rule of thumb is if the veggies are typically hard when raw, a quick blanch helps to create softer veggies when rehydrated.
How Long Does Dehydrating Your Own Backpacking Meals Take?
This largely depends on several factors. First, how much water content the ingredients had before being dehydrated. Secondly, how big were the cuts of food or how thick is the sauce? Thicker cuts take longer and also take longer to re-hydrate Lastly, how full is your dehydrator? A fuller dehydrator takes longer, but is more efficient overall. Typically, I’ll start my dehydrator at 6 hours on a high-heat setting and check afterward. Again, it isn’t an exact science, but more of a feel. The more you practice the better it will be.
How to Dehydrate Sauces, Salsas, and More
Dehydrating homemade or pre-made sauces and salsas are fairly simple. You want to stick to non-dairy sauces since dairy doesn’t dehydrate well. First, blend the ingredients using a blender or food processor until smooth. Next, pour the mixture into your dehydrator (you’ll need dehydrator sheets to do this) and spread until the mixture is between 1/8″ to a quarter-inch thick. Then dehydrate until the mixture lacks moisture. Typically you’ll have a slab of leather-like texture or crackle – either one works great. Dehydrated salsas and sauces
For fruit leathers, pick any kind of fruits you like (I love mango, kiwi, strawberry, and apple). Core, hull, or remove seeds and peels. Add about 1/2 cup of apple sauce and a few squirts of lemon juice to the mixture. Blend to combine and layer on your dehydrator just as you would a sauce. Once the mixture is dehydrated to a leathery texture you’re good to go!
Rehydrating Your DIY Backpacking Meals on the Trail
When you reach camp and it’s time to chow down on your DIY backpacking meal, you’ll need about 30 to 45 minutes prior to eating. Pour the dehydrated meal contents into your cooking vessel. Add about two cups of water per serving to the dehydrated meal and let it sit for 30 to 45 minutes. You’ll notice the veggies start to look a bit plumper and are a tad softer. Add water as needed. Then, turn on the heat and heat up your meal, adding water if you need to. If you’re preparing soups, this is the time to add the powdered soup base and noodles. You’ll likely need a bit more water for soups so plan ahead. As always, only use treated water for backpacking meals.
The Best Dehydrated Backpacking Meals
The best dehydrated backpacking meals are ones that combine a variety of ingredients with some spices. Creating your own meals is actually a lot simpler than it looks. A general rule of thumb is to include a base (instant potatoes, instant rice, dried, pre-cooked lentils, or instant noodles) with an array of veggies. Typically one tablespoon of dehydrated veggies will be satisfactory for one person. For example, if you’re making ramen, a tablespoon of dehydrated carrots, a tablespoon of dehydrated peas, a tablespoon of dehydrated green beans will add plenty of healthy ingredients to your DIY backpacking meals. Use teaspoons to add more pungent things such as onions. A pinch of dehydrated ginger, miso or other additions goes a long way to flavor homemade made ramen.
Use items like beef jerky and bacon bits to add a little protein to your meal if you wish. You can opt to buy jerky, or use your dehydrator to make your own jerky to add to your homemade backpacking meal.
Stay tuned for some mouth-watering recipes coming soon!
Add Some Luxury to Your Backpacking Menu
Consider bringing luxury items like hard cheese or durable fruits. Fruit goes a long way in providing your body with a sugary boost. Pick fruits with thick rinds, like an orange and eat it early on. Always pack out your trash, even organic waste. These foods should be consumed in a timely manner, to avoid having to deal with a rotten mess.
You’ll burn upwards of 6,000 calories a day backpacking, so bring on the fatty goodness! Backpacking requires a lot of effort and you burn through tons of calories so go ahead, eat that extra candy bar and put butter in your hot chocolate if it pleases you! Great calorie-packed snacks are chocolate, high-calorie bars, fruit roll-ups, cheese, peanut butter and trail mixes.
Simple Backpacking Meal Ideas for Lunch
Lunch is tough. You don’t want to stop and whip out the stove, but you need a bit more than a Cliff Bar to fill you up. I’m a huge fan of what I like to call the hobo burrito. Essentially I combine granola or trail mix with peanut butter, some hard cheese, beef jerky, maybe an apple and whatever snack I have laying around and roll it into a burrito. On particularly tough days, the combinations become creative. This backpacking lunch is easy and lightweight. It’s also a great way to see who can come up with the best flavor combinations on the trail.

DIY Backpacking and Hiking Snacks
That dehydrator is really going to pay off when you use it to make your own snacks. Beef jerky is relatively simple. Google around and find a seasoning mix you like. I like teriyaki, but to be honest with you, we’ve never used the same recipe twice. Next, buy a prime cut of skirt steak. Put it in the freezer for about 30 minutes. This helps the meat stay firm when you cut it. Cut into thin, 1/8″ thick slices, marinate then dry until the meat is flexible, but dry throughout.
Alternatively, you can dry your own fruit. Create your own supply of nature’s candy by simply slicing fruit and drying it. I’ve had great success with everything but bananas. For items such as apples, spritz a little lemon juice on the slices so they don’t turn brown. The thinner the slices, the quicker the fruit dries. I recommend 1/4″ slices at the thickest. For strawberries (yum) be sure to hull them first. The best dried fruits are:
- Mango
- Kiwi
- Strawberries
- Apples

Choose the Best Hiking Snacks for the Season
You’re out and about in a winter wonderland. All a sudden your tummy is rumbling and you stop for a snack. You pull your favorite flavor of Cliff Bar from your bag, except it’s frozen solid. Nothing is worse than gnawing on a Cliff Bar in the dead of winter. Alternatively, no one likes a glob of melted chocolate on a hot summer’s day. Pick seasonally appropriate snacks to avoid any hungry heartache on the trail.
Great winter snacks include:
- Honey Stinger Waffles
- small niblets of chocolate
- Trail mixes and granola
- Hot soup
- Fruit leathers
- Cheese-its, Goldfish, and Triscuits
Summer favorites are:
- Chocolate covered fruit with a waxy coating to avoid melting
- Trail mixes
- Cliff Bars, Luna Bars, Honey Stinger Waffles, and power gels
- Fruit leathers
- Dried fruit
- Granola bars
- Gummy worms and other deliciously fake candy
Now you’re ready to up your food game with these delicious DIY backpacking meals and menu ideas. What are your favorite trail foods?